
On version 3.5.2 on Advanced Coupons premium we’ve introduced a new feature for cashback. You can view our changelogs here: Changelog – Advanced Coupons (advancedcouponsplugin.com)
The Cashback Coupon will provide a fixed $ or percentage amount to the user’s store credits after the order status is set to Complete. The customer can then use the earned store credits on their next purchase on checkout. Learn more about it here: How To Use Store Credit – Advanced Coupons (advancedcouponsplugin.com)
Setting Up Cashback Coupons
On your WordPress dashboard go to Coupons > Add new and create a new coupon. On the Discount Type, select Fixed Cashback (Store Credits) or Percentage Cashback (Store Credits) and set the amount or value.
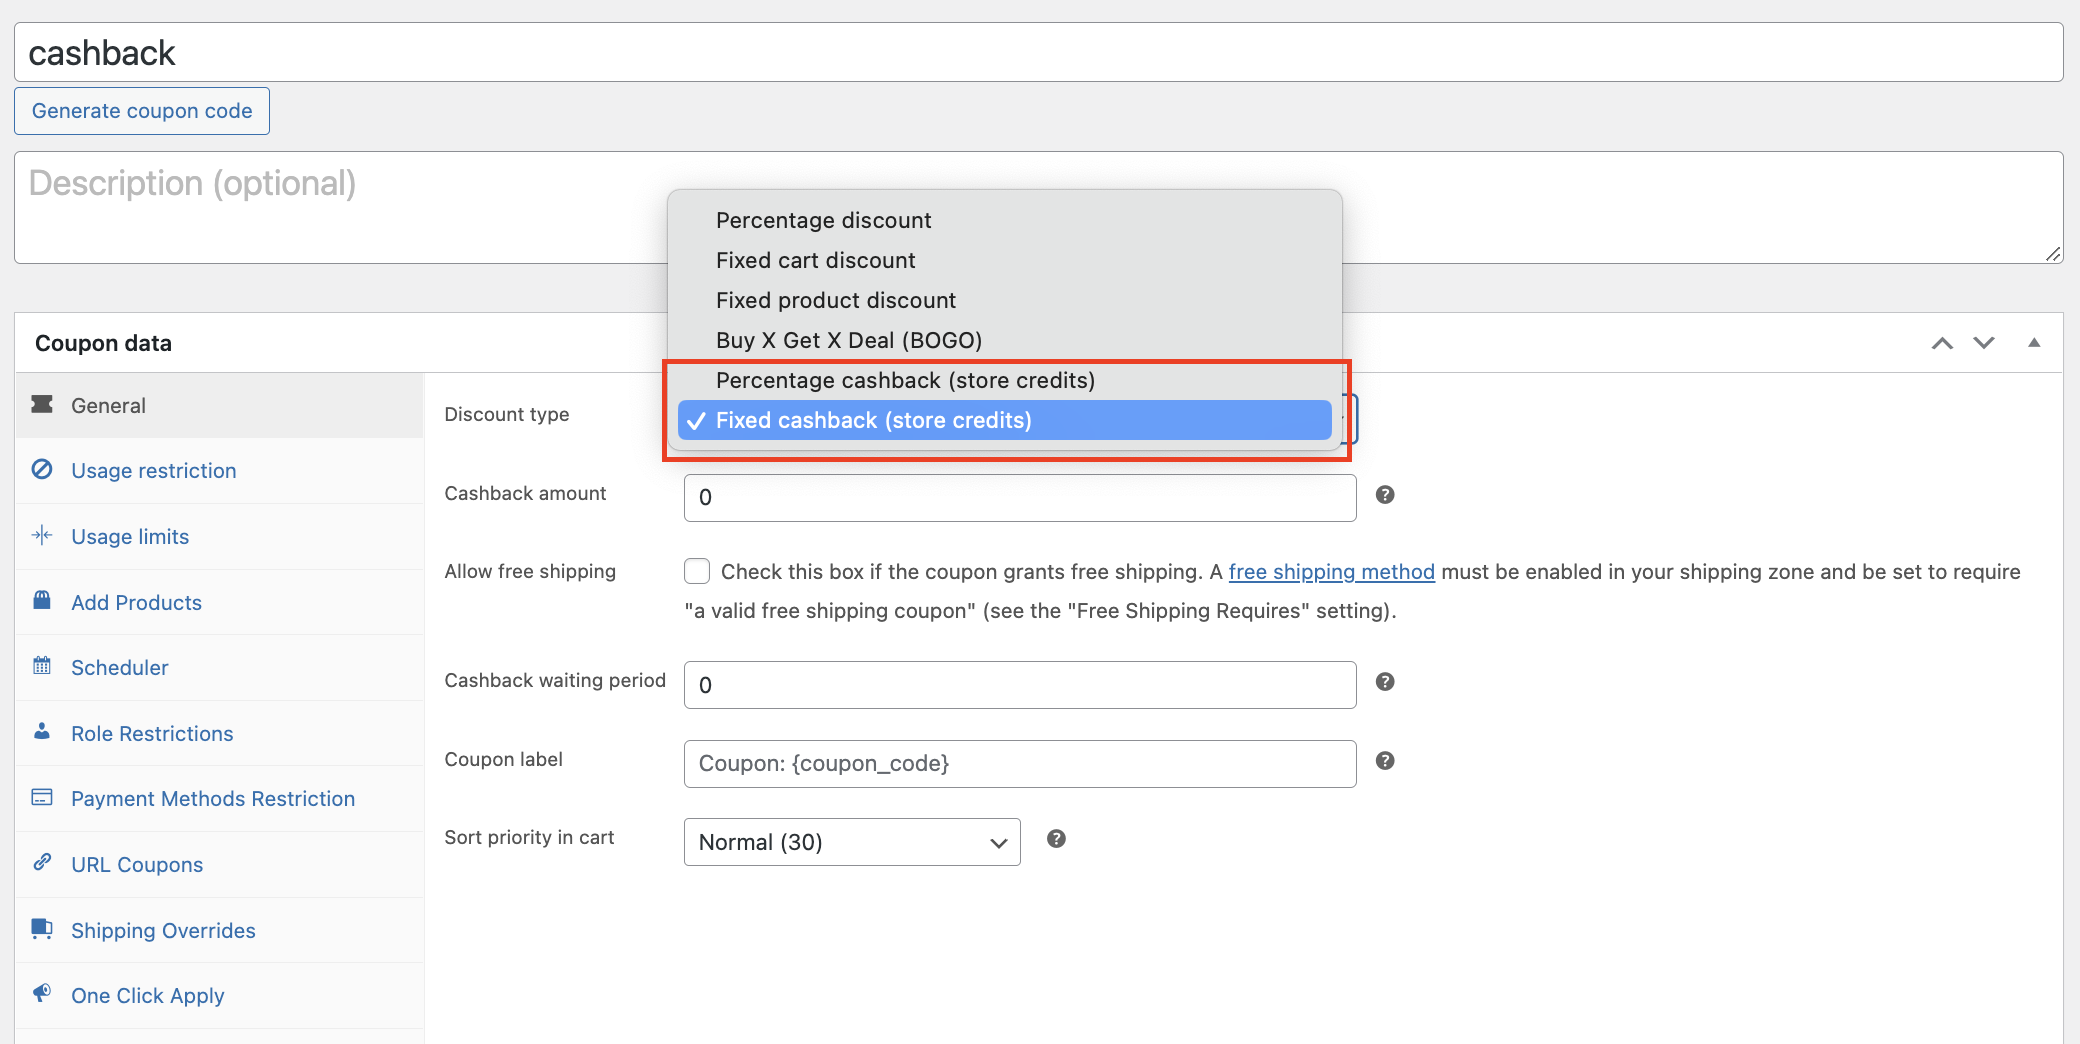
The Cashback waiting period is an option that delays when the customer will receive the cashback/store credits after the order is set to complete. By default, it is set to 0 which means the cashback will be given immediately after the order is set to complete. If you set it to 3, it means that the cashback will be given after 3 days since the order is set to complete.
Coupon Example
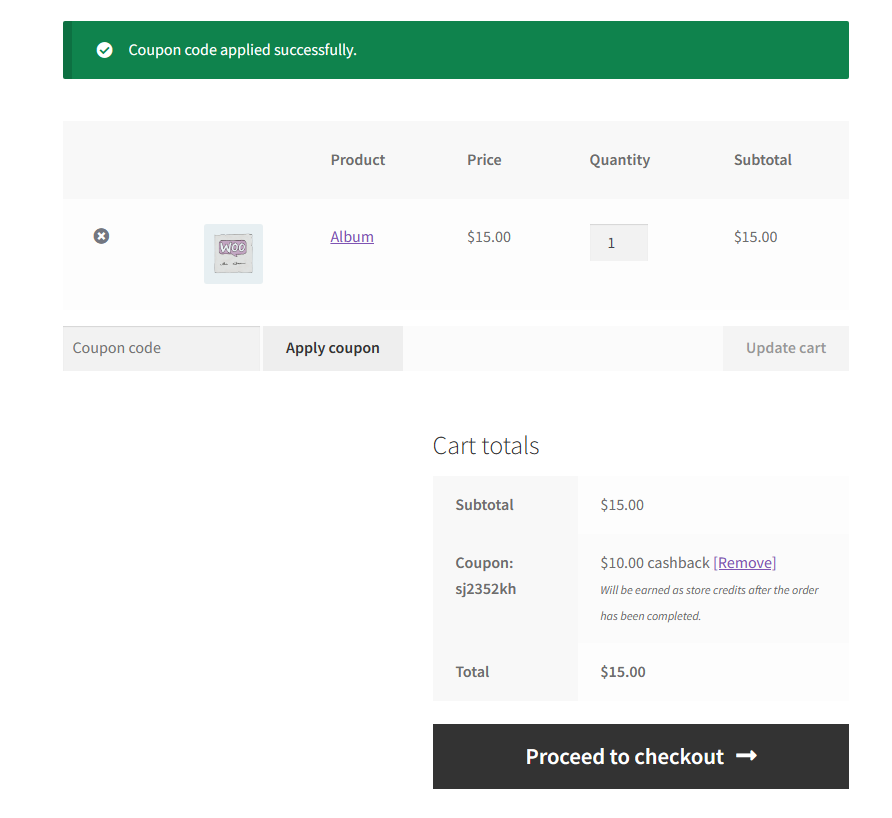
For this example, I’ll be creating a $ 10 value cashback with a cashback waiting period of 0

On the cart or checkout, after applying the coupon the customer will see this.
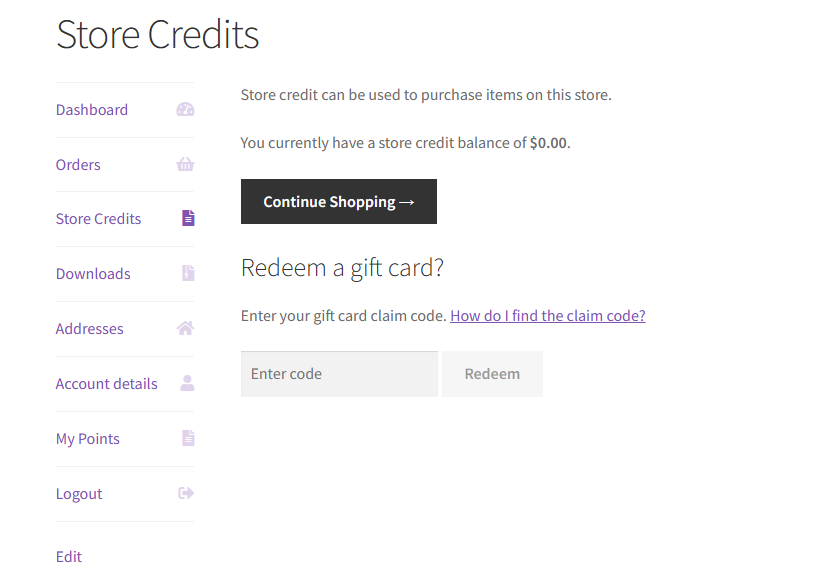
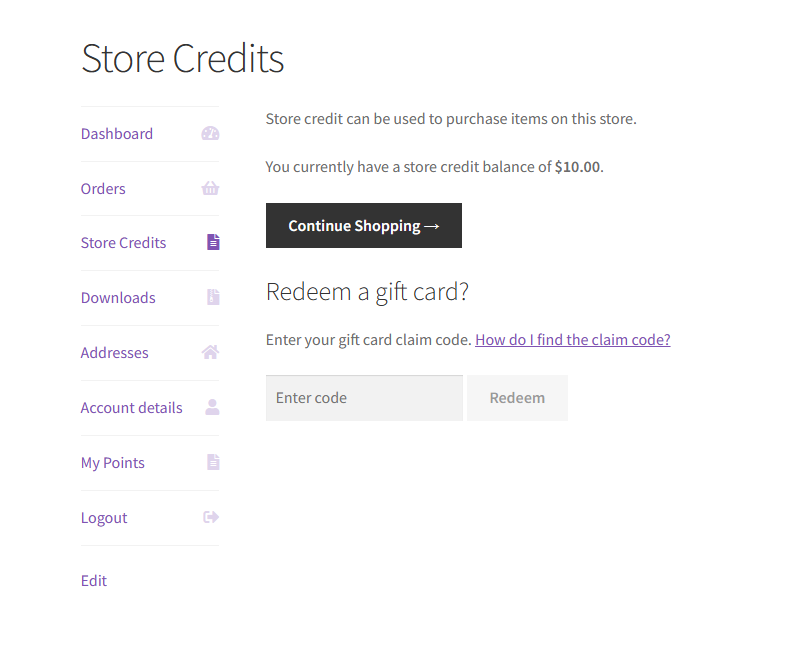
We first check the value of the user’s account which is 0.
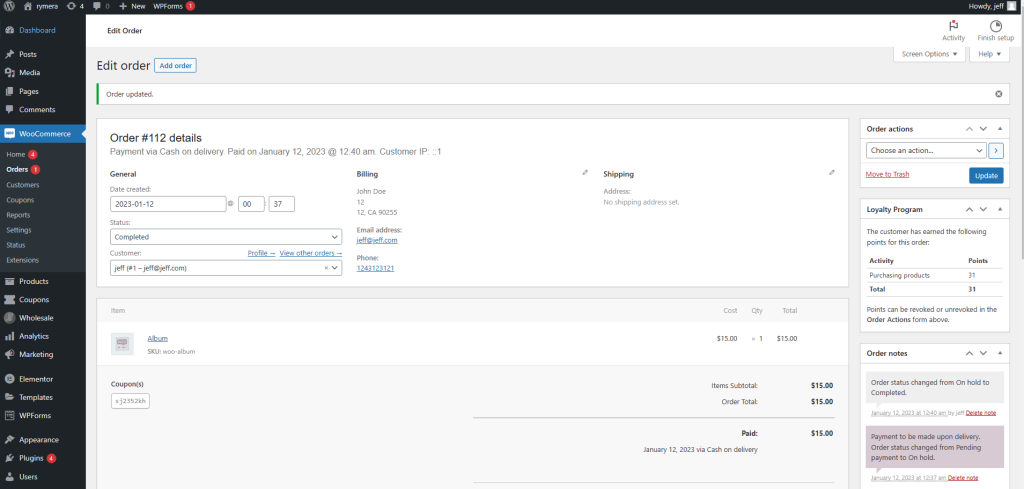
Now according to our coupon settings, once the order has been set to complete the user will automatically receive $10 in-store credits.
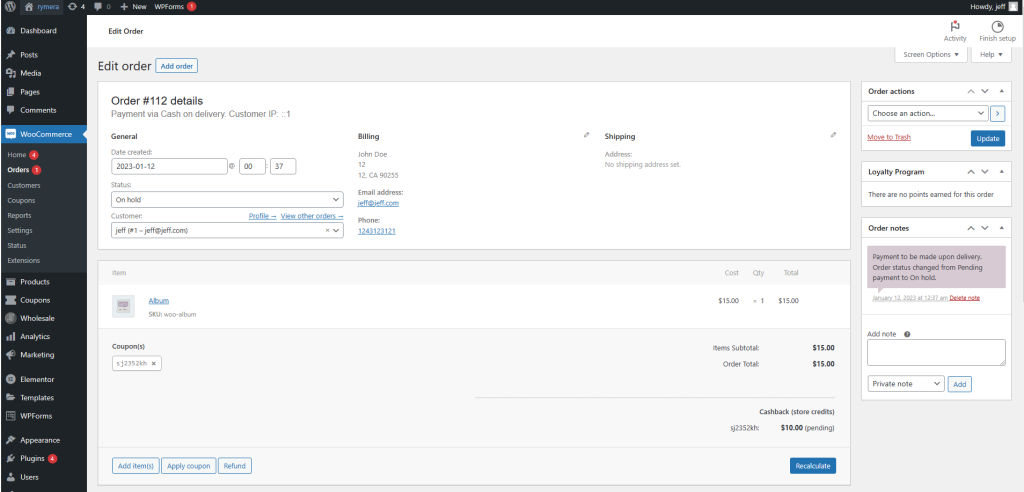
I’ve done that and it’s automatically given
Set Order Status for When to Award Cashback Credits
On previous versions, cashback points are awarded when the payment is made, whether the status is still processing or completed.
With the recent release of version 3.6.1, we have added a new feature that allows Store Owners to have more control over when the cashback will be credited to the customers.
We have recently added a field called Order status(es) for when to award cashback credits where store owners can select either Completed, Processing or both.
To set your Order Status, just navigate to Coupons > Settings > Store Credits.

When using cashback coupons, it’s best to use the Cart Subtotal Restriction. This is done because it can look quite odd if the customer’s purchase is $20 and the store credits/cashback amount is $30
Though, this entirely depends on how your store operates or the type of promotion you are going after. Customize the coupon to match your requirements!
Finalizing Your Store Credit Setup
Once you’ve configured the store credit settings and defined the conditions, you can explore different scenarios to automatically grant store credit based on customer actions. Below are some practical use cases that demonstrate how to maximize the benefits of offering cashback to your customers. Note that cashback coupons only work for logged-in customers. A guest who checks out will not have the coupon applied and will not earn store credit.
Use Case Scenario: Automatically Grant Store Credit When a Customer Makes a Purchase
If you want to automatically award store credit to your customers after they make a purchase, you can combine Auto-Apply Coupons with Cart Conditions. This ensures that store credit cashback is granted if the customer meets certain purchase conditions.
Example Setup #1: Grant Cashback for Orders Over a Certain Subtotal
- Create a Coupon for Cashback:
- Go to Coupons > Add New and create a new coupon.
- Set Discount type to Fixed cashback (store credits) or Percentage cashback (store credits), then set the amount.
- Set Cart Conditions:
- In the Cart Conditions box below the Coupon data section, add a condition:
- Cart Subtotal — set the comparison to greater than and the value to 50, so cashback is granted only when the cart subtotal is above $50.
- In the Cart Conditions box below the Coupon data section, add a condition:
- Enable Auto-Apply:
- In the Auto Apply Coupon box in the right sidebar, tick Enable auto apply for this coupon. Do not set Usage limit per coupon, Usage limit per user, Allowed emails, or Virtual coupons on the same coupon, because any of those stops auto apply from working.
- This way, store credit is granted as a reward without any manual action required from the customer.
Example Setup #2: Grant Store Credit for Specific Customer Roles or Loyalty Programs
- Create a Store Credit Coupon for VIP Customers:
- Go to Coupons > Add New and create a new coupon.
- Set Discount type to Fixed cashback (store credits) or Percentage cashback (store credits), then set the amount.
- Set Cart and Customer Conditions:
- In the Cart Conditions box below the Coupon data section, add the Allowed Customer User Role condition.
- Select the roles that should receive cashback. The dropdown lists the user roles that already exist on your site, so create a role such as “VIP customer” first, or use a role your membership plugin added.
- Enable Auto-Apply:
- In the Auto Apply Coupon box in the right sidebar, tick Enable auto apply for this coupon. Do not set Usage limit per coupon, Usage limit per user, Allowed emails, or Virtual coupons on the same coupon, because any of those stops auto apply from working.
Help & Support
We have a dedicated support team for Advanced Coupons who know our products, WooCommerce, and the industry very well. You’re welcome to make use of their expertise at any time, worldwide.
If you are an existing customer please go to the support ticket request form and send us a message.
If you are a free plugin user, please send us a support request on the forum, we actively monitor the WordPress.org support forums for the free plugin and help our users there as best as we can.