WooCommerce Add to Cart URLs can be found throughout your store. Whenever a customer interacts with an Add to Cart button, they are utilizing a URL generated by WooCommerce. This URL serves as a command for WooCommerce to include a particular product in the customer’s cart.
Moreover, you have the ability to manually generate these links!
In this article, we will discuss two easy ways to create a WooCommerce Add to Cart URL. Firstly, we will explore the manual approach, illustrating the inner workings of such URLs. Then, we will proceed to create one using Advanced Coupons. So, without further ado, let’s delve into the details!
What Are WooCommere Add to Cart URLs?
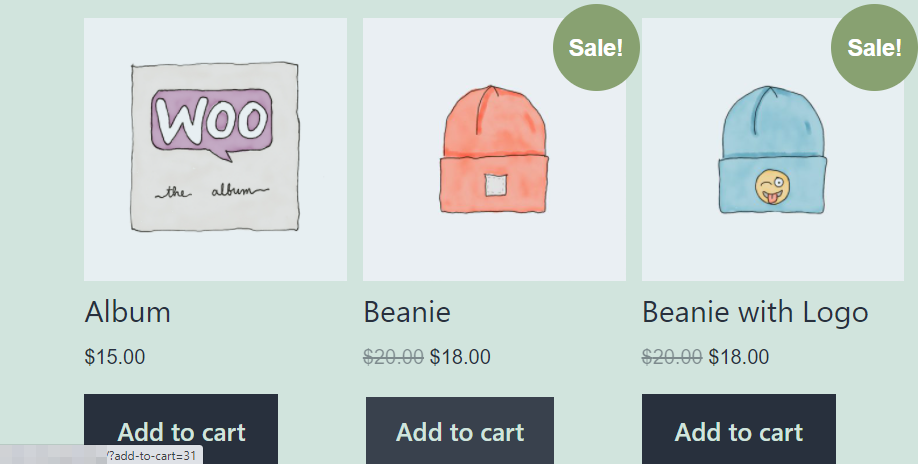
Usually, customers interact with Add to Cart URLs using buttons. When you click on a purchase button in a WooCommerce store, it uses an URL to tell the website to add a product to your cart. So, let’s inspect an Add to Cart button so you can see how that URL looks:
The URL that you see in the bottom left is where WooCommerce “sends” you when you click on an Add to Cart button. WooCommerce uses a very specific format for those URLs, which means that you can easily create your own. Let’s find out how to do it.
How To Create A WooCommerce Add To Cart URL (2 Ways)
For this section, we’ll show you how to create WooCommerce Add to Cart URLs manually and using Advanced Coupons. Let’s start with the manual approach.
1. Create WooCommerce Add to Cart URLs manually
As you might have noticed, WooCommerce Add to Cart URLs follow a very specific structure. You have your site’s URL followed by ?add-to-cart=”PRODUCT ID”. Here’s a quick example:
yourstore.com/?add-to-cart=11
We’re adding one single parameter to your store’s URL and indicating what product it should add to your customer’s cart. You can create WooCommerce Add to Cart URLs for any product on your store. All you need is that product’s unique ID.
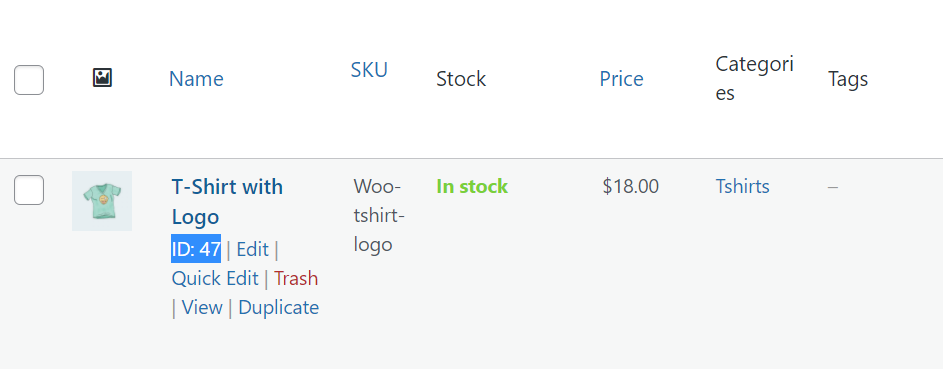
To find a product’s ID, go to your dashboard. Then, head to the Products > All Products tab.
Subsequently, hover over the product that you want to create a custom URL for and you’ll see its ID showing next to the Edit option:
Once you have the product ID, you can now create a WooCommerce Add to Cart URL for it.
Additionally, where to place that URL is up to you. However, traditionally, users prefer to click on buttons to add products to their carts. You can use that URL to add new buttons to your product pages besides the Add to Cart option that WooCommerce generates for you.
Similarly, with custom Add to Cart URLs, you can place buttons for your most popular products anywhere on your site, in places that WooCommerce traditionally doesn’t include those elements.
2. Generate an Add to Cart URL using Advanced Coupons
Using Advanced Coupons, you can generate links that automatically add coupons when users click on them. Another one of Advanced Coupons’ features is that it enables you to create coupons that add specific products to customers’ carts. When you combine both features, you can create coupons that:
- Have links that enable users to click on them to apply the coupon
- Automatically add specific products to customer’s carts
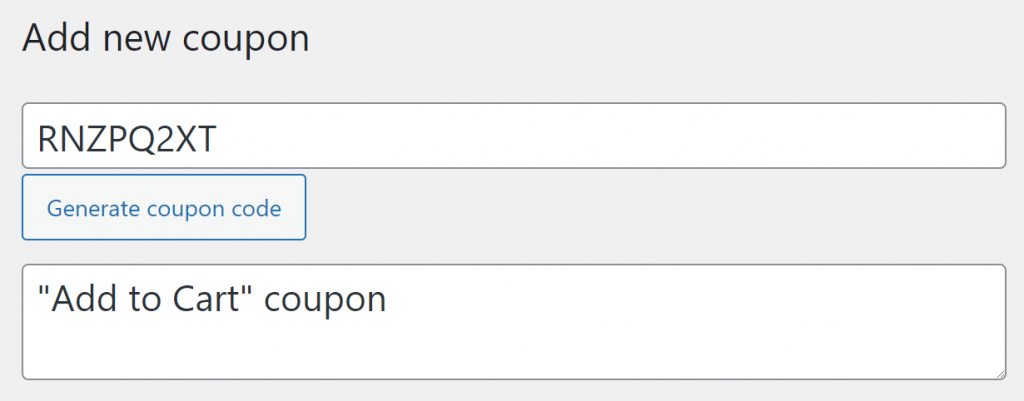
If you want to create that type of coupon, go to Coupons > Add New. First, let’s generate a coupon code and enter a description for it:
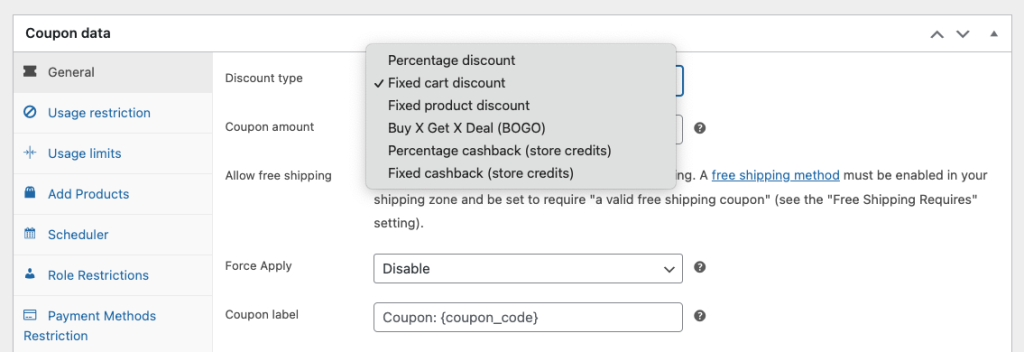
Then, go to Coupon Data > General and choose what type of discount you want the coupon to offer. You can also proceed with setting up the coupon amount while you’re at it:
Moreover, you can select the Fixed product discount option. That will apply a discount for specific products and we can configure the coupon to add those items to customer carts automatically.
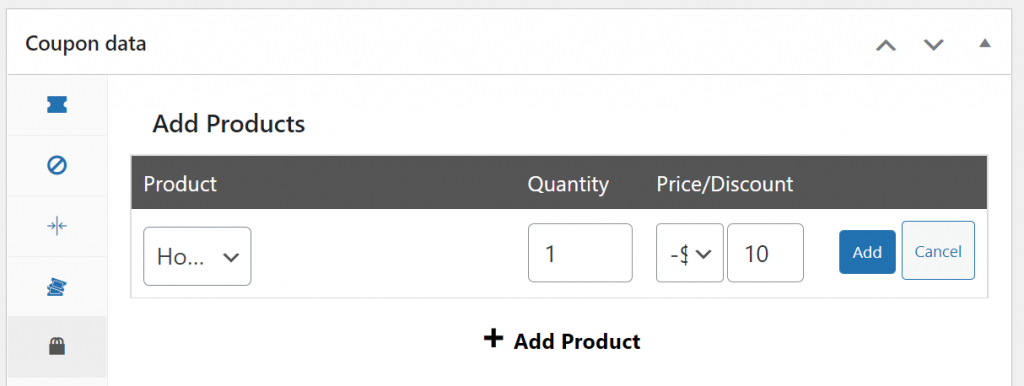
To do that, go to the Add Products tab and select what products the coupon should add:
You can configure your coupon to add as many products as you want to customer carts. At this stage, you already have a fully working coupon code. However, it’s still missing a URL that customers can use to apply it without entering the code manually.
Creating URL coupons in WooCommerce
Publish the coupon code and then go to Coupon data > URL Coupons. After you publish a coupon, Advanced Plugins will automatically generate an URL for it:
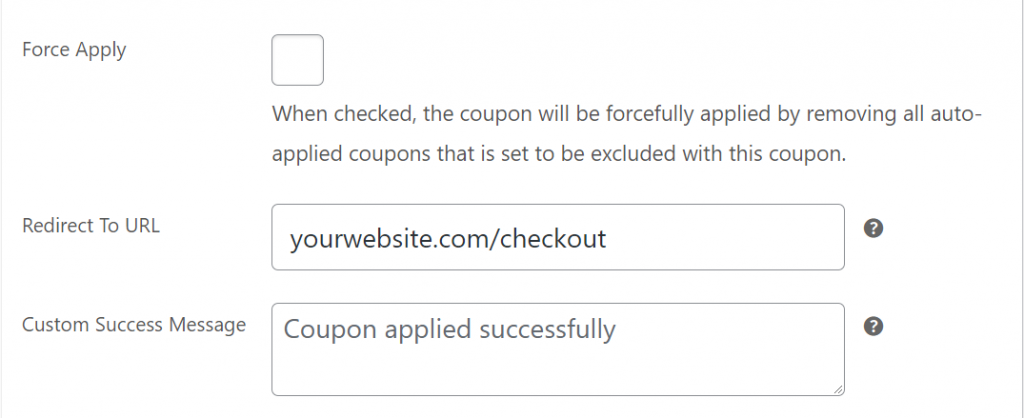
When users click on that URL, it’ll apply the coupon and add the products that you configured to their carts. By default, Advanced Coupons will redirect users to their cart. However, you can also change the Redirect to URL setting to send customers directly to the checkout page:
Your WooCommerce checkout page should be located at yourwebsite.com/checkout unless you changed it. By directing users to the checkout, you make it easier for them to complete their purchase.
Finally, now you can go ahead and share your WooCommerce Add to Cart URL coupon using social media, your email list, or just add it directly to your website.
Conclusion
WooCommerce makes it easy for customers to add products to their carts. And in this article, we shared 2 easy ways to create Add to Cart URLs in WooCommerce:
If you use Advanced Coupons, you can create coupons that add products to customer carts automatically. Each coupon gets its own URL, which you can place anywhere you want on your website. The advantage of this approach is that you can enable customers to add products to their carts and apply discounts with a single click.
Do you have any questions about how to create WooCommerce Add to Cart URLs? Let’s talk about them in the comments section below!


