Boring coupon strategies that don’t seem to resonate with customers are out. Nowadays, it’s important to add some marketing magic to your coupon game if you want to truly stand out from the crowd. And one effective way to do this is by adding URL coupons to your arsenal!
These discounts are created with custom URLs and offer a fantastic way to entice customers to your store, track your marketing efforts, and boost sales in a snap. They also add a touch of excitement and exclusivity to your marketing strategy.
In this article, we’ll walk you through the simple process of creating URL coupons in WooCommerce. With just three easy steps, you’ll be on your way to boosting your conversion rates and growing your business. Let’s get this party started!
What Are URL Coupons?
URL coupons are essentially discounts or promotions that are applied to your online store via a specific web address or URL. They function similarly to secret codes that your customers may use to gain access to exclusive deals and discounts on your offers.
Not only are URL coupons easy to use and track, but they’re also highly customizable. These coupons can be created for certain products, categories, or even the entire order. You can also limit the number of times a coupon can be used and when it expires.
This provides you with complete control over your promotions and how they are distributed.
Benefits Of Running URL Coupons In WooCommerce
Navigating the world of e-commerce marketing can be overwhelming, especially if you’re not familiar with all the different tools and strategies available to you.
However, one strategy you don’t want to overlook is URL Coupons. Despite the name sounding a bit intimidating, setting up URL Coupons is actually quite straightforward.
More importantly, there are many benefits to running URL Coupons in your online store. For starters, they can be a powerful tool for increasing customer engagement and improving your store’s overall performance. Here are just a few of the benefits you can expect from implementing URL Coupons:
- Improved customer loyalty
Offering URL discounts is a terrific way to incentivize your most loyal customers. You make them feel valued by offering them exclusive bargains and promotions not available to the general public.
- Easy to track
URL discounts are easy to track, allowing you to assess their success and change your marketing strategy accordingly. You can quickly examine how many times a coupon was used, how much revenue it created, and how it affected your overall sales.
- Increased revenue
Of course, and the most obvious benefit, URL coupons can help increase sales. It is an excellent technique to motivate purchases and encourage customers to return to your online store.
Additionally, you can motivate customers to take action and make a larger purchase by providing exclusive discounts and promotions via a unique web address.
How To Create URL Coupons In WooCommerce
As you know by now, offering URL Coupons can create a more engaging and satisfying shopping experience for your customers while increasing your bottom line.
The question is… how do you do it?
In this guide, we’ll take you through three easy steps to create and implement URL coupons using Advanced Coupons. All you need to do is follow along and you’ll be on your way to using this powerful tool to grow your online business:
Step 1: Create a new coupon
To begin creating a URL coupon in WooCommerce, the first step is to go to your WordPress dashboard and create a new coupon. You can do this by navigating to Coupon > Add New:
Make sure that you have a specific coupon code for easier management in the future. This can come in handy if you need to edit the coupon later on.
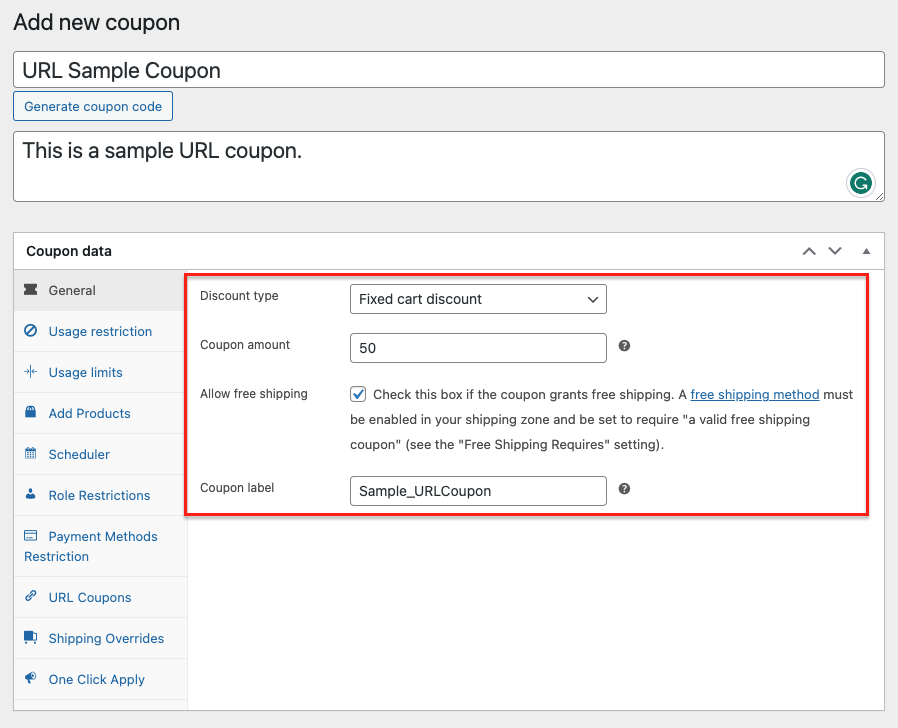
Once you have your coupon code, it’s time to set up your Coupon Data. This is where you can customize your coupon offer according to your preference. You’ll see a variety of settings that you can specify to curate the perfect coupon, including the discount type, coupon amount, and coupon label:
However, if you already have an existing coupon that you want to use for this specific offer, then you can skip this step and move on to the next one.
Step 2: Enable coupon URL
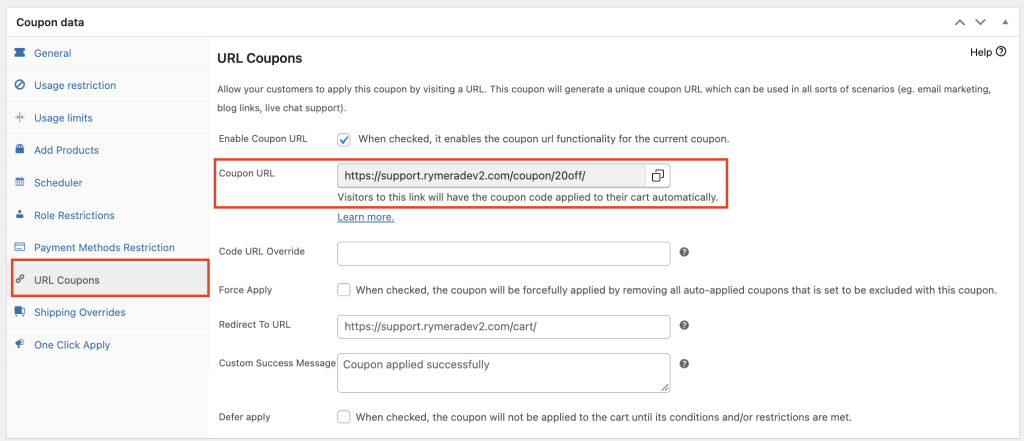
After setting up your Coupon Data, jump to the URL Coupon tab on the left side of your screen. From here, simply click on the box next to “Enable Coupon URL”:
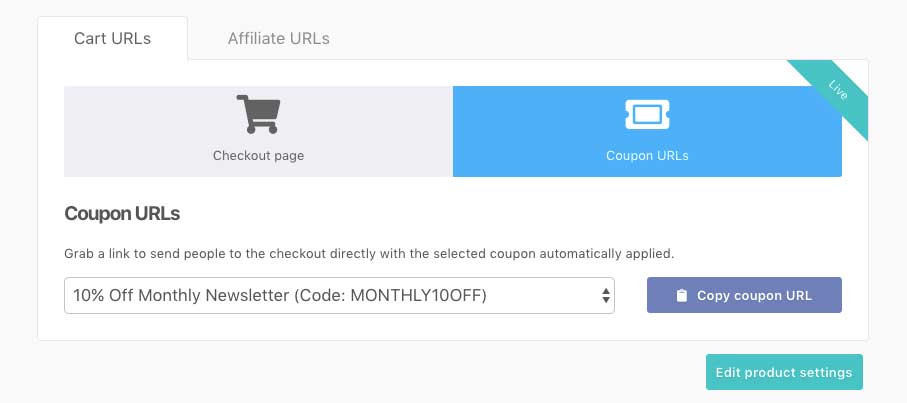
Essentially, a unique coupon URL is generated that can be used in various scenarios such as email marketing, blog links, and live chat support. You can even create a button with the URL and have customers click on it to apply the coupon.
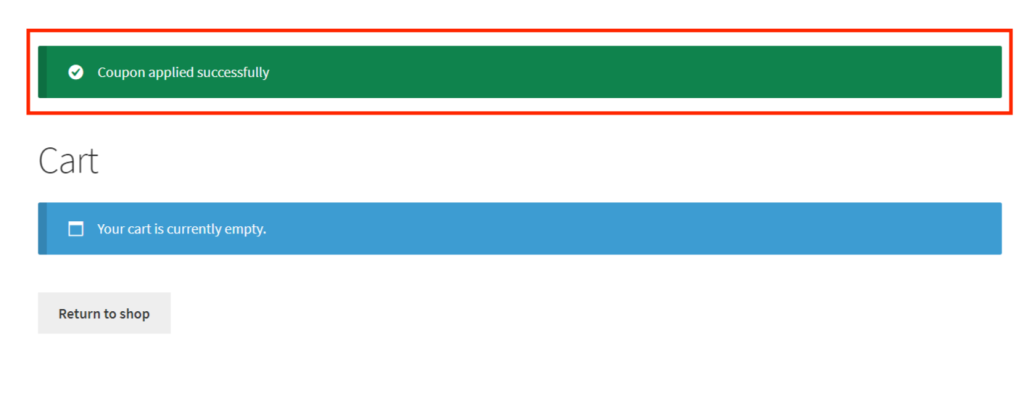
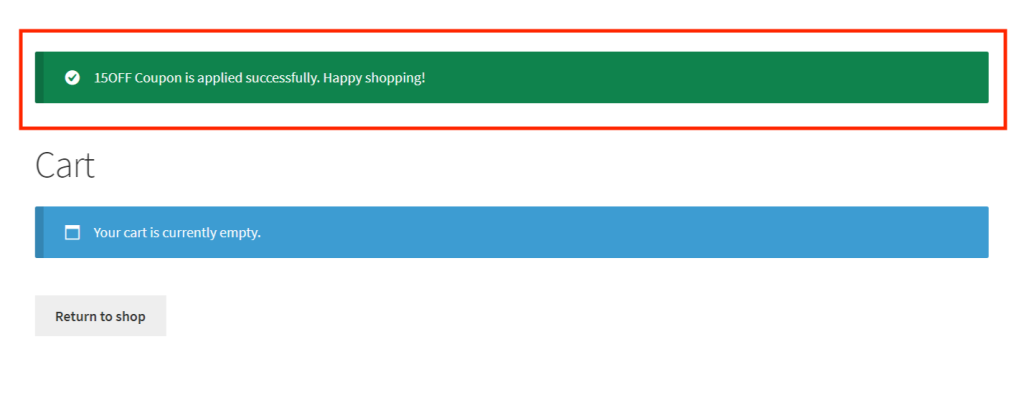
This setting is particularly useful for immediate coupons, such as a 15% discount on the total cart value. For instance, when the customer clicks on the URL, they’ll be redirected to their cart and a notice will appear once the coupon is successfully applied:
Step 3: Customize the success message of your URL coupons
To further enhance the user experience, you can customize the success message that appears when the coupon is applied successfully.
This can be done by jumping to URL Coupons > Custom Success Message. From there, you can add a specific message or instruction for the customer, making it more personal and engaging:
This level of customization can go a long way in making the shopping experience more enjoyable for the customer and could potentially lead to increased sales and customer loyalty!
Conclusion
With the use of URL Coupons, you can make it easier for your customers to take advantage of your offers by allowing them to apply the coupon by simply visiting a specific URL. Fortunately, setting up URL Coupons in WooCommerce is relatively easy with Advanced Coupons.
In this article, we discussed 3 easy steps to create URL Coupons in WooCommerce:
Do you have any questions about this guide? Let us know in the comments below!


