Offering discounts can be an effective way to boost sales. However, it’s important to ensure that these are set up correctly to avoid abuse and profit loss. This means you’ll need to learn how to set up discount rules for WooCommerce.
Fortunately, our Advanced Coupons plugin enables you to configure usage restrictions and cart conditions for your coupons. It comes with a variety of options, so you can make sure that your discounts are used effectively.
In this post, we’ll discuss the benefits of setting up discount rules for WooCommerce. Then, we’ll show you how to create coupon limitations and conditions and look at some examples. Let’s get started!
The Benefits Of Setting Up Discount Rules
Discounts can help you make more sales and increase your customer retention rate. In fact, 35 percent of shoppers are willing to try a new product if there’s a coupon or discount code involved. Another 36 percent are more likely to buy a product if it comes with a free gift.
However, creating appealing offers is not enough. You’ll also need to set up discount rules to make sure that these coupons are used by the right customers.
By default, WooCommerce lets you run basic offers. With our Advanced Coupons plugin, you’ll get access to more advanced discount rules and settings. This way, you can refine your sales strategy and target the right customer.
By setting up discount rules, you can make sure that you’re still making a profit with your coupons.
For instance, you can limit the number of times they can be used, define the products they can be used on, and more.
How To Set Up Discount Rules For WooCommerce
Our Advanced Coupons plugin enables you to set up different discount rules for WooCommerce. You can create basic offers, like discounts on minimum spending, to more complex ones, like savings on select products.
In this tutorial, we’ll look at how to set up rules for a fixed cart discount. Later in the post, we’ll cover a few more examples.
Step 1: Select a discount type
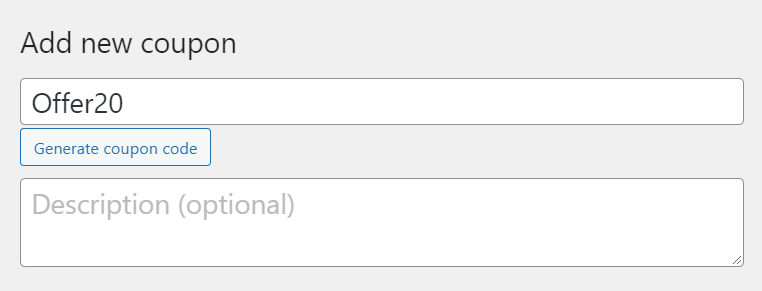
Once you’ve installed and activated the plugin on your site, navigate to Marketing > Coupons and click on Add Coupon. Here, you can enter a code for your coupon, or ask the plugin to generate one for you:
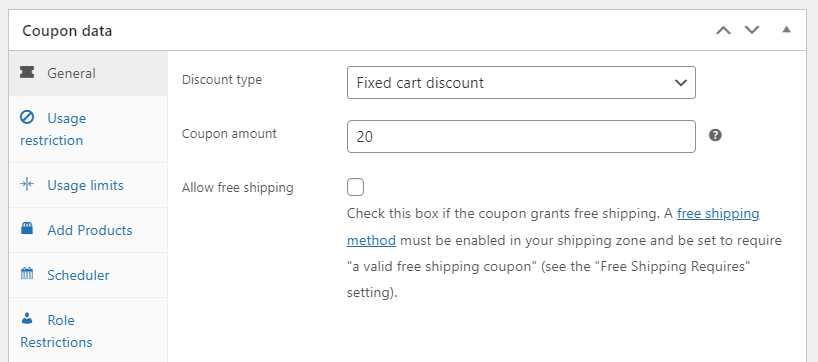
Then, scroll down to the Coupon data box. In the General section, you can select the type of discount you want to offer and the coupon amount:
You also have the option to offer free shipping with the coupon.
Step 2: Configure usage restrictions and limits
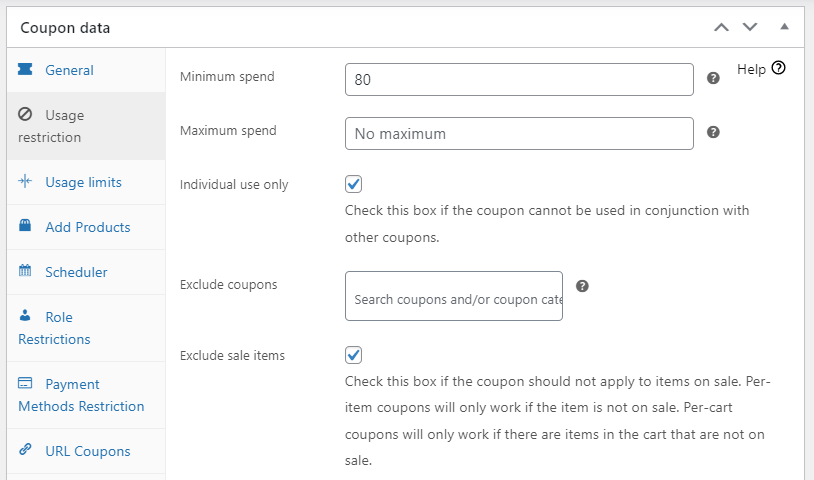
Next, go to the Usage restriction tab. Here, you can choose when the coupon can be used. For example, you can define a minimum and maximum spend, and prevent shoppers from using the coupon with another offer and/or sale items:
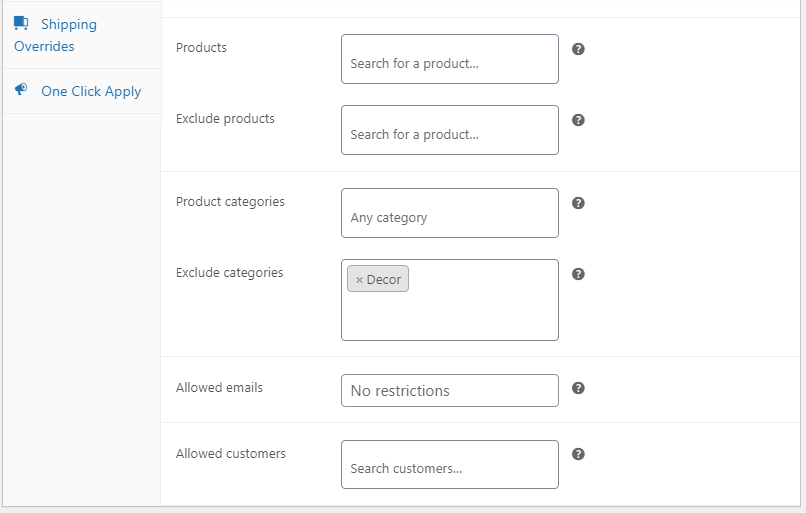
Additionally, you can exclude particular products and product categories from the offer:
This way, shoppers won’t be able to redeem the coupon if they have particular items in their carts. Alternatively, you can select the products and categories that the discount can be used on.
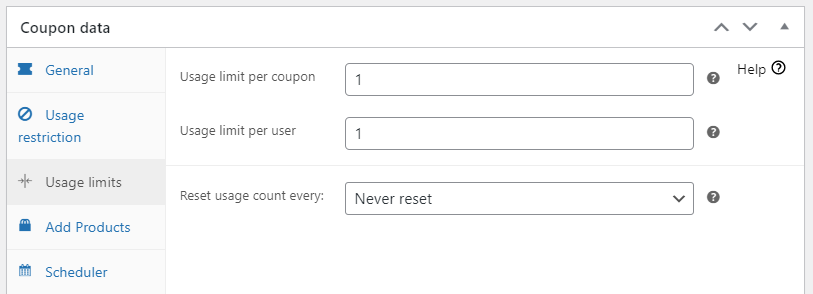
Let’s move on to the next set of rules. If you click on the Usage limits tab, you can define the number of times that the coupon can be used:
You can also select the number of times it can be used by an individual shopper. These rules will help you prevent coupon abuse.
Step 3: Create role and payment restrictions
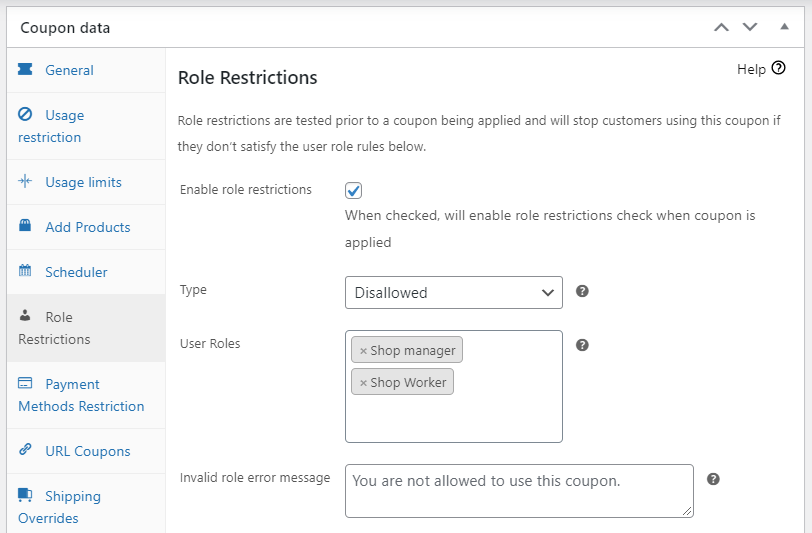
You may also want to prevent your employees from using the discount on your store. To do this, navigate to the Role Restrictions tab and tick the box for Enable role restrictions:
For Type, select Disallowed.
Then, in the User Roles field, choose the users that you want to bar from the offer.
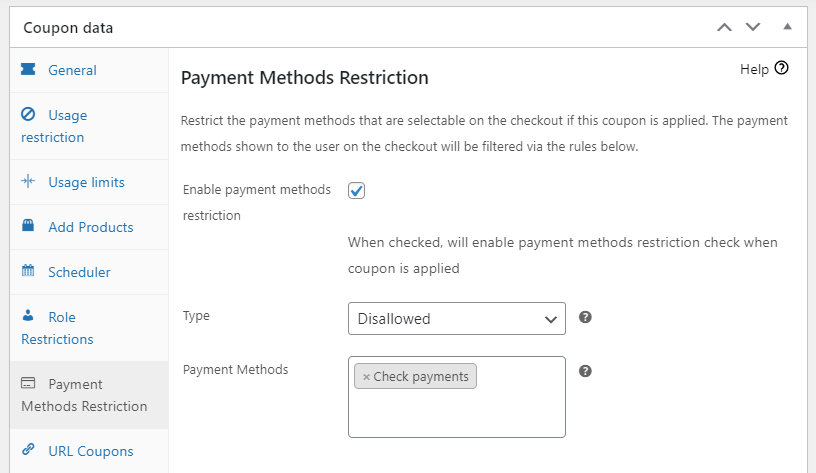
Similarly, you might want to prevent shoppers from using the discount with particular payment methods. Navigate to Payment Methods Restrictions and tick the box for Enable payment methods restriction:
In the Type field, choose Disallowed. In Payment Methods, select the types of payment that cannot be used with the coupon.
Step 4: Add cart conditions
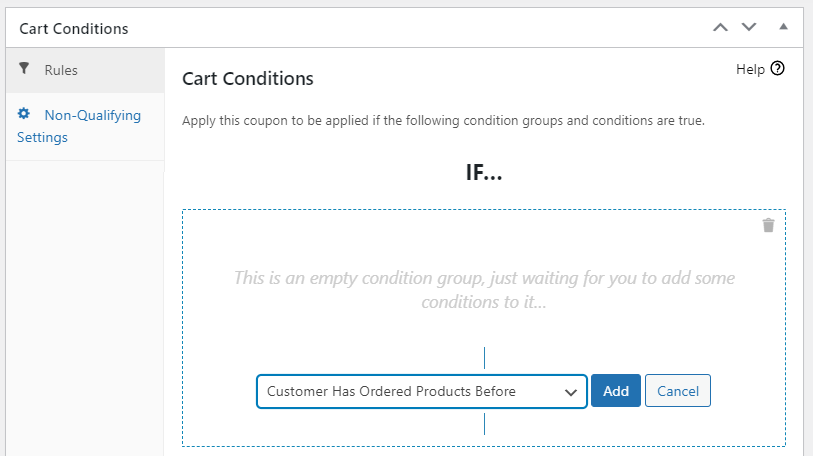
Our Advanced Coupons plugin also enables you to add cart conditions. This way, you can set up more advanced discount rules for WooCommerce.
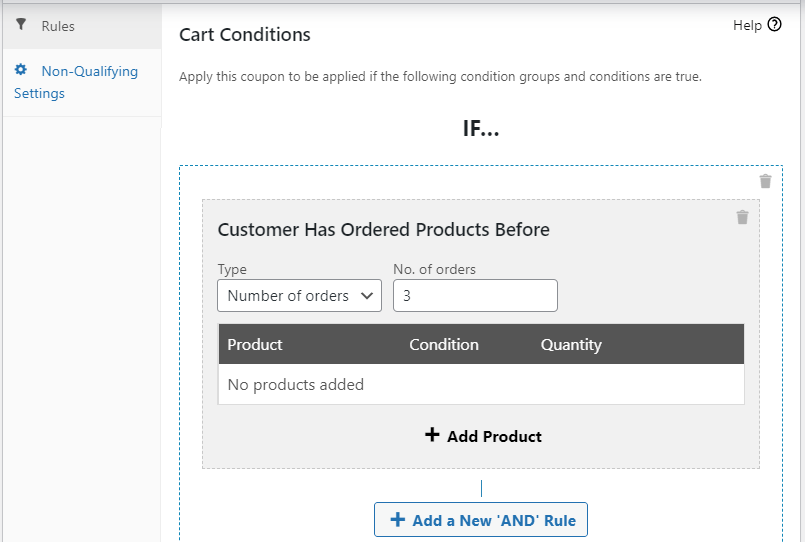
For example, let’s you want to make your coupon available to repeat customers only. Navigate to Cart Conditions > Rules. From the dropdown menu, select Customer Has Ordered Products Before:
Once you click on Add, you can configure additional conditions for the coupon. For example, the customer would need to have made at least three orders in the past:
You can also select specific products that they would need to have purchased. When you’re ready, click on Save Cart Conditions. Then, hit Publish to make your coupon live.
Examples Of Discount Rules For WooCommerce
Now that you know how to set up discount rules for WooCommerce, let’s look at some examples. Once again, we’ll be using our Advanced Coupons plugin to create these offers.
1. BOGO deals for particular products
Buy One Get One (BOGO) deals are an effective way to encourage purchases. With this offer, shoppers who buy a particular item will get another one for free.
You can also offer BOGO deals to get rid of excess stock in your inventory or promote a particular brand.
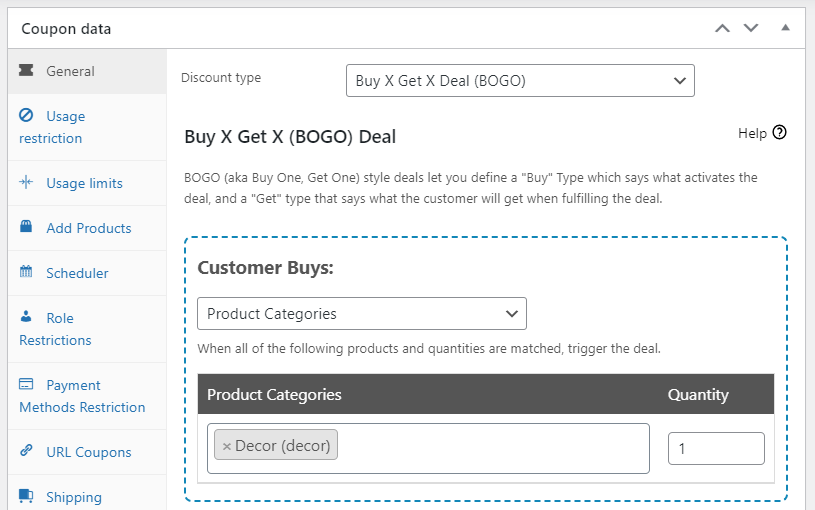
To get started, select Buy X Get X Deal as your discount type. Then, choose the products or product categories that the coupon can be used on:
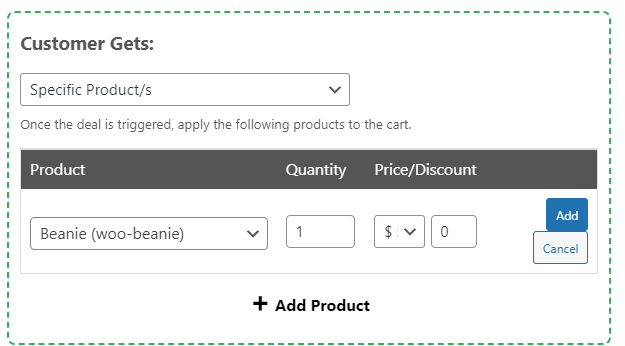
You’ll also need to select the product that the customer will get once they redeem the coupon:
Finally, you can add cart conditions to your BOGO deal.
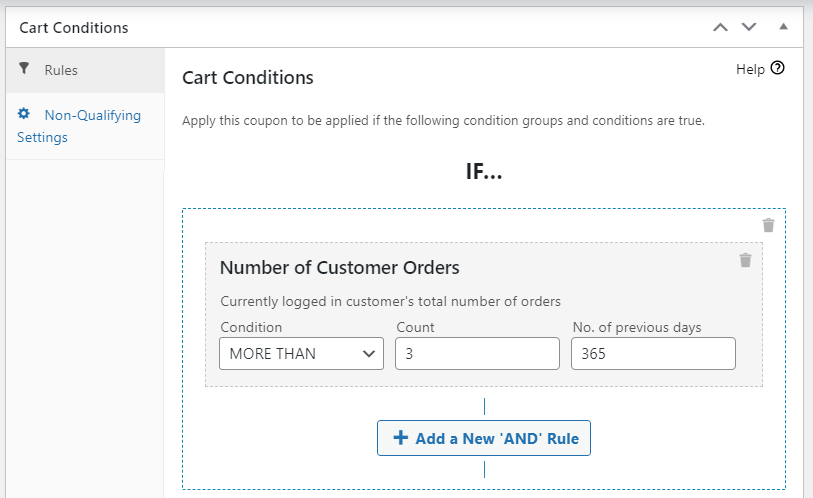
For example, you might choose to only make it available to logged-in customers who have made a particular number of orders within a specified period of time:
You may also add a secondary condition. Remember to save your changes when you’re ready.
2. Personalized coupons
Let’s look at another example of discount rules for WooCommerce. As a shop owner, you want to create coupons just for your employees to express your appreciation for their hard work.
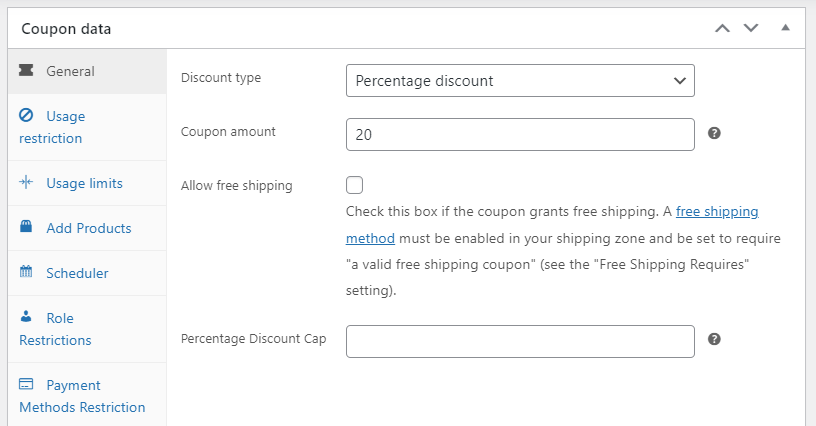
First, you’ll need to select a discount type and amount:
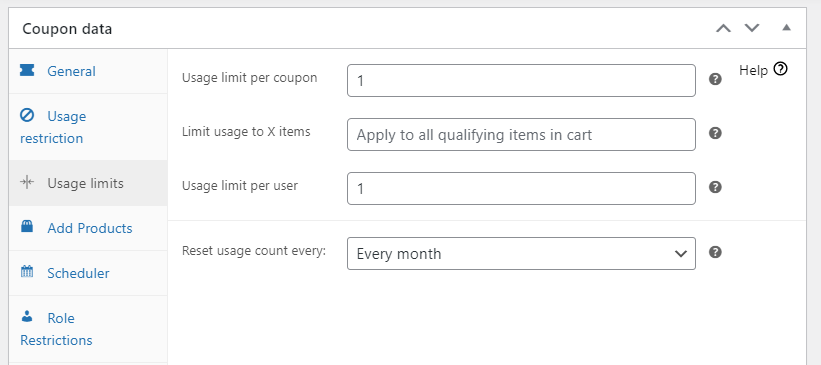
For example, let’s they get a 20 percent discount per month, which they can use on any products and orders. In the Usage Limits section, set the limit per coupon and user to 1. Then, for Reset usage count every, select Every month:
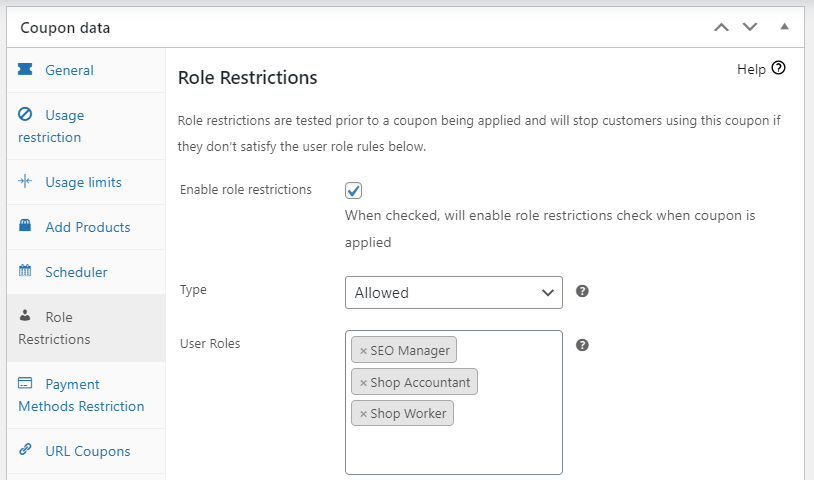
Now, go to Role Restrictions. Tick the box to enable role restrictions, set the Type to Allowed, and choose the users that will have access to the coupon:
That’s it! Remember that you can add cart conditions if you want to set up more discount rules.
3. Location-based offers
Now, let’s look at a less common example of discount rules for WooCommerce. If you’re tapping into a new market, you may wish to offer discounts specifically for users in a particular location.
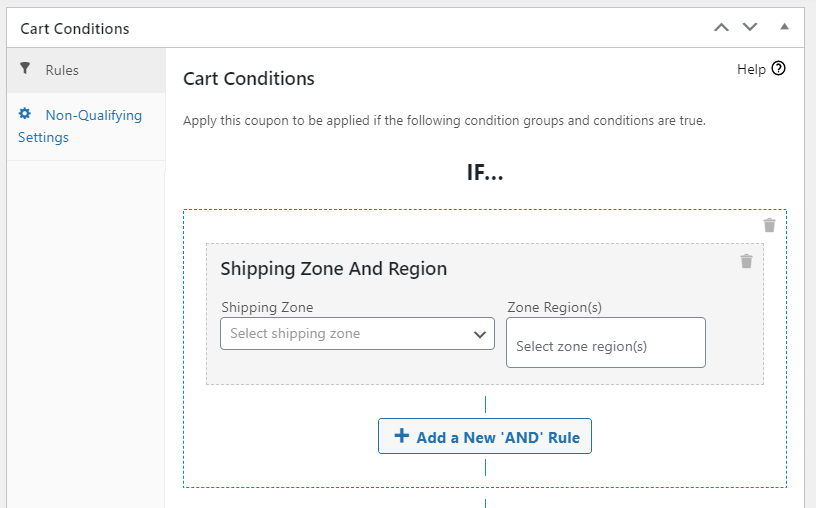
Start by defining your discount type, usage restrictions, and usage limits (as shown earlier). Then, in Cart Conditions, select your shipping zone and region:
Now, customers who fall within the specified shipping zone will be able to use that coupon.
You could also use this feature to create multiple offers for different audience segments, based on geographical locations. For instance, you might offer a 20 percent discount to users in the US, and a 15 percent discount to shoppers in the UK.
Conclusion
Discounts can be a powerful way to make more sales. However, you may need to set up specific rules to make sure that your coupons are used effectively. With Advanced Coupons, you can configure usage restrictions and limits for your coupons in just a few steps:
- Select a discount type
- Configure usage restrictions and limits
- Create role and payment restrictions
- Add cart conditions
In this article, we provided a complete guide to discount rules. We also shared 3 examples of discount rules in WooCommerce:
Do you have any questions about setting up discount rules for WooCommerce? Let us know in the comments section below!


