Offering free or discounted items can be an effective strategy for boosting sales in your online store. One approach that can help is offering the 3rd product cheaper when a customer purchases two. However, setting up this type of promotion manually can be time-consuming and prone to errors.
The good news is that it’s simple to set up all kinds of promotions in WooCommerce. For example, you can easily automate a ‘buy two get one at a discount deal, either throughout your entire store or only on specific products.
In this post, we’ll show you exactly how to give the third product for a cheaper price using WooCommerce coupons. By following our step-by-step guide, you’ll be able to implement this promotion in your store and take advantage of its benefits. Let’s get to work!
Why You Might Want To Give The 3rd Product Cheaper
Attracting people to visit your WooCommerce store can be a lot of work. Once they’ve arrived, therefore, you need to encourage them to buy as much as possible.
Offering coupons is an excellent way to do this. Discounted items can:
- Encourage customers to add more items to their carts than they originally intended.
- Play on customers’ Fear of Missing Out (FOMO), especially if the promotion is offered for a limited time.
- Prompt customers to share information about your deal on social media.
The numbers support the power of discounts as well. For instance, 64% of consumers will wait to purchase products until they’re on sale, and 22% will purchase products only when they’re on sale or a coupon is offered – even from their preferred brands.
There are many effective types of discounts you can offer, but one of the best options is to offer a lower price on a third item for customers who have already purchased two of the same (or similar) items.
This can encourage customers who only planned to buy one product to increase their order and take advantage of the deal.
How To Give The 3rd Product Cheaper With WooCommerce Coupons (In 5 Steps)
So how do you implement this kind of discount in your WooCommerce store? The easiest method is to use a coupon – let’s walk through how that process works.
Step 1: Install WooCommerce and Advanced Coupons
To start with, we’ll be assuming that you already have a WooCommerce store up and running. If not, the first thing you’ll want to do is set up WooCommerce on your website.
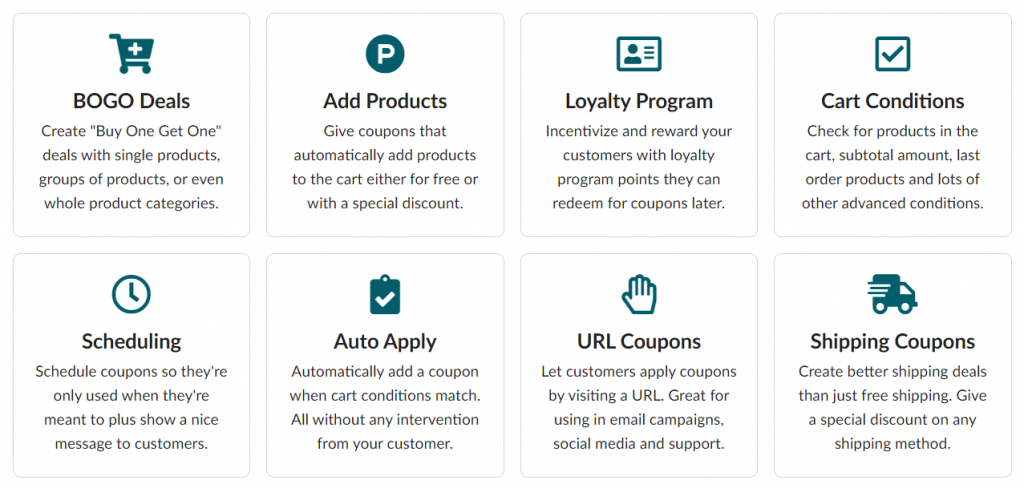
In addition, you’ll want to add our own Advanced Coupons plugin to your store. This plugin is designed to extend WooCommerce’s coupon features and add new options, making it easy to create all kinds of coupons and customize them exactly how you like:
So you’ll need to start by installing and activating Advanced Coupons on your website. The free version will suffice to set up basic BOGO-style deals. However, we recommend the premium version for this use case, as it offers access to more features and options.
If you opt for the premium version, note that you will also need the free version installed. Plus, don’t forget to activate your license under WooCommerce > Settings > Advanced Coupons > License.
Step 2: Choose your coupon trigger and products
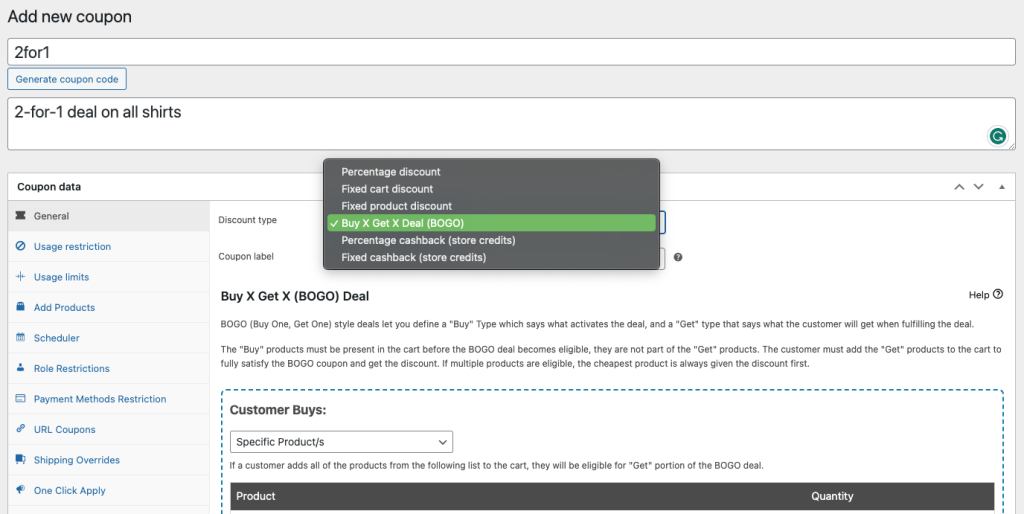
Now that you have the tools you need, you’re ready to set up your deal. Head to WooCommerce > Coupons, and select the option to create a new coupon. Then click on the section called General then choose the Buy X Get X Deal (BOGO) discount type:
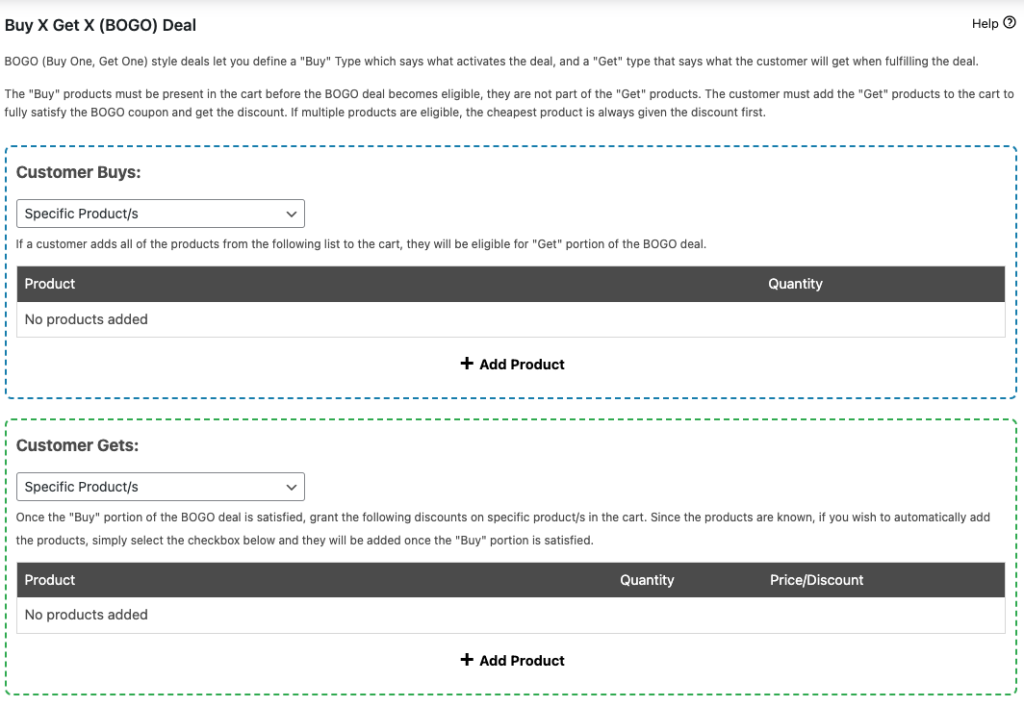
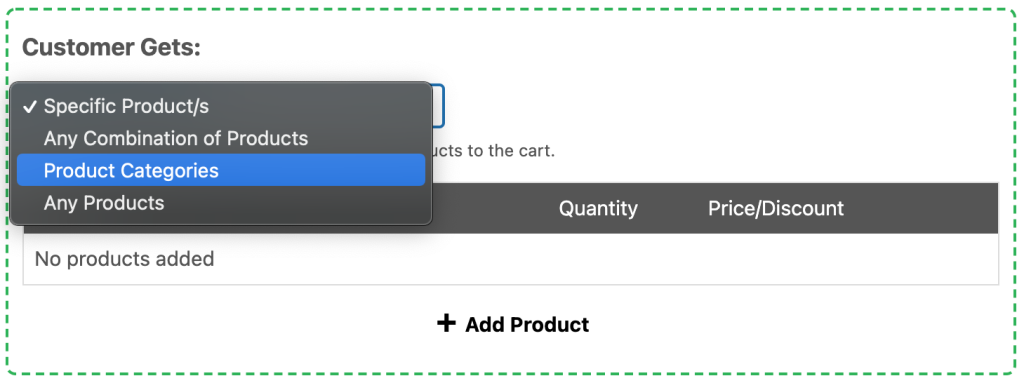
Here, the first thing you’ll need to do is select a “Buy” type. This determines what conditions will activate your BOGO deal. With the premium version of the plugin, you’ll have three options:
- Specific Products: For the deal to apply, customers will have to add specific products to their carts in pre-determined quantities.
- Any Combination of Products: Customers merely need to meet the required quantity, but can select any combination of items.
- Product Categories: Again, customers must meet the required quantity, and they’ll need to select items from specific categories.
- Any Products: Customers can add any products to trigger the deal
Choose whichever of these triggers best fits your needs. Below that, you’ll find a field labeled Products:
There, you can decide what specific products (or product categories) your deal will be applied to.
Make sure to enter “2” as your quantity – this will require customers to purchase two items before they are applicable for the discount.
Step 3: Set up your deal
Next up, you’ll need to choose an option under Customer Gets:
You’ll see the same four options we described above. The only difference is that this setting will be used to determine what products the discount can be applied to.
Specific Products is a useful option here if you’re setting up your BOGO deal for one particular item. When selected, customers will have the indicated item automatically added to their carts once they’ve satisfied the conditions of the deal.
If you select Any Combination of Products or Product Categories or Any Products, on the other hand, customers will be able to select their discounted item from all the available options. Again, these options can be customized by adding products and categories in the Product field below.
For your discounted product(s), be sure to add “1” as the quantity. You can also specify any discount you like, either as a percentage or a fixed amount.
Step 4: Customize your additional settings
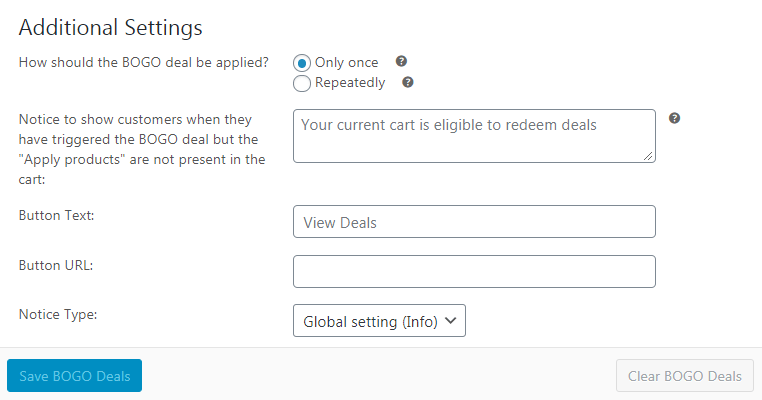
Before finishing up, it’s worth checking out the Additional Settings section at the bottom of the page:
Here, you can make a few more choices about how your deal will work. You can set the coupon to be applied only once per customer, for example. Or you can select “Repeatedly” so that for every two eligible items, the customer can get a third at a discount.
In addition, you can customize the message and button that will be displayed to customers, letting them know about the deal. You can also change the way the WooCommerce notice is displayed using the Notice Type option.
Once you’re done here, hit Save BOGO Deals. This will activate the deal on your site, and enable customers to start benefiting from it! Of course, it’s also a good idea to promote your discount, whether on your store itself, through social media, or in your email list (or all three!).
Step 5: Configure your cart conditions
Technically, you now know how to give the 3rd product cheaper by using a WooCommerce coupon. However, there’s one more thing you’ll likely want to do.
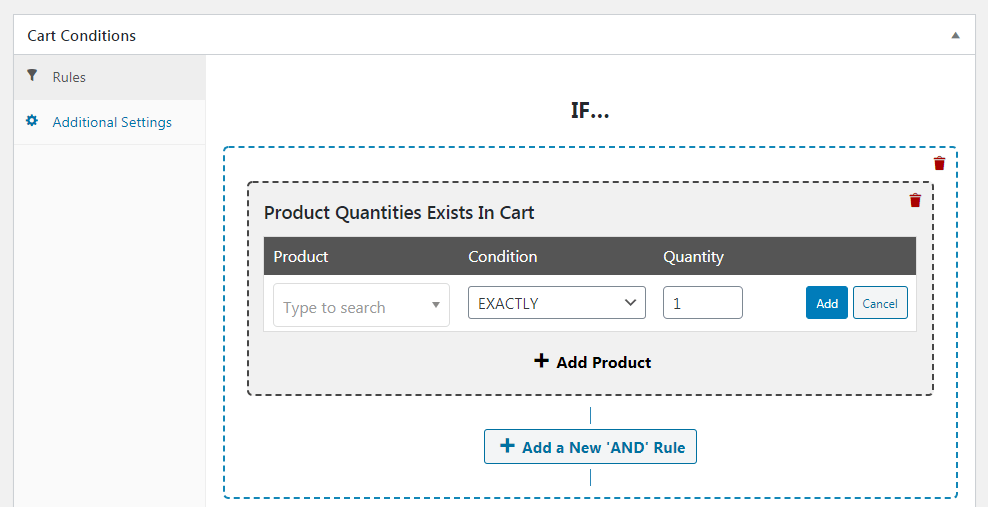
At the very bottom of the Add New Coupon page, you’ll find a section called Cart Conditions:
This section enables you to automate your coupon, so it will be applied as soon as the items in a customer’s cart meet the requirements for the deal.
For example, you can select Product Quantities Exists In Cart, then enter the product your deal applies to and a quantity of “2”. This will activate the coupon once a customer has added two of the eligible items to their cart.
You can also configure your cart conditions to look for products in specific categories and so on. Just make sure that your selections here line up with the deal you created in the first four steps. Then you can save your cart conditions, and you’re all set.
Conclusion
If you want to kick-start sales in your online store, it’s worth learning how to give the 3rd product cheaper with WooCommerce coupons. This is an easy deal to set up and can encourage customers to add more items to their carts.
To recap, here are the five simple steps you can follow to create this kind of discount:
- Install WooCommerce and the Advanced Coupons plugin.
- Choose your coupon trigger and products.
- Set up your deal.
- Customize your additional settings.
- Configure your cart conditions.
Do you have any questions about how to customize your WooCommerce coupon? Ask away in the comments section below!

