Offering unique bargain shopping opportunities to your customers can be a game-changer for your online sales. One popular promotional strategy that can skyrocket your revenue is the Buy 2 Get 1 Free discount percentage.
Essentially, a Buy 2 Get 1 Free coupon is a promotion where customers are offered a free item when they purchase two items at full price. If you’d like to entice customers to purchase more items while feeling like they are getting a great discount, this is a great strategy to begin with.
In this article, we will explore the ins and outs of creating a Buy 2 Get 1 Free coupon. We will also provide you with step-by-step instructions on how to implement this promotion on your WooCommerce store. So, let’s dive deeper into it!
What Is The Meaning Of Buy 2 Get 1 Free?
“Buy 2 Get 1 Free” is an enticing offer that allows customers to receive a free item when they purchase two others at full price. Essentially, they get three items for the price of two, making them feel like they’re getting a great deal! It’s also a win for your business, as you can increase average order values and boost sales.
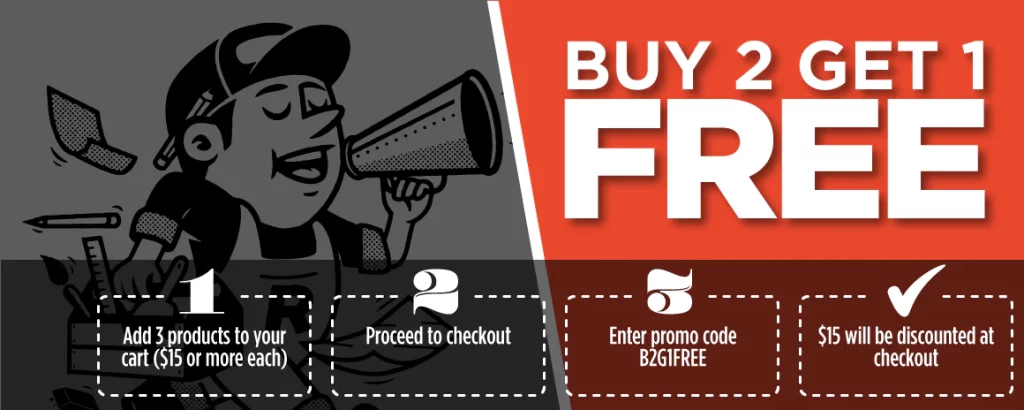
Example: If you sell $20 t-shirts, with the deal, customers can get three for $40 instead of $60.
The Buy Two Get One Free deal is a versatile deal that you can apply to almost any product category, whether you’re selling accessories, beauty products, clothing, or groceries. It’s a compelling promotion to run during special events and periods, helping you clear our inventory faster.
Benefits Of Offering Buy Two Get One Free Deals
Let’s take a closer look at why you should consider running this type of deal in your e-commerce store:
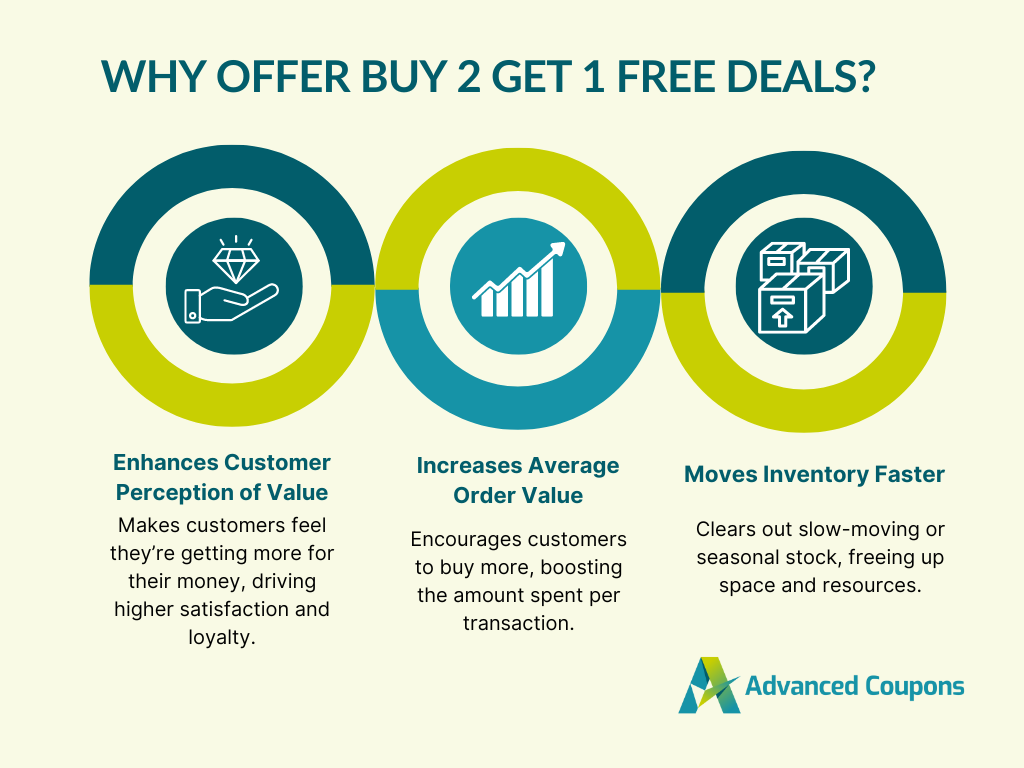
1. It makes your offerings more enticing
You know this.. shoppers are always on the hunt for a great deal! The “Buy Two Get One Free” increases the perceived value of your offerings, encouraging them to complete their purchase to take advantage of the offer.
This type of deal is even more compelling when paired with a limited-time offer. By offering this deal only for a certain period, you can create a sense of urgency. Customers are motivated to act quickly so they won’t miss out on the chance to get the best value for their money.
Lastly, it’s a great way to nudge customers on the fence about making a purchase. The allure of a free item can tip the scales, reassuring customers that they’re making a smart buying decision.
2. Helps you increase average order values
Average Order Value (AOV) measures the average dollar amount customers spend when they make a purchase from your store. Every e-commerce store aims to increase its average order values–it’s a powerful metric that can help you drive growth for your business. One way to do this is by offering Buy Two Get One Free deals.
When customers know they’ll get an item for free by purchasing two, they are more likely to add additional items to their cart. For instance, a customer planning to just buy one bottle of lotion may decide to purchase two more to get the third item for free. This increases their total spend, which is good news for your bottom line.
💡 Tip: This type of deal can be more effective when applied to complementary items. If you’re selling gourmet coffee, you can offer a free bag of coffee beans when shoppers purchase two different blends. It’s also a great way to introduce them to your other offerings.
3. Moves inventory faster
Overstocked items can be a headache for store owners–they take up storage space and tie up your resources. Offering a “Buy Two Get One Free” deal is one way you can move inventory faster, ensuring that products don’t sit on shelves for too long, or become obsolete over time.
💡Tip: Consider pairing your best-selling items with slow-moving inventory to increase sales across the board. For example, if you sell skin care products, you can offer a free, less purchased product when customers buy two popular moisturizers. This can also introduce your buyers to products they might not have considered buying before.
How To Create Buy 2 Get 1 Free Discount Percentage (5 Steps)
While WooCommerce includes basic coupon and discount features, creating a Buy 2 Get 1 Free coupon requires more advanced configuration options.
This is where the Advanced Coupons plugin for WooCommerce comes in handy.
This plugin extends the functionality of your coupon interface, allowing you to create various types of Buy X Get X (BOGO) deals. You can, for example, explore the following:
Buy…
- One, Get One 25%
- 3, Get 2 Free
- One, Get a Gift Card
- One, Get One 50% Off
- And many more!
So, assuming that you have downloaded and installed Advanced Coupons, we can now start creating our Buy 2, Get 1 Free coupon:
Step 1: Add a new BOGO deal
As mentioned, Advanced Coupons extends your basic WooCommerce features. Once this is activated, you’ll have access to advanced coupon features that will make your promotions more effective.
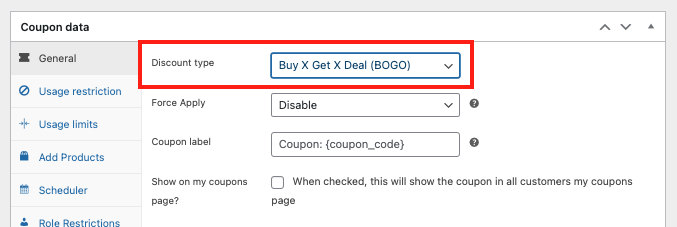
So, to get started, simply start by navigating to your WordPress dashboard and selecting “Coupons” > “Add New”. Here, you can enter a unique coupon code and description for your promotion:
Then, in the “Coupon Data” section, select “Buy X Get X Deal (BOGO)” as the discount type:
This will enable you to set up your Buy 2 Get 1 Free deal.
Step 2: Set the trigger for your coupon
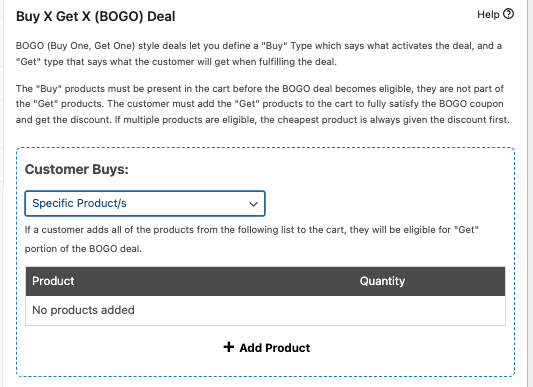
After selecting your discount type, another section containing the triggers will appear.
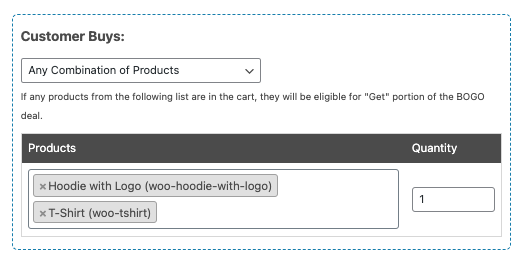
So first configure the “Customer Buys” section, where you can define the trigger for your Buy 2 Get 1 Free coupon. This determines what items a customer needs to purchase to activate the coupon:
You have several options for the trigger:
- Specific Products: Choose individual items from your store that the deal will apply to.
- Any Combination: Allow customers to purchase any two products to qualify for the free item.
- Product Categories: Apply the deal to all items within a specific category.
- Any Products: Let customers choose any products, and the cheapest one will be discounted.
For a Buy 2 Get 1 Free deal, select the “Any Combination of Products” option. This allows customers to purchase any two items to qualify for the free item:
Step 3: Specify the free item
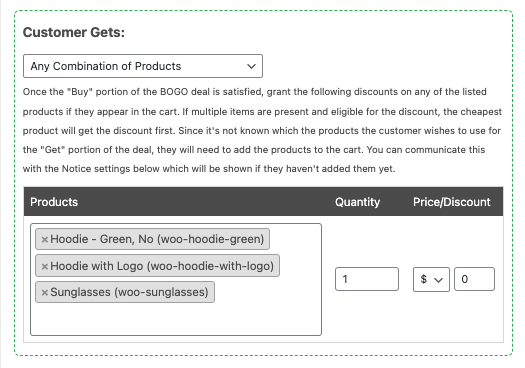
Next, in the “Customer Gets” section, you can specify the item that customers will receive for free when they meet the trigger criteria.
Since we’re aiming for them to receive any free item, you can simply choose the same options for the “Customer Gets” section as you did for the “Customer Buys” section.
So, for example, if you selected “Any Combination of Products” as the trigger, choose the same option for the “Customer Gets” section:
Set the quantity of the free item to 1 and the price to $0. This ensures that customers receive the free item without any additional charges.
Step 4: Configure additional settings
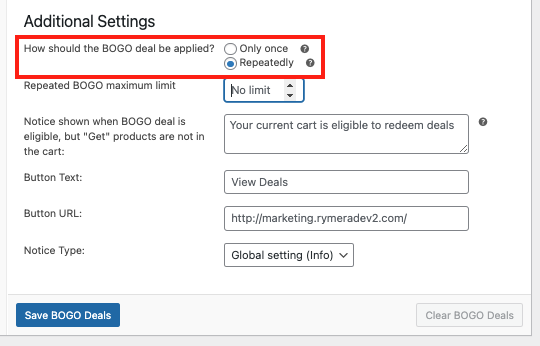
Moreover, don’t forget to configure the “Additional Settings” section. This allows you to specify extra rules or specification options for your Buy 2 Get 1 Free coupon.
One important setting is the “Repeatedly” option. If you enable this, the coupon will apply the discount to every third item in the cart:
So, let’s say a customer buys six items. If this setting is enabled, they will receive two items for free.
You can also customize the customer notification message, button text and URL, and notice type to guide shoppers and alert them to your deal.
Step 5: Set up the cart condition.
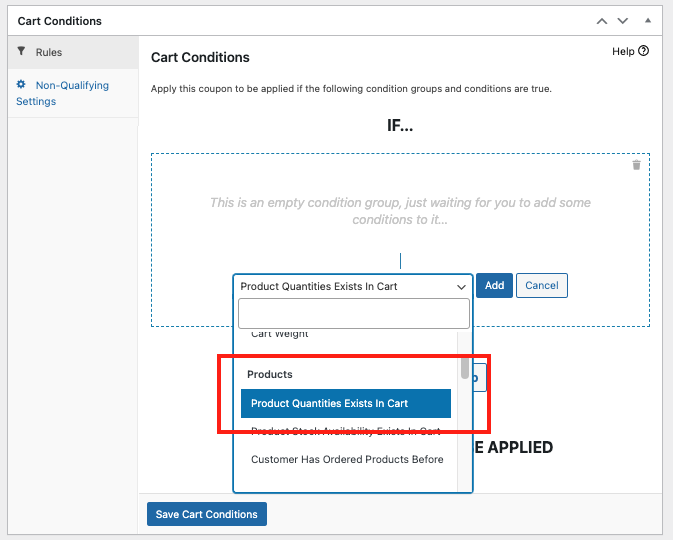
Finally, to ensure that the Buy 2 Get 1 Free coupon is applied correctly, you need to set up cart conditions that match the trigger you defined earlier.
In the “Cart Conditions” section, select “the condition that matches your trigger. For example, if you chose the specific product (i.e. the Hoodie), select the “Product Quantities Exists In Cart” condition and specify that same product:
Now, once you have configured all the settings for your Buy 2 Get 1 Free coupon, click on the “Save BOGO Deals” and “Save Cart Conditions” buttons.
Then, publish your coupon to make it available to your customers!
Frequently Asked Questions
What is buy 2 get 1 free pricing strategy?
In this promotional offer, customers receive a third item for free when they buy two items at full price. This enhances the perceived value of your offerings, enticing customers to add more items to their cart.
What does buy 3 get 1 free mean?
“Buy 3 Get 1 Free” is a promotional strategy where customers receive a fourth product for free when they purchase three items at full price. It’s an effective way to boost average order values and move excess inventory in your store.
What does 2 for 1 promo mean?
Also called “Buy One Get One Free” – it’s a type of deal where customers receive two identical items for the price of one. Essentially, they get the second item for free, doubling the perceived value of their purchase.
Conclusion
Creating a Buy Two Get One Free coupon can be a powerful tool to boost your sales and attract more customers to your WooCommerce store. In this article, we walked you through the basics of this promotion and how it can benefit your online store:
With the Advanced Coupons plugin, you can easily set up and customize this type of promotion, offering your customers irresistible deals that will encourage them to make larger purchases. In this article, we shared 5 easy steps to create a Buy 2 Get 1 coupon using this plugin:
- Add a new BOGO deal
- Set the trigger for your coupon
- Specify the free item
- Configure additional settings
- Set up the cart condition
Do you have any questions about this article? Let us know in the comments below!

