
When a customer asks about their store credit, you need to find their balance quickly and see how it got there. The Store Credits Dashboard in Advanced Coupons holds both. This article shows you how to sort and search the customer list, and how to read the credit history log.
Before you start
- Store credits must be enabled in Advanced Coupons.
- Go to Coupons > Manage Store Credits. The screen is titled Store Credits Dashboard and has four tabs: Dashboard, Customers, Automations and Bulk Adjust.
Find and sort a customer balance
- Open the Customers tab.
- Type a name or address into Search by name or email to jump straight to one customer.
- Or click a column heading to sort the whole list. Customer Name, Email and Store Credit Balance are all sortable.
- Click the same heading again to reverse the order.
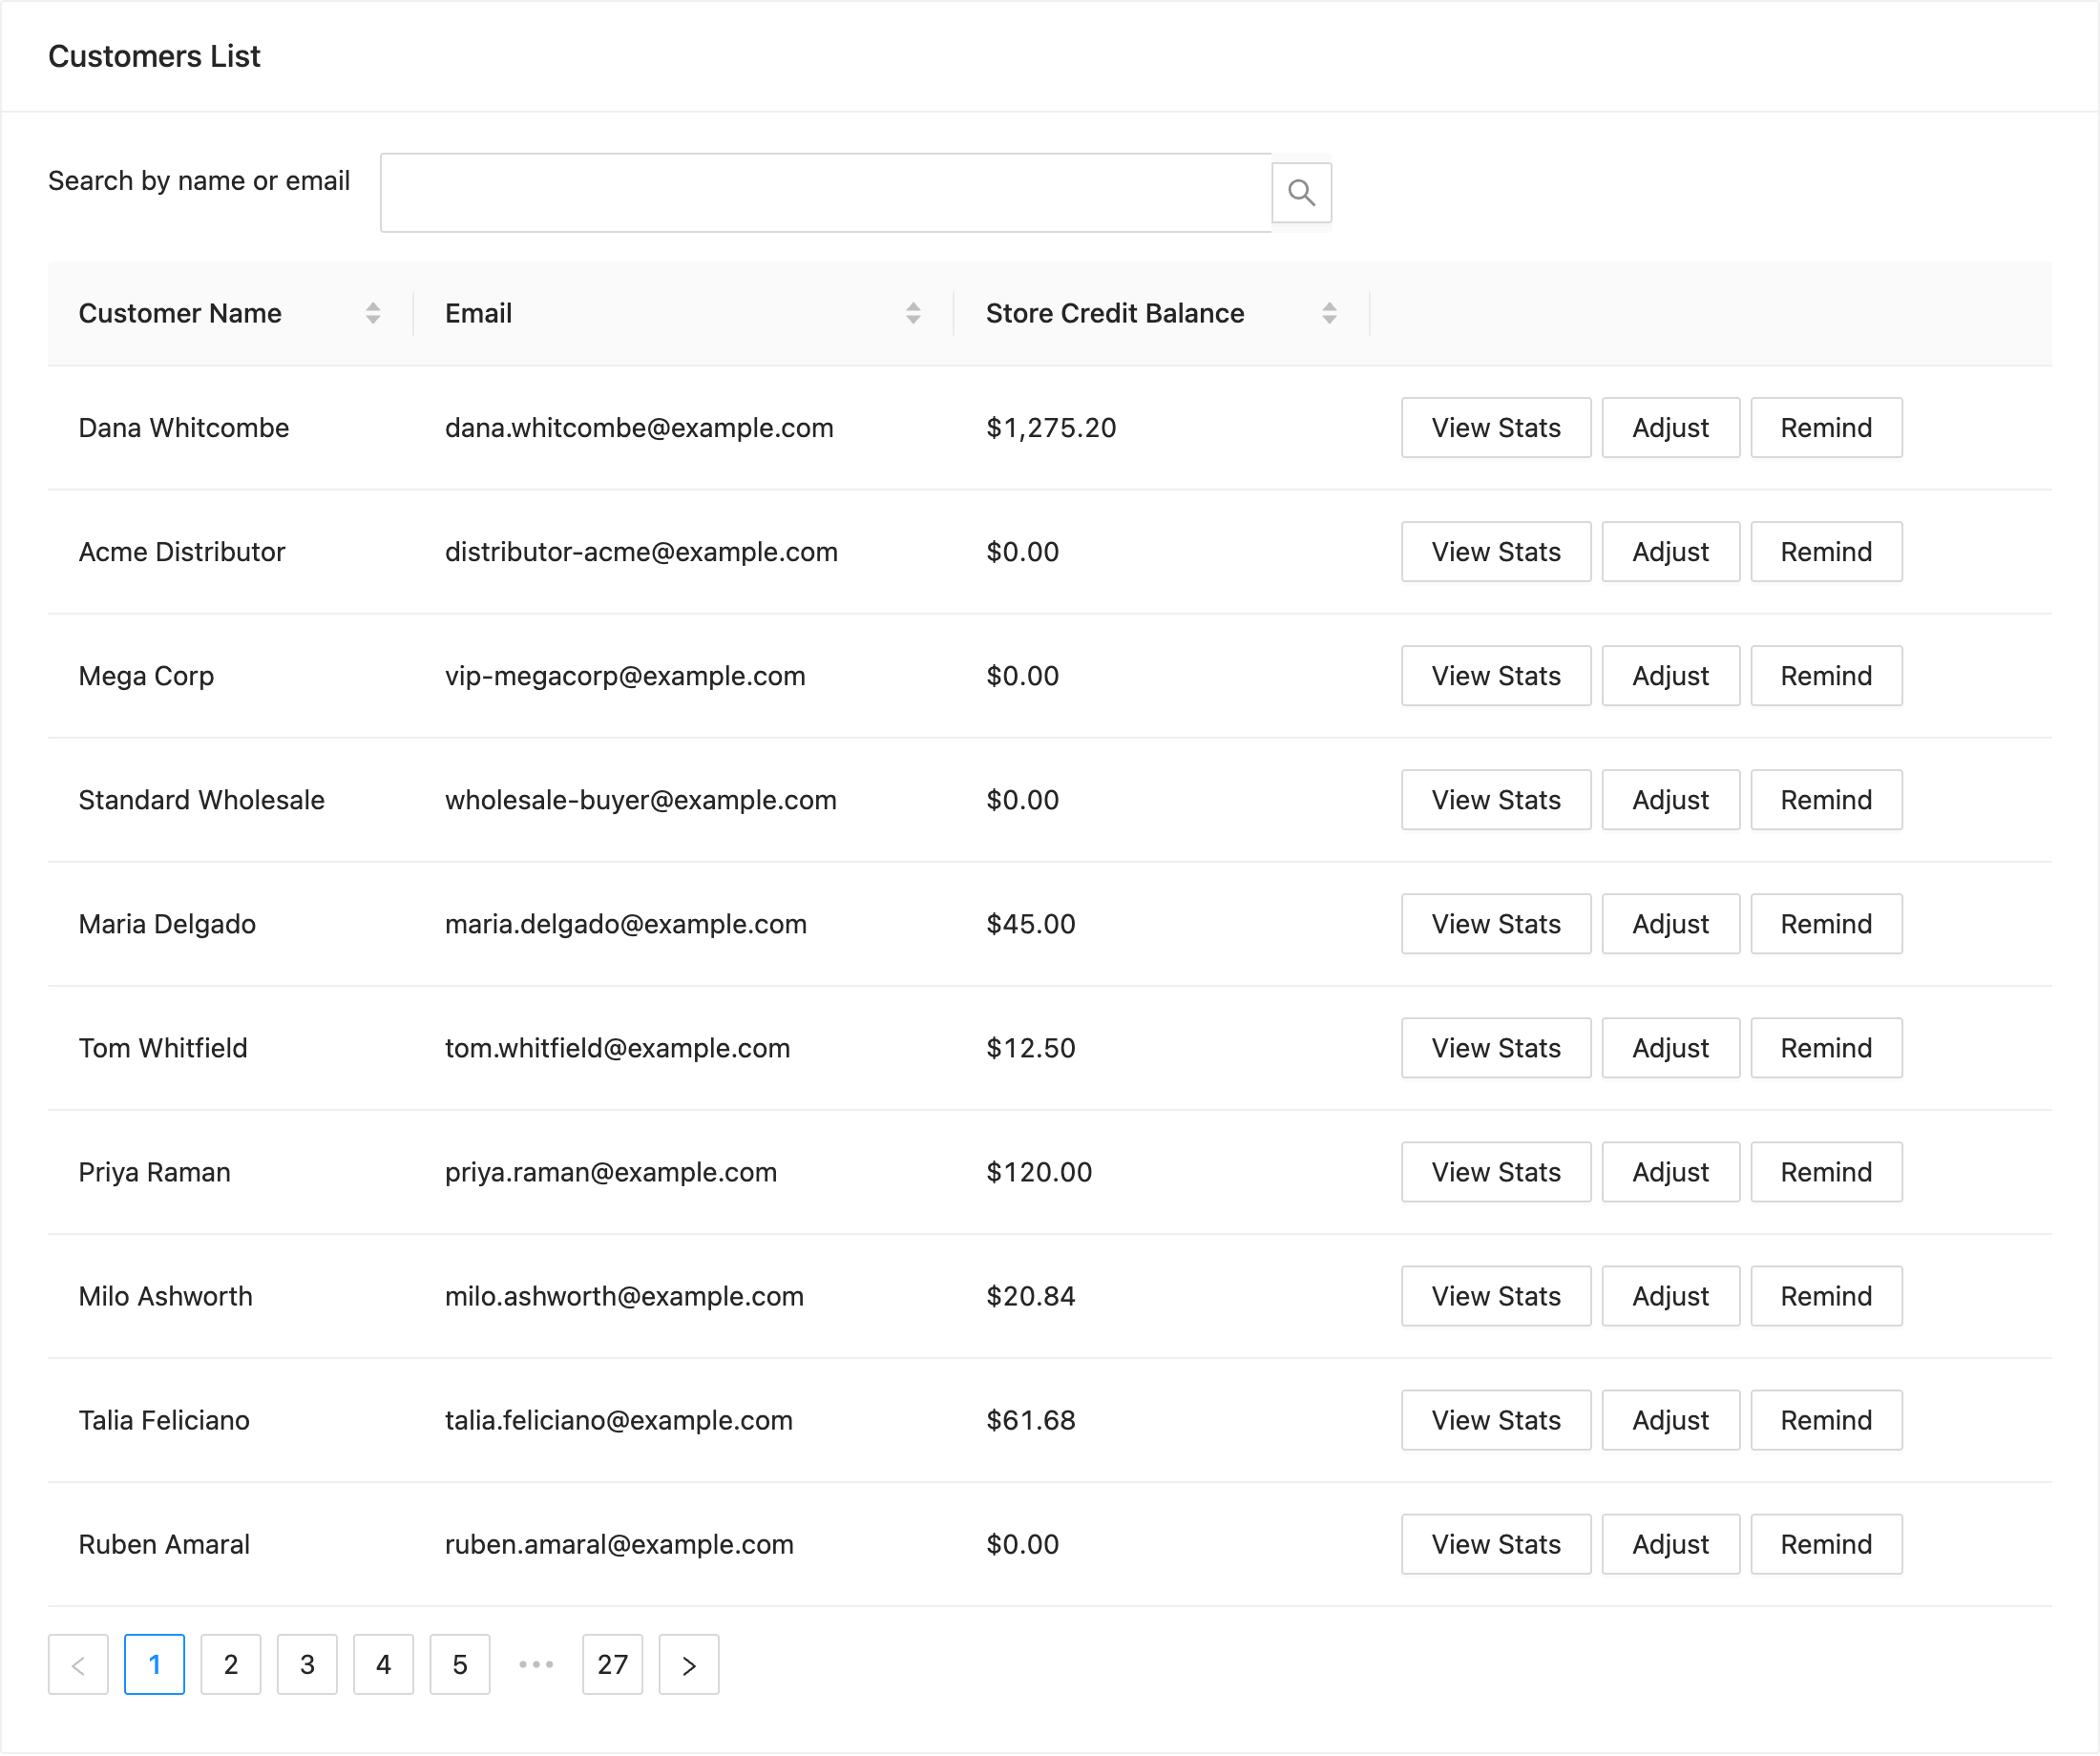
Sorting by Store Credit Balance is the quickest way to see who is holding the most unspent credit, or to find the accounts sitting at zero.
Actions on each row
Each customer row carries its own actions. View Stats opens that customer’s credit figures. Adjust lets you add or remove credit on the account. Remind sends them a reminder email about their balance, and is a premium feature.
Read the store credit history
The Dashboard tab holds the credit log for the whole store, so you can see recent movement without opening a single customer.
- Open the Dashboard tab.
- Set the date range at the top right. It opens on Month to Date, and you can pick your own Start date and End date.
- Read the Store Credit History panel below Store Credits Status.
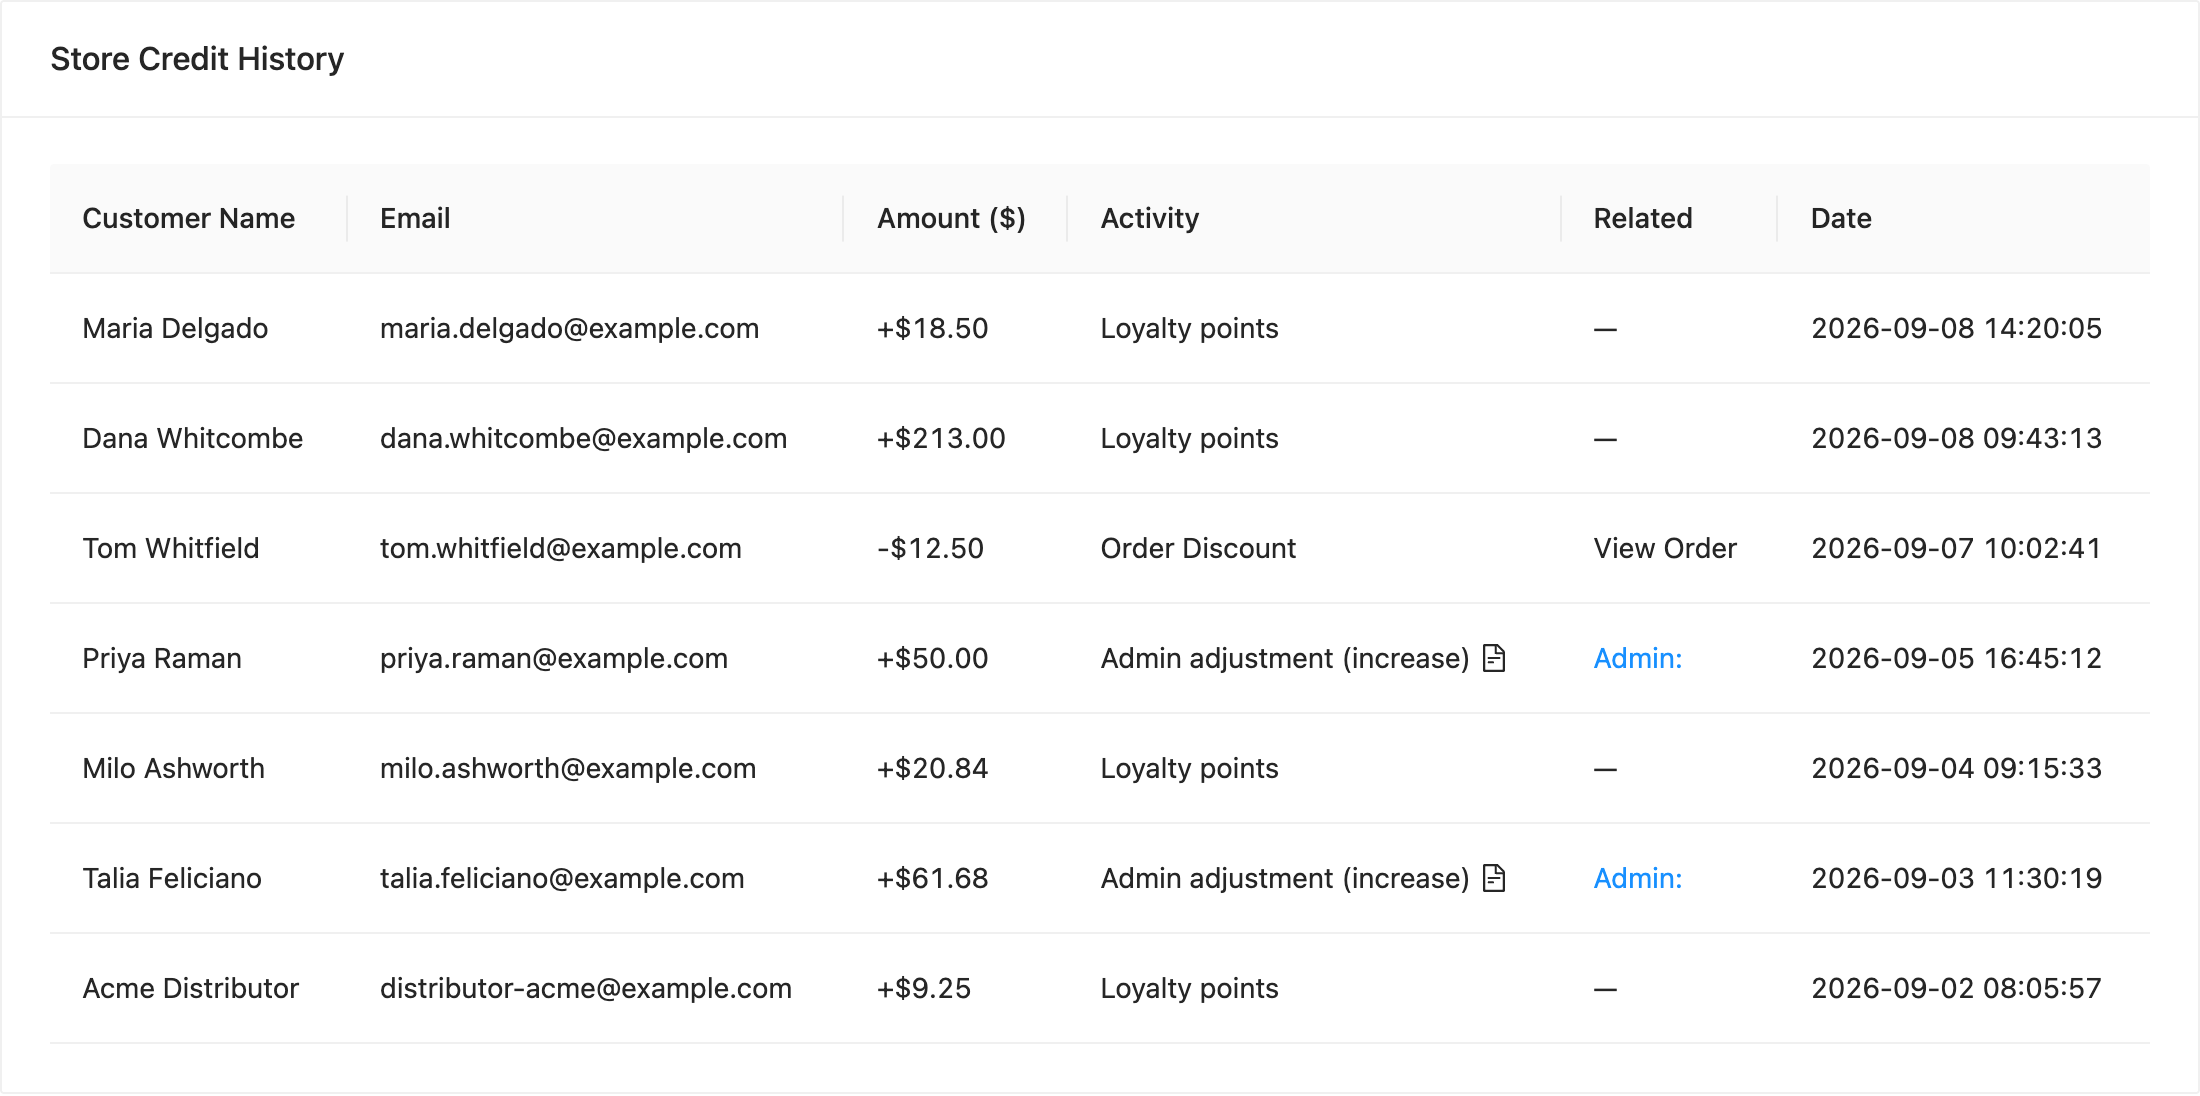
Each row in Store Credit History covers one movement of credit. The columns are Customer Name, Email, Amount ($), Activity, Related and Date.
- Amount ($) carries a plus sign when credit was added and a minus sign when it was spent.
- Activity names the reason, for example Loyalty points, Order Discount, or Admin adjustment (increase).
- Related links to whatever caused the entry. An order-linked row offers View Order, an admin adjustment names the admin who made it, and a row with no source shows a dash.
Store Credits Status
The Store Credits Status panel above the history summarises the same date range. Unclaimed is the credit your customers are holding but have not spent. Added in Period and Used in Period cover credit issued and credit spent inside the dates you picked.
Troubleshooting
The history panel says “No data”. Widen the date range. The panel opens on Month to Date, so early in the month it can be empty even on a busy store.
You cannot find a customer in the list. Use Search by name or email rather than paging through the list. Store credit is held against a registered account, so a guest who checked out will not appear.
A balance looks wrong. Open the Dashboard tab and read that customer’s rows in Store Credit History. Every change is logged there with its reason, so the log shows you what moved the balance.
The Remind button does nothing you expect. Remind sends a reminder email and needs the premium plugin. Check the reminder email is enabled under WooCommerce > Settings > Emails, where it is listed as Advanced Coupons – store credit reminder.
Need help?
If you have a question or run into any issues, we’re here to help.
- Premium users: Open a support ticket
- Free users: Visit our community forum