
This tutorial will show you how to schedule a coupon in WooCommerce with a start and end date.
Technically you can only do start date scheduling in WooCommerce BUT this post will show you a tool that will let you schedule the end date as well!
Not only that you will be able to show a special message to people that are using it too early or too late.
Having a schedule on the coupon that you are using for a sale promotion on your WooCommerce store is essential to prevent misuse.
You don’t want people using your coupon ahead of time if they happen to guess the right code? And you don’t want people using the coupon after the promotion is finished, right?
That’s where this method comes in handy.
Video Tutorial: How To Schedule A Coupon In WooCommerce
Check out the video above for a full video tutorial of how to schedule a coupon in WooCommerce with Advanced Coupons extension.
Here are the steps:
Step 1 – Setting Start Date (The Old Way)
As I hinted above, there is actually a way to set the start date in WooCommerce without having Advanced Coupons installed.
WooCommerce coupons, when it comes down to it, are just a new post type in WordPress. And because of that they also inherit the post scheduling capabilities that blog posts have.
You can set the scheduled publish date of a coupon and effectively, that is like setting a “start date” for the coupon.
The only downside is that if someone tries to use it, they get a message saying the coupon doesn’t exist which might lead to confusion.
But never fear, you can solve that problem with Advanced Coupons too.
Step 2 – Setting Start Date Of A Coupon & A Nice Message
The tools inside Advanced Coupons (which is a WooCommerce plugin that adds extra coupon features) give you a bit of extra control around this whole process.
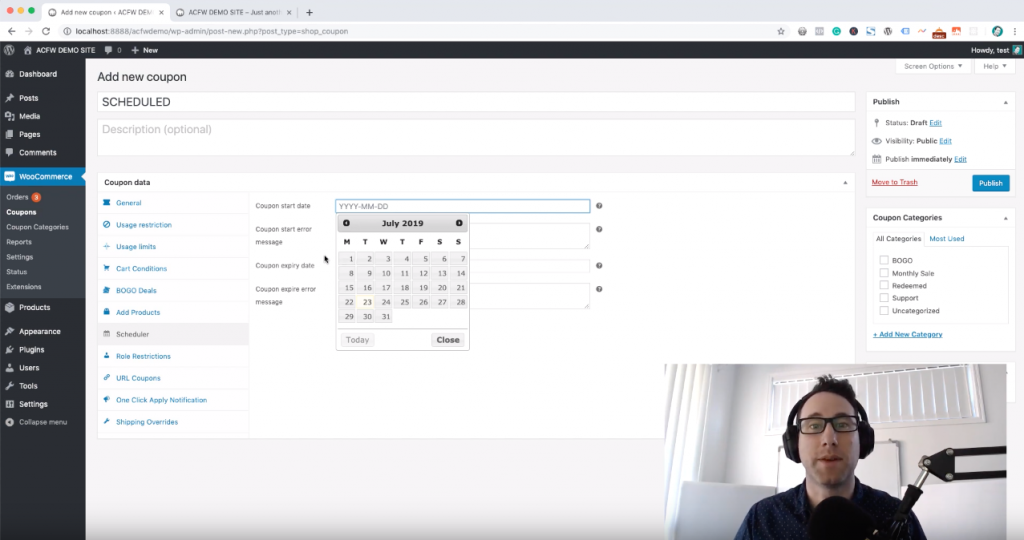
Once installed, edit your coupon and click on the Scheduler tab on your coupon edit screen. You’ll see four boxes, the first two are related to setting the start date of your coupon.
The first box lets you select the date it should become available to customers.
The second box lets you define a custom message that will show to users that try to use the coupon before it’s ready.
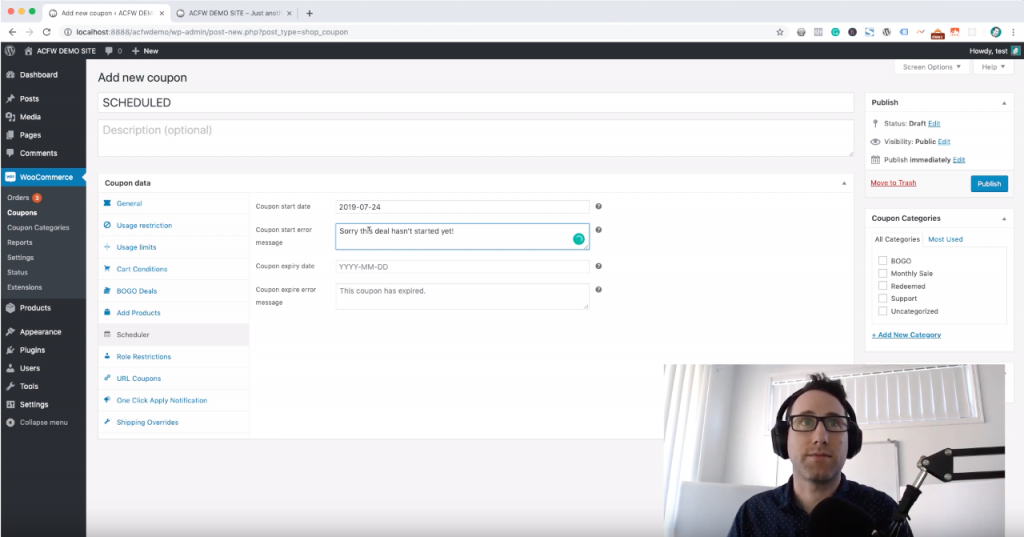
That’s a lot nicer than the confusing “Coupon doesn’t exist!” that WooCommerce core spits out when doing it the old way.
Here’s what it looks like on the front end when you test it:
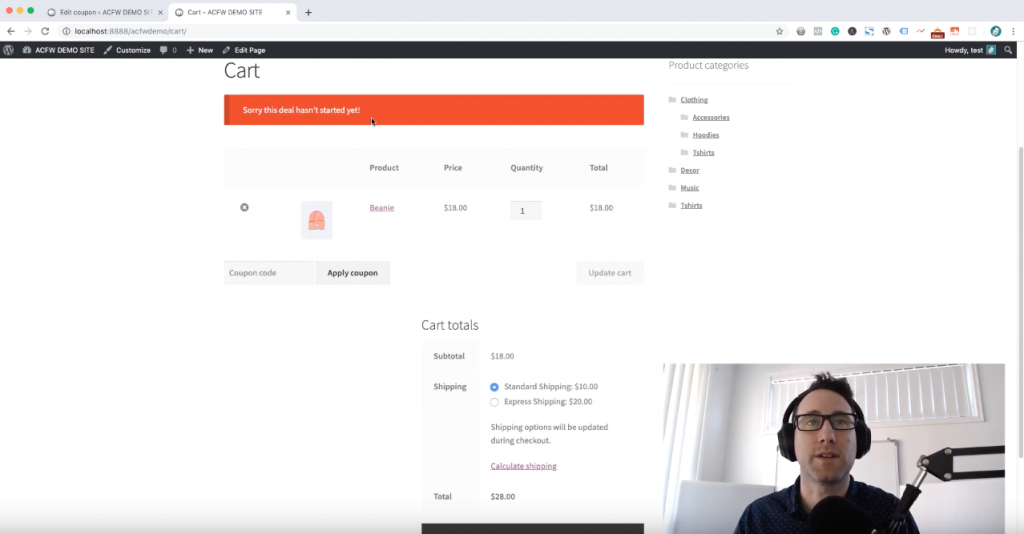
Step 3 – Setting End/Expiry Date Of A Coupon & A Nice Message
Editing the end date is quite similar. You have two boxes, the first of which defined the actual date it should expire. The second box defines the nice message it should show to customers if they try to use the coupon after it has finished.
You can put whatever you like in this box and it will convert it into a WooCommerce notice. In this way, if you know a little HTML you can even give a link off to a current coupons page or special deals page.
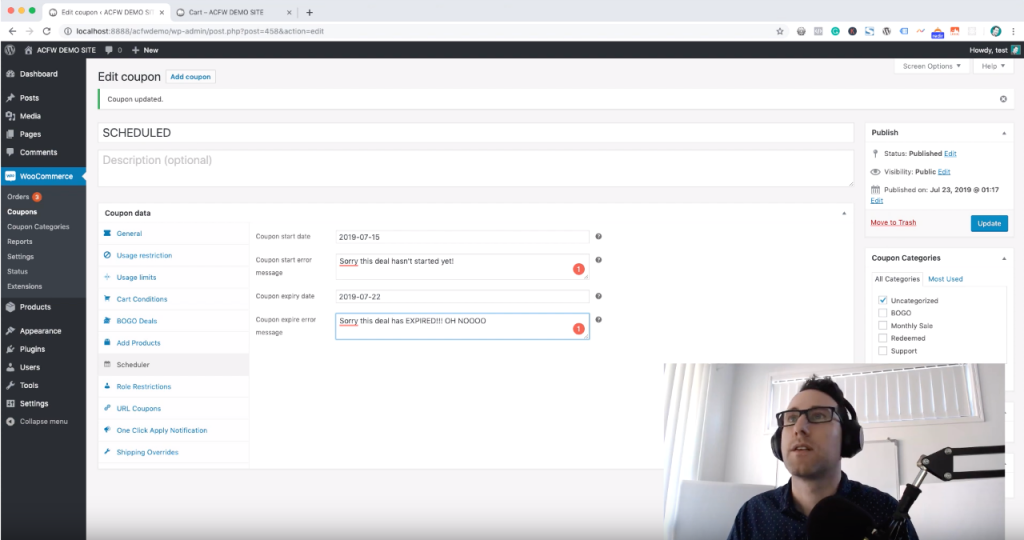
And here is how the message will look when you test it on the front end.
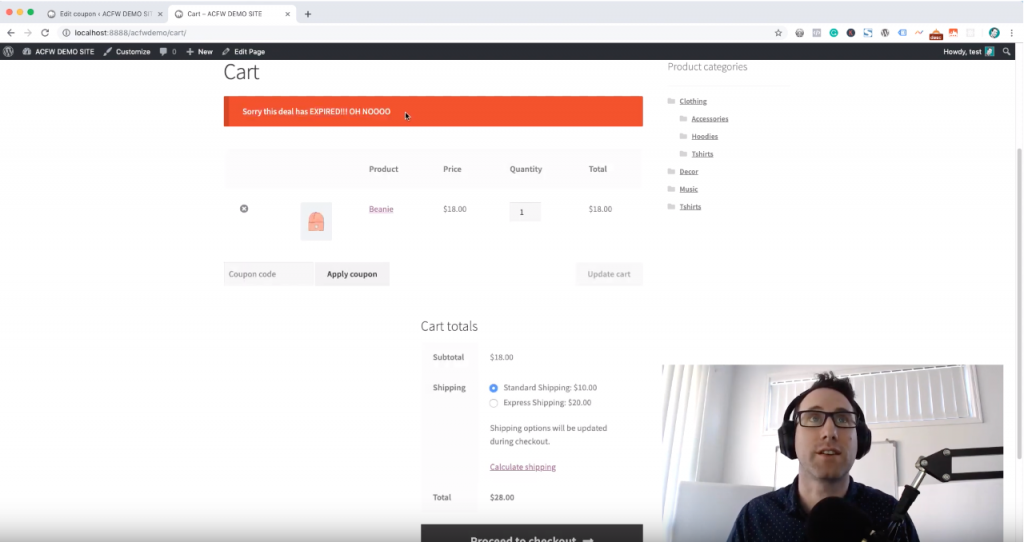
Again, the great thing about is this that you can provide a message to customers that actually makes sense. This is about improving that customer experience and making them feel the love.


