If you’re eager to boost your store’s growth through some savvy marketing moves, consider creating your very own Loyalty Program. Luckily, this article will guide you step by step on how to establish a WooCommerce loyalty program tailored to your store’s needs.
We’re going to cover a few things:
- The points value settings to set up at the outset of your loyalty program
- How to configure the messages shown on the single product, cart and checkout pages
- The earning actions your customers can do that will earn them points
Additionally, if you prefer, you can watch this tutorial here:
The Loyalty Program For WooCommerce Plugin
In this tutorial, we’ll be using The Loyalty Program for WooCommerce, a premium plugin designed for creating Loyalty Programs in WooCommerce stores.
To explore all its features and get details about pricing for this plugin, you can find more information here. However, our focus today will be solely on using the Loyalty Program for WooCommerce plugin, even though it offers much more functionality beyond this.
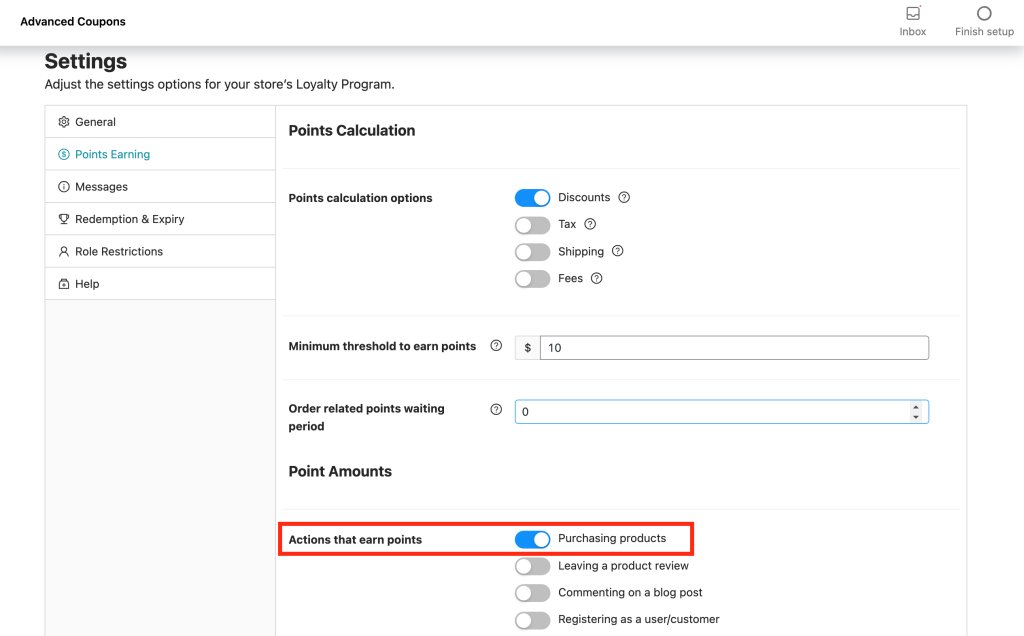
Once you install the plugin, it activates automatically. Subsequently, if you navigate to the settings section at Coupons ➝ Loyalty Program ➝ Settings ➝ Points Earning, you will notice that “Purchasing products” is already enabled as the default setting.
Determining The “Value” Of A Point In Your Loyalty Program
Next, you must establish two crucial settings that will define the “value” of a point in your WooCommerce store’s loyalty program.
When you think about it, a loyalty program is like the promise of a discount on a future order. It’s not a real currency. What they’re buying into is the intangible value of a future discount.
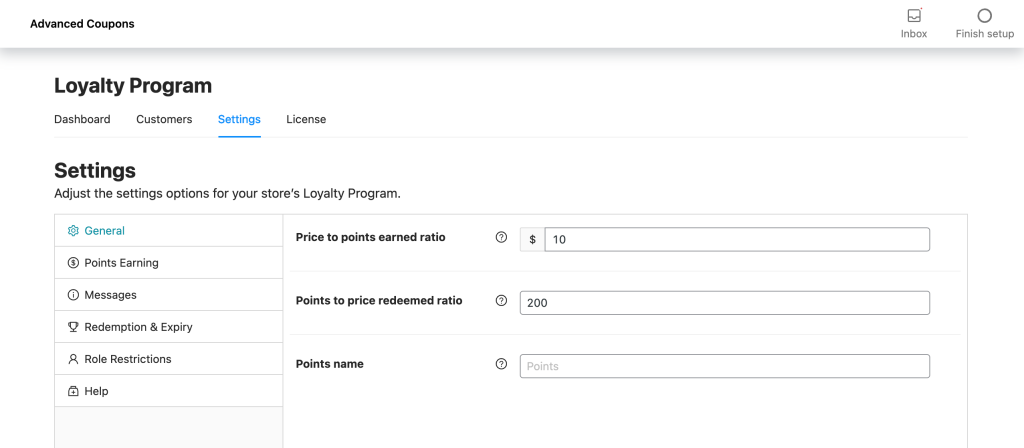
Price to points earned ratio
The first setting involves determining the ratio between the price and points earned. So, in simpler terms, it dictates how many points a customer earns for each unit of currency spent (e.g., how many points they receive for every $1).
You should configure this setting to make it appear enticing. For instance, if you set the price to points earned ratio at 1, customers will earn 1 point for every $1 they spend (or the equivalent in your currency, such as 1 euro or 1 pound).
However, if you set it to 10, customers will earn 10 points for every $1 spent.
This latter option may appear more appealing to customers, consequently influencing their “perceived value” of a point. Earning 1000 points for a $100 order is more enticing than earning just 100 points for the same purchase.
Points to price redeemed ratio
Secondly, consider the points-to-price redeemed ratio, which essentially instructs the system about the “value” of a point.
In this setting, you’re specifying how many points are required to exchange for 1 unit of currency.
In the screenshot provided above, I’ve set it to 200, indicating that to receive a $1 discount, you’ll need to redeem 200 points. Yes, it involves some calculations, but the temporary effort of figuring this out is worthwhile for creating a well-configured loyalty program.
Math Alert!
Here’s how you work out the future discount based on the program:
Future discount (as %) = ( ( ( 1 / points to price redeemed ratio ) * price to points earned ratio ) * 100 )
Points name
Finally, this setting allows you to choose the name for your points in your points program. You do this for display purposes to make the points sound familiar to your customers.
You can name them as you wish – get creative with options like “Baby Rewards”, “Bone-us Doggie Points”, and many more!
Role Restrictions
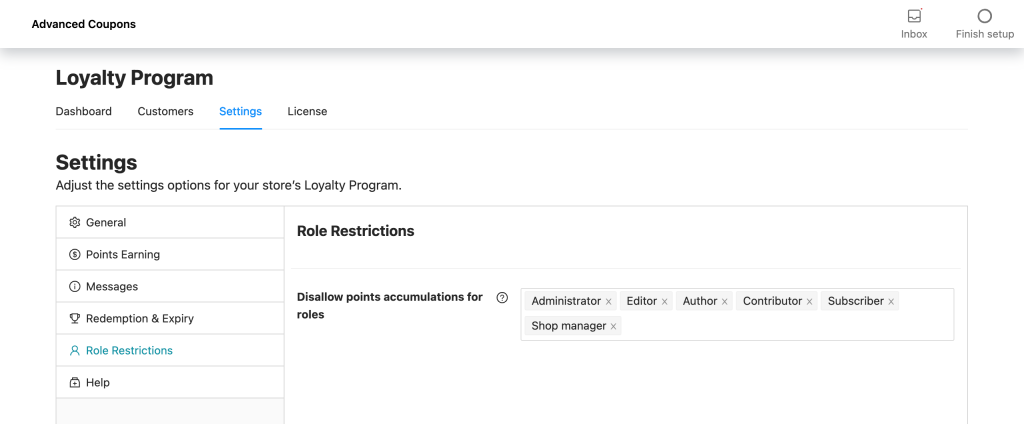
Here, you can use the setting to restrict specific user roles from participating in the loyalty program:
Then, if you add a role here and the user logs in, they will not see anything in their My Accounts area or any of the messages throughout the site. It will be impossible for them to accumulate points.
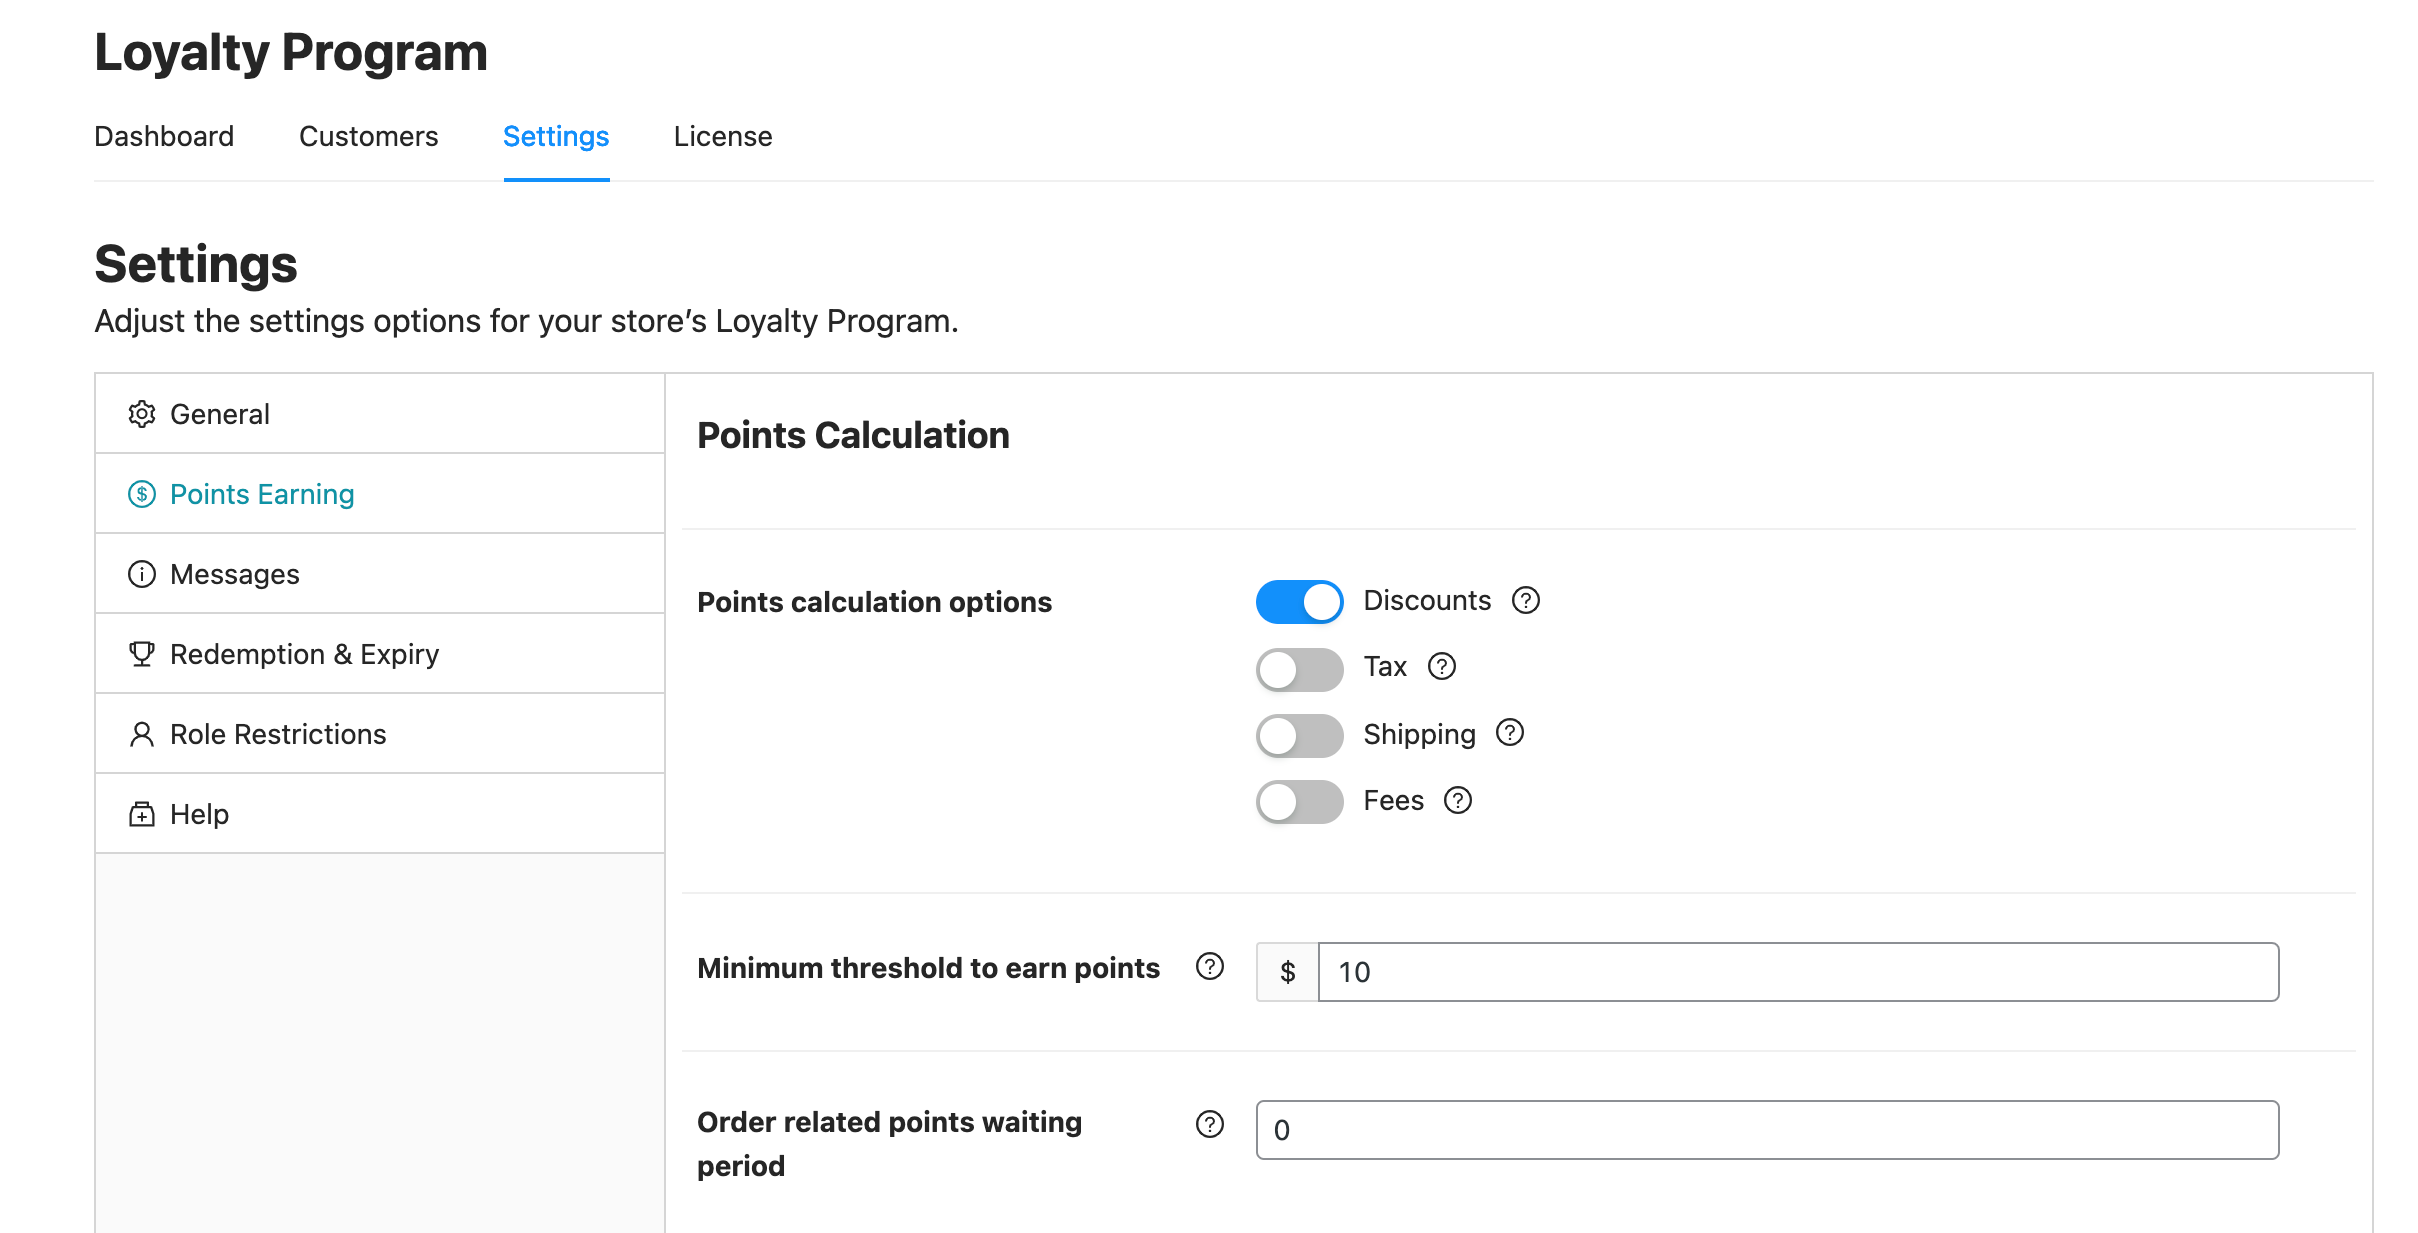
Points Calculation
There are three settings for setting points calculation in your loyalty program:
Points calculation options
First, you can choose whether to calculate the points, including the coupon discount, tax, shipping, and fee amount, or exclude them.
Minimum threshold to earn points
On the other hand, the minimum threshold determines the subtotal at which customers can accumulate points for their order.
If their order subtotal exceeds this threshold, they will receive points for the entire order subtotal.
It’s crucial to grant points for the entire subtotal as this threshold serves as an incentive for customers to increase their order value to at least the minimum. I recommend calculating your average order value and setting the threshold just at or slightly above that value.
Order related points waiting period
And lastly, in this setting, you can specify the number of days within which order-related points can be redeemed by customers.
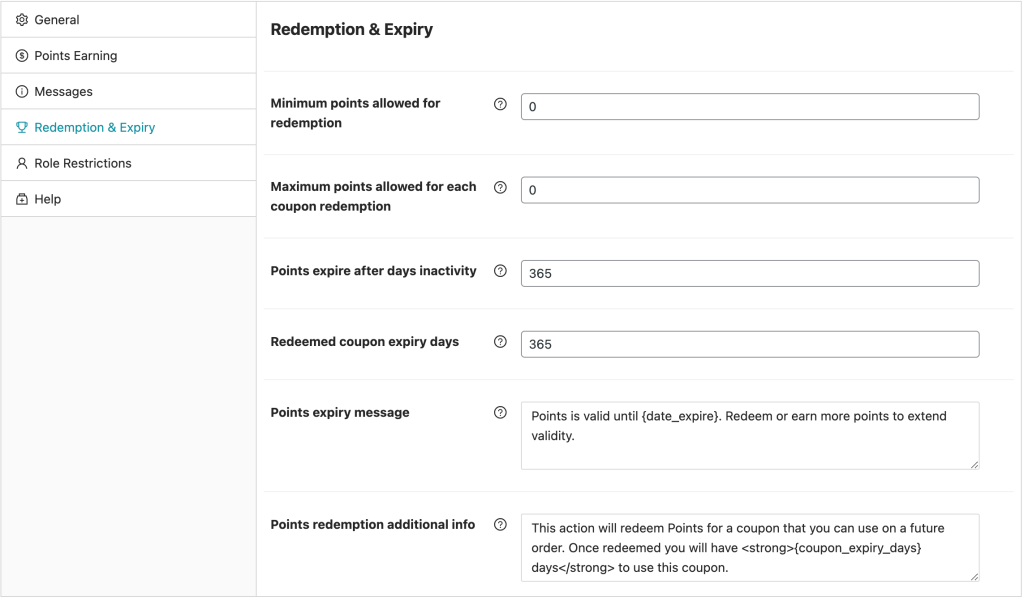
Redemption and Expiry
Additionally, you can also set how the customers can redeem the points and when it will expire.
Minimum points allowed for redemption
It’s all about the minimum points they need to redeem for store credit.
In your loyalty program, customers exchange points for store credit, which they can apply to another order. This threshold, then, ensures they must accumulate a minimum number of points before redeeming store credit.
Maximum points allowed for redemption
Moreover, you also can set the maximum points customers can redeem at once for store credit. This acts as a safety measure to prevent excessive point redemption.
Points expire after days inactivity
You can specify the number of days before points expire due to inactivity. Once points expire, customers cannot redeem them anymore.
This information will be displayed on the My Points page in their My Accounts area.
Note, however, that store credits do not expire. So, once points are redeemed, customers can use them whenever they choose.
Editing The Messages Shown Throughout Your Store
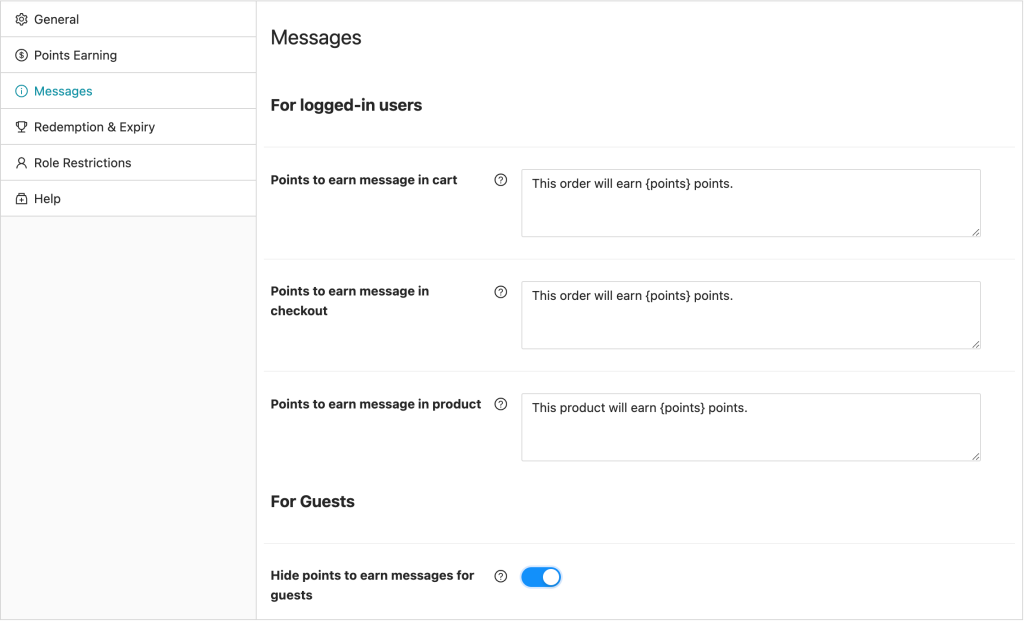
Another excellent feature would be points messaging system in WooCommerce Loyalty Program plugin. In this section, there are three main places that messages about points are shown to customers:
You can control the message that is shown here easily; additionally, there is a template tag called {points} which gets substituted for the actual points value on display. Similarly, it also has the option to let you hide these messages for guests.
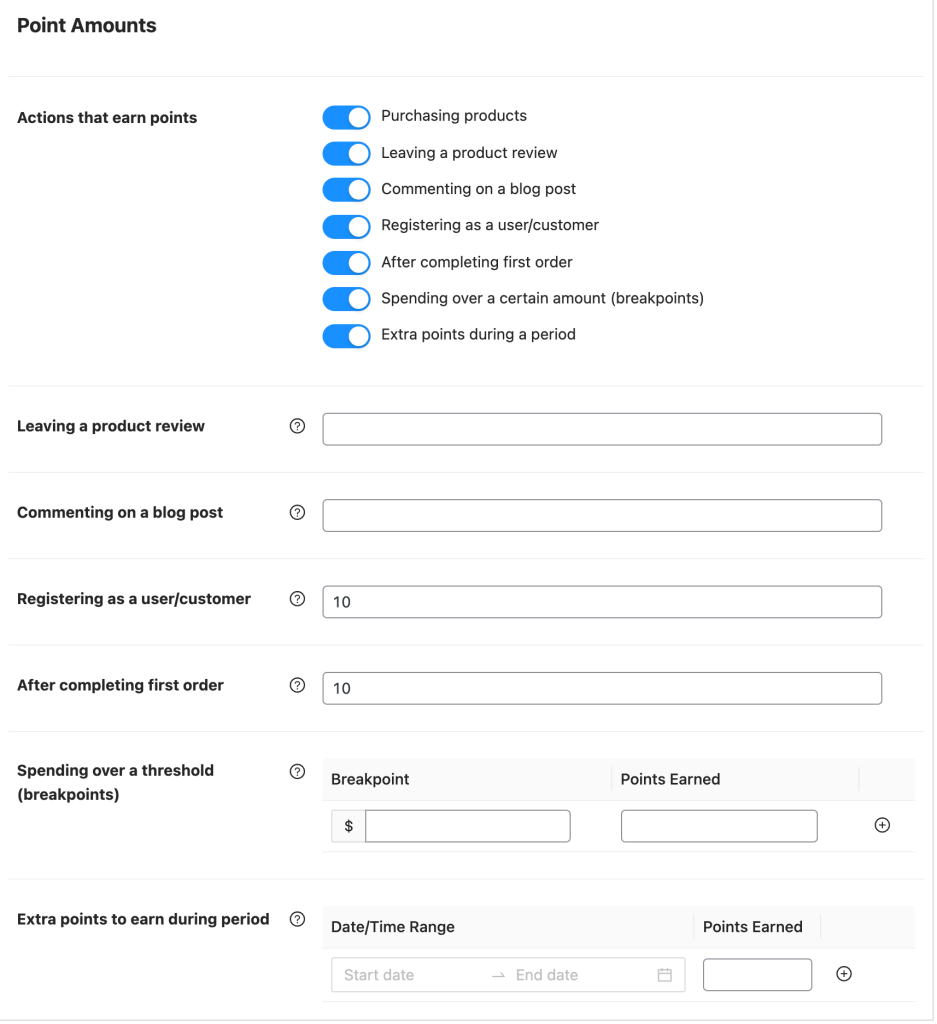
Earning Actions
Lastly, you can also control the earning actions and even give bonus points for non-purchase event activities such as when a customer registers for an account or when a customer makes their first order.
My Points Area
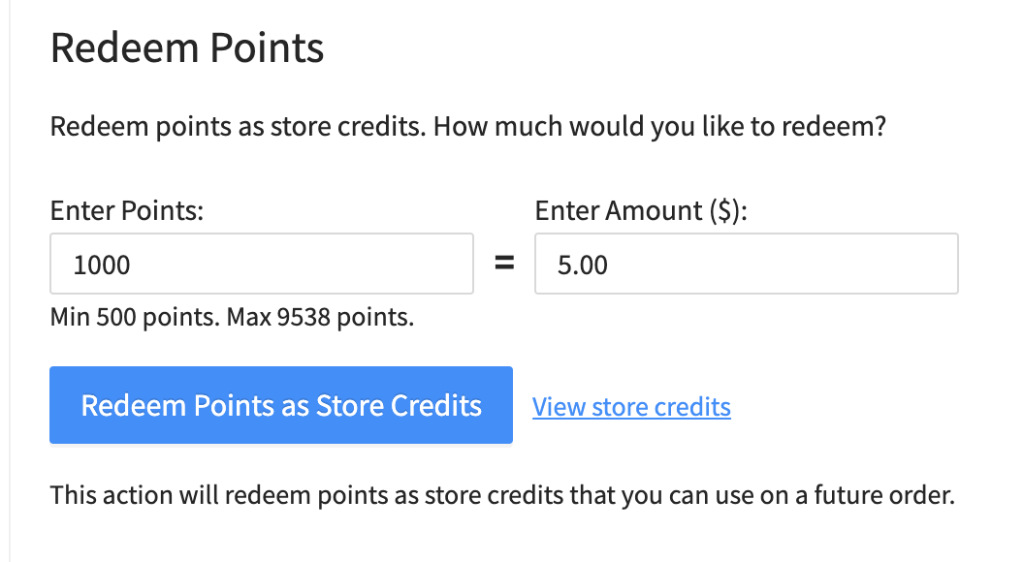
Furthermore, as a customer, when you view your My Account area, there will be a new page called My Points. This, then, features three sections: Points Balance, Points History, and Redeem Points.
Finally, the My Points page also gives customers vital information about the program such as how much 1 point is worth and what the minimum and maximum is points are for redemption.
Get Started
To initiate a loyalty program for your store, you’ll first need the Loyalty Program for WooCommerce plugin. This plugin can work wonders for your store’s growth. In this article, we have highlighted some of the key features of this plugin that you shouldn’t overlook:
- Points ratios
- Role restrictions
- Points calculation
- Redemption and Expiry
- Points messaging
- Earning actions
- My Points Area
Click here to get the Loyalty Program plugin as well as see a full rundown of features available.




depuis la dernière version, la page mypoint ne fonctionne plus impossible pour le client de consulter ses points ou de les échangés. La page se retrouve en erreur. avez vous une solution ?
Hi Nathan, please get in touch with our support team. Also if you previously were using the Loyalty Program as a module of Advanced Coupons Premium, please switch over to using the Loyalty Program plugin instead (check your account).
Hello,
I have downloaded the loyalty program plugin and did setups following the instructions above but during the tests I identified an issue with “Product review” points. The customer is not getting points after reviewing products based on setups added. Do you know who can help me to solve it?
Thanks a lot
Hi Karina,
Can you please send through a support ticket? Thanks!