A Buy One Get One (BOGO) or 2-for-1 deal is one of the most popular discounts retailers provide. However, using this type of offer strategically on your WooCommerce site is a delicate process.
Fortunately, our Advanced Coupons plugin can help you limit your BOGO deal to a specific WooCommerce product category. This may enable you to avoid over-discounting and other pitfalls some online retailers encounter.
In this post, we’ll review what 2-for-1 deals are, why they’re useful, and why you might want to offer them for a particular product category. Then we’ll walk you through how to do so. Let’s go!
Understanding Category-Specific 2-for-1 Deals
A 2-for-1 deal is a discount that permits customers to ‘purchase’ one item for free when they buy another item of the same type. This is also sometimes called a Buy One Get One (BOGO) deal.
Giving away merchandise may not seem productive, but it can be useful to retailers. People love to think they’re getting something for free, so these types of offers often draw customers in and lead them to make purchases they otherwise wouldn’t.
Plus, a 2-for-1 deal can help you clear out products you no longer want to stock for some reason. Perhaps you’re discontinuing a certain item or accidentally overstocked it.
The only real drawback to holding a 2-for-1 sale is that if you aren’t strategic when selecting which products to include, you may end up over-discounting. This happens when an offer ends up costing you more money than it helps you make.
One way WooCommerce sites can avoid this is by offering category-specific 2-for-1 deals since limits on your sales can minimize over-discounting. Zeroing in on a certain category can also help you focus your deal on overstocked items.
Another strategy you could use is to create a new category specifically for 2-for-1 items. This can prevent you from accidentally offering your deal on products you don’t want to discount since you will have to manually add them to the category.
How To Give A 2-for-1 Deal For A Particular Category In WooCommerce (In 5 Steps)
Although WooCommerce includes native coupon functionality, it’s not well suited to more complex offers. Fortunately, we created Advanced Coupons to fill in the gaps.
The steps below will show you how to create a 2-for-1 deal for a particular WooCommerce category. We’ll assume you already have an active e-commerce site and that you’ve installed and activated Advanced Coupons.
Step 1: Create a new BOGO deal
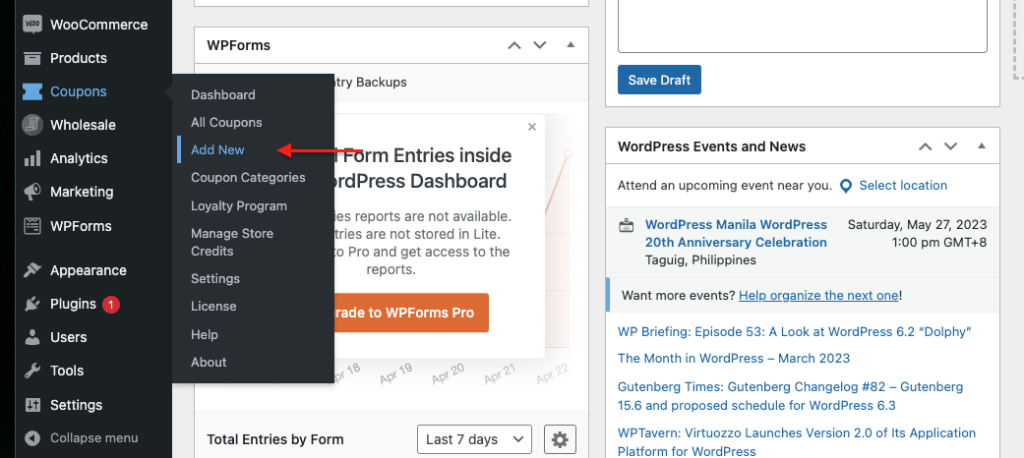
First, navigate to WooCommerce > Coupons in your dashboard:
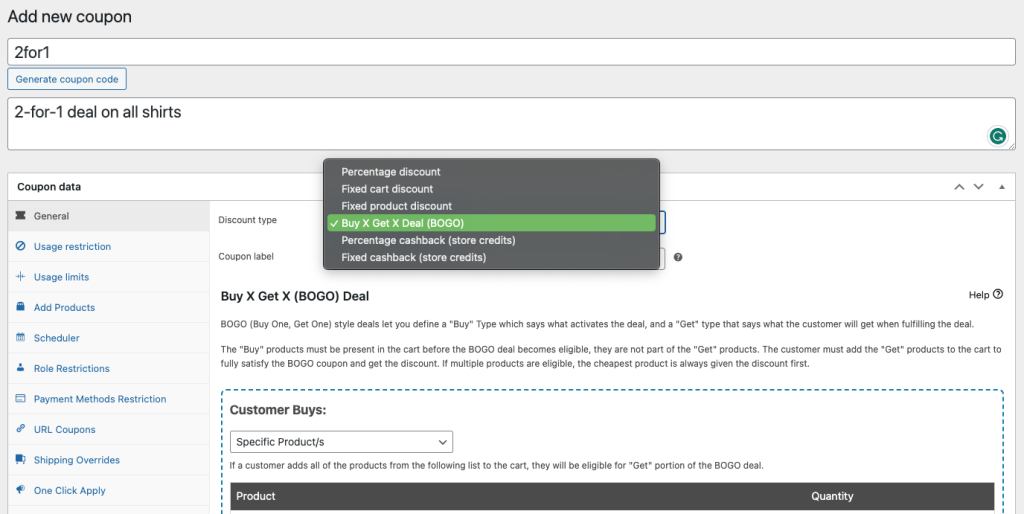
Then, click on the Add coupon button. Create a coupon code for customers to enter at checkout and a description for your own reference. Then scroll down and click on the General tab then choose the Buy X Get X Deal (BOGO) discount type:
Here you’ll start building your offer.
Step 2: Establish a coupon trigger
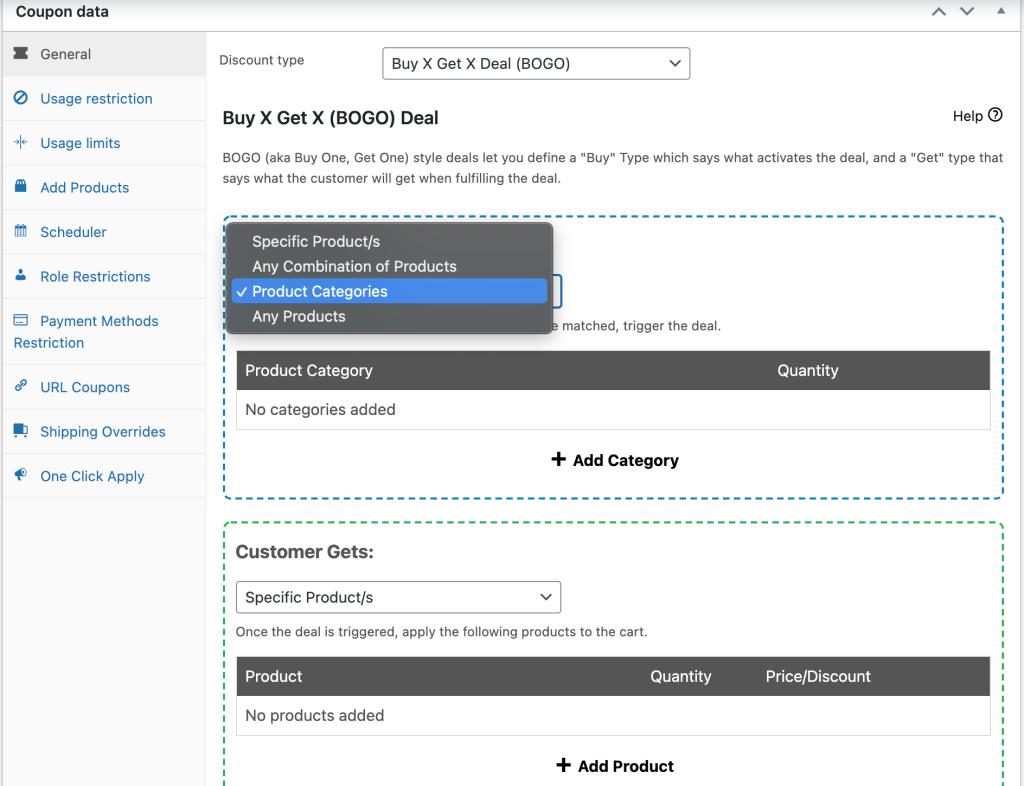
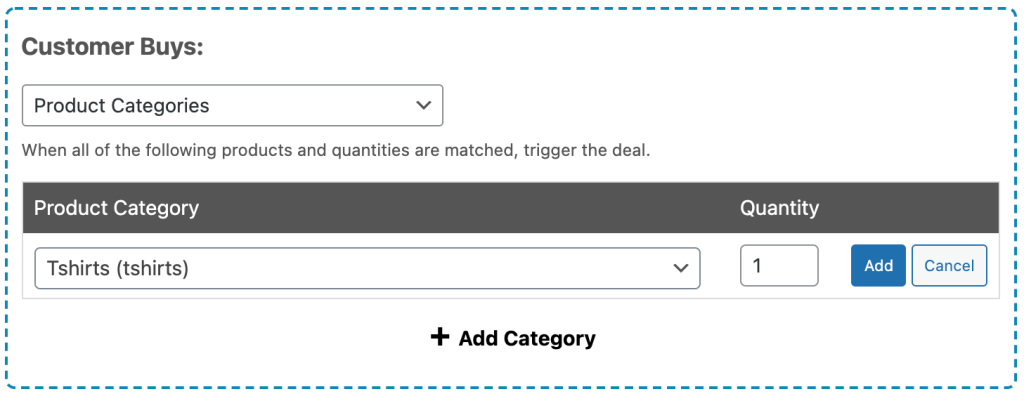
Every BOGO deal needs a ‘trigger’, which defines the circumstances under which a customer qualifies for the offer. In this case, we want to set the Customer Buys to Product Categories:
Then we need to select the specific category we want to apply the discount to. For our example, we’re using shirts. Click on Add Category, select the one you want to use, and set the Quantity to 1:
Then click on the Add button.
Step 3: Select your discount type
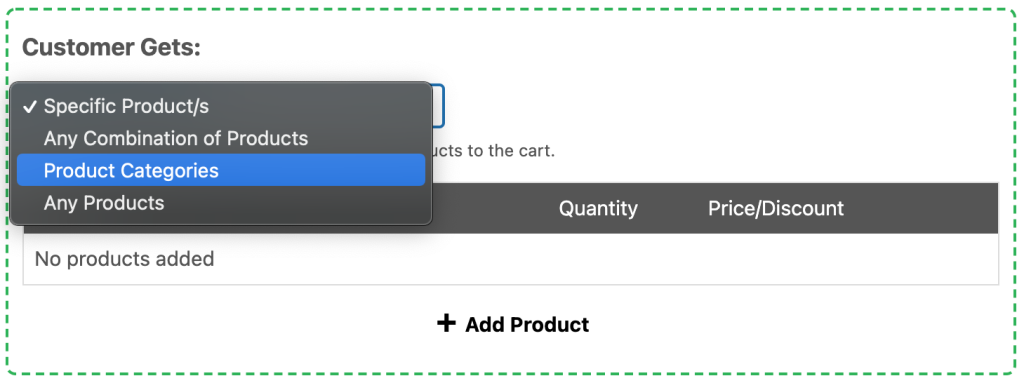
Next, you need to define your discount type, which determines what the customer gets when they meet the requirements of the trigger (in our example, adding one product from the t-shirt category to their cart). Use the Discount Type dropdown to select Product Categories:
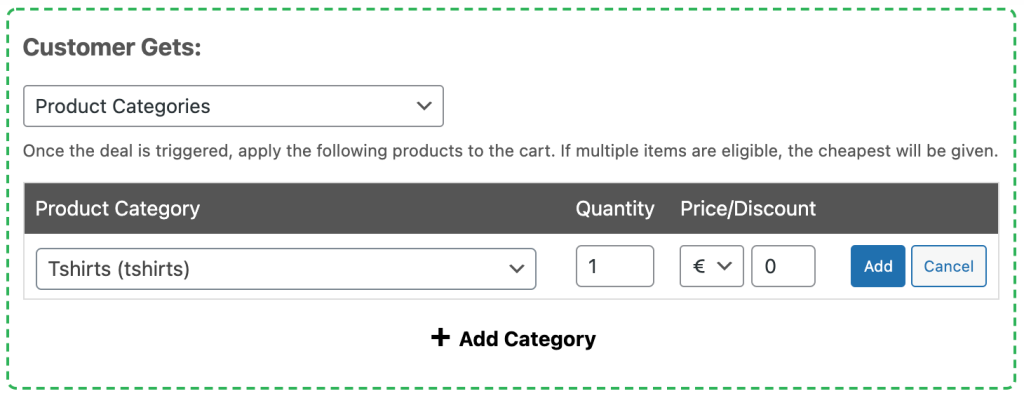
Then add the same category you chose in Step 2. The Quantity should remain at 1. The easiest way to set the Price/Discount options is to select Override Price and set the amount to 0.
Then click on the Add button:
To break down everything we’ve done in our example so far, we’ve set a trigger so customers qualify for our 2-for-1 deal when they add at least one product from the t-shirt category to their carts. When they do, they’ll receive another item from the t-shirt category at the price of $0.
Step 4: Set your discount frequency and notifications
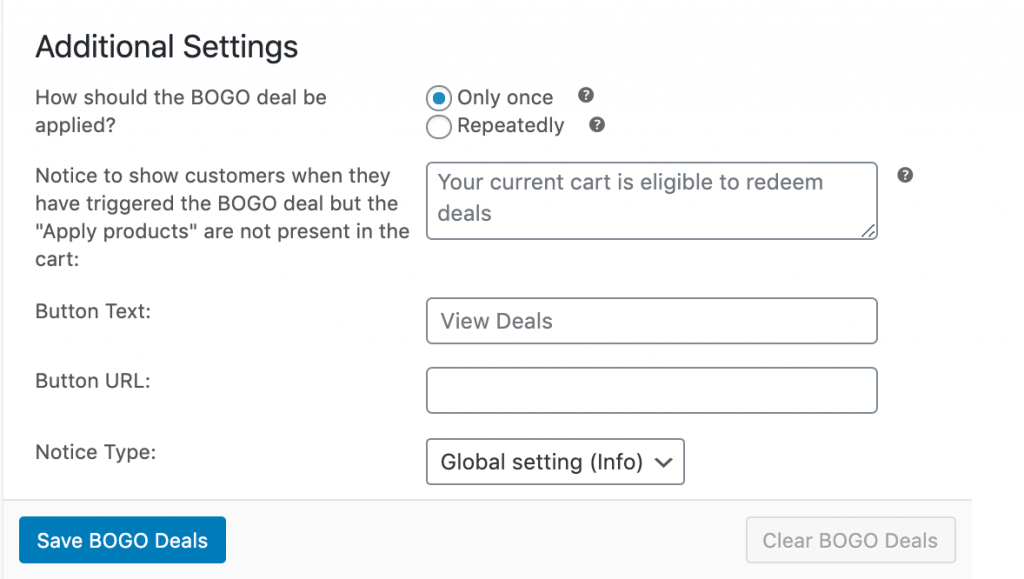
Once you set your trigger and discount, scroll down to the Additional Settings section. Here, select whether your 2-for-1 deal will repeat:
If you enable this option, customers will continue to receive an additional free item every time they meet your trigger. So, for our example, customers who buy two shirts will get two more for free, those who buy three shirts will get three for free, and so on. This is an excellent way to move overstocked merchandise.
You can also write a custom message to display when customers activate your trigger and personalize the button they can click on to see more details. Save your BOGO deal when you’re done.
Step 5: Add your cart conditions
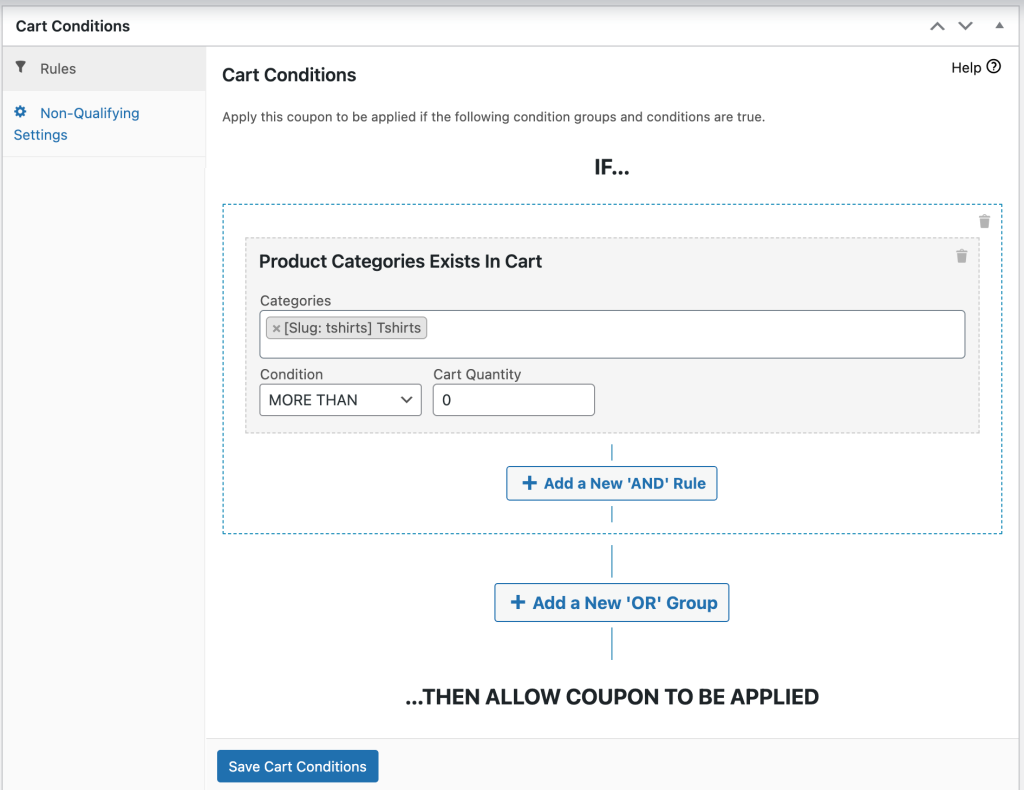
There’s just one more thing you need to do before launching your 2-for1 deal. The cart conditions section at the bottom of the screen should match the trigger you created earlier.
For us, that means adding just one condition:
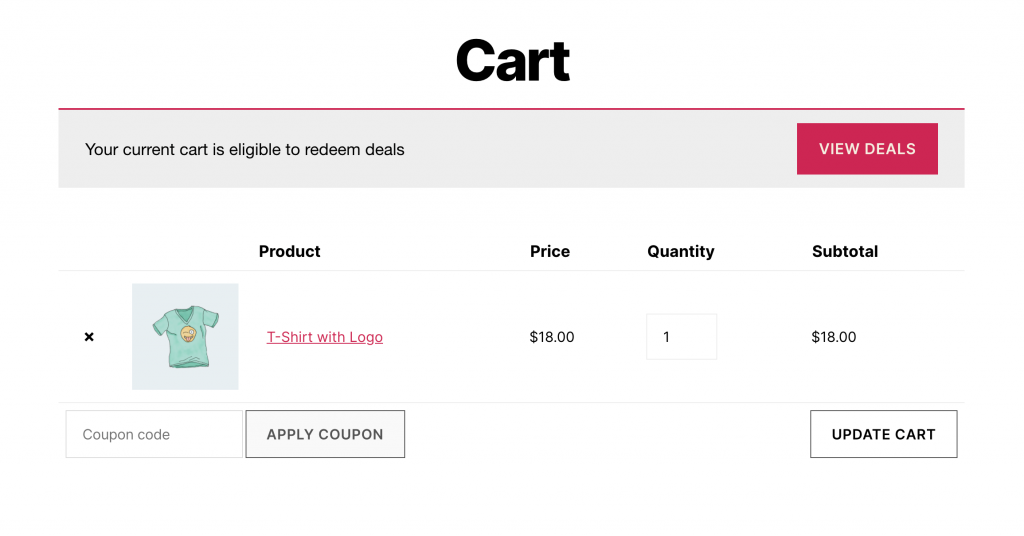
A product from the t-shirt category must be in the customer’s cart. If that condition is met and the customer has entered the coupon code you created in Step 1, they’ll see a notification informing them they’ve qualified for the deal:
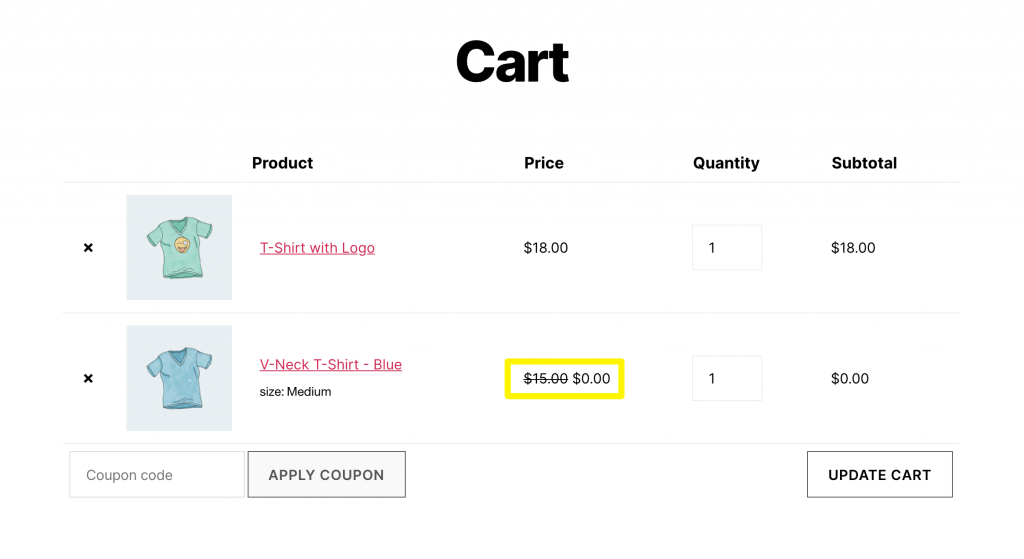
They can then add a second t-shirt to their cart and the discount will be applied:
You can also modify your 2-for-1 deal to automatically apply the discount and notify qualifying customers, even if they don’t have your coupon code.
Conclusion
Regardless of your e-commerce site’s specialty, offering an occasional 2-for-1 deal can be a smart strategy for driving sales. It can also help you offload products in certain categories if you’ve overstocked them or discontinued some items.
In this post, we explained how to use Advanced Coupons to create a 2-for-1 deal for a product category in WooCommerce:
- Create a new BOGO deal.
- Establish a coupon trigger.
- Select your discount type.
- Set your discount frequency and notifications.
- Add your cart conditions.
Do you have any questions about how to add a 2-for-1 deal in WooCommerce? Leave them for us in the comments section below!




I am wondering if I can have multiple deals on a BOGO coupon. What I want to do is to give customers a free item (only one) from either of two categories I’ve chosen and then give a 15% discount on another category. Can I limit to just one of those conditions but use the same coupon code?
Basically, I don’t want people to use the deal and get 2 products for free and 15% discount on another one – just one of those only.