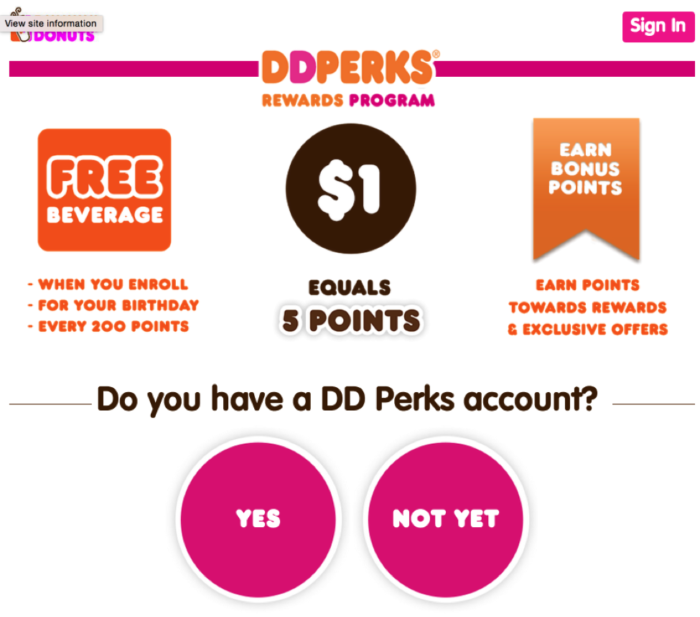
Did you know that over 90% of companies out there now offer a special loyalty membership program to reward their loyal customers? You know those places you frequently shop at—say, Walmart or Amazon? And if you’re into shoes, chances are you’ve heard of Nike’s and Adidas’ cool membership perks too!
But have you ever stopped to think about why they’re so popular? Well, it’s simple! Getting a new customer onboard can cost a company 5 to 25% more than keeping a current one happy. Plus, a big chunk of a company’s earnings actually come from people who keep coming back for more.
In this article, we’re going to guide you through some simple steps to help you create your very own loyalty membership program using WooCommerce. We’ll also introduce you to a fantastic tool that can make the whole setup process super easy and smooth for your customers. So, let’s dive right in!
How Effective Are Loyalty Membership Programs?
A recent study found that over 83% of shoppers believe that being part of a loyalty program affects their decision to buy from a brand again. Adding to that, another study revealed that a solid 84% of consumers are inclined to stick with a brand that offers a loyalty program.
If you dive into these stats, you’ll get a clearer picture of how loyalty programs work wonders for your store’s customer loyalty. Just imagine seeing repeat purchases skyrocket by more than 80%!
But that’s not all—loyalty programs also have a knack for boosting your revenue. As your brand gains more loyal followers, you’ll have a steady stream of income flowing in regularly.
Loyalty programs aren’t just good for your bottom line; they also entice your customers to shop more at your store. The fun and engaging nature of loyalty memberships inspires your customers to increase their average spending in the hopes of unlocking rewards or achieving goals.
In fact, 66% of shoppers reveal that the opportunity to earn rewards actually changes how they spend.
What’s more, a whopping 90% of consumers who believe that companies truly understand their shopping preferences are much more likely to buy a bunch of products from them!
How To Create A Loyalty Membership Program In WooCommerce
Given how awesome loyalty programs are, I’m sure you’re raring to dive into the business world. Well, let’s not waste any time; let’s jump right in!
First things first, you’ll want to gear up your store with the WooCommerce Loyalty Program plugin. The standard features of WooCommerce might not cut it when you’re aiming to create a rewards program.
With this powerful plugin in your toolkit, however, you’ll be able to:
- Provide your members with multiple earning point options,
- Allow self-service redemption of points,
- Set sensible expiration periods,
- Prompt members about how many points they’re potentially earning for products,
- Have a full admin dashboard showing how many points are in the system, and
- Manually grant or take away points.
Once you’ve got that locked in, let’s move right along with the setup process:
Step 1: Determine the value of each point
Once you’ve got the plugin installed, the Loyalty Program springs to life all on its own.
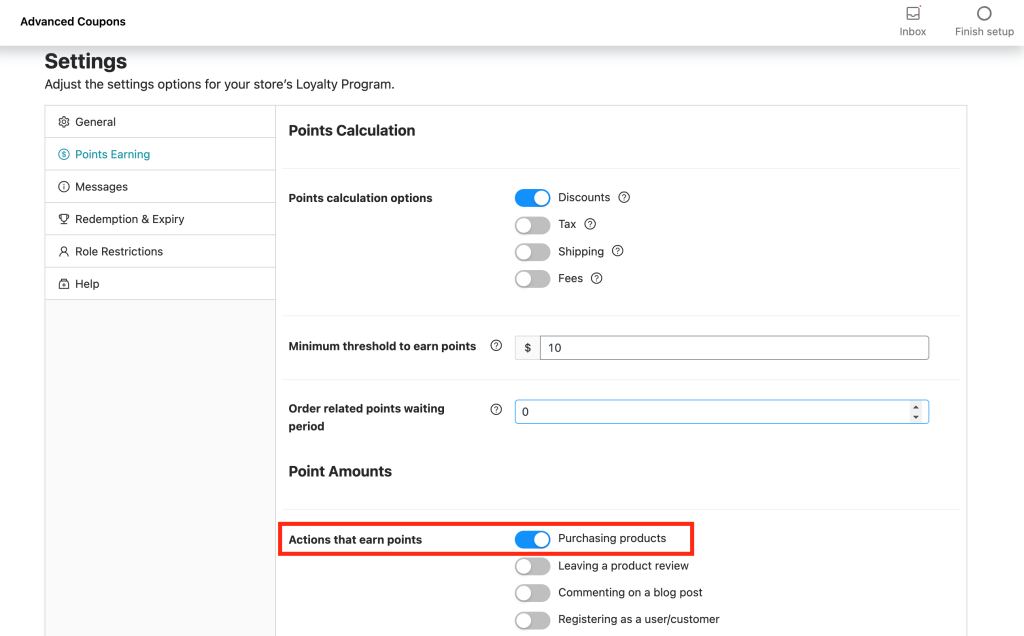
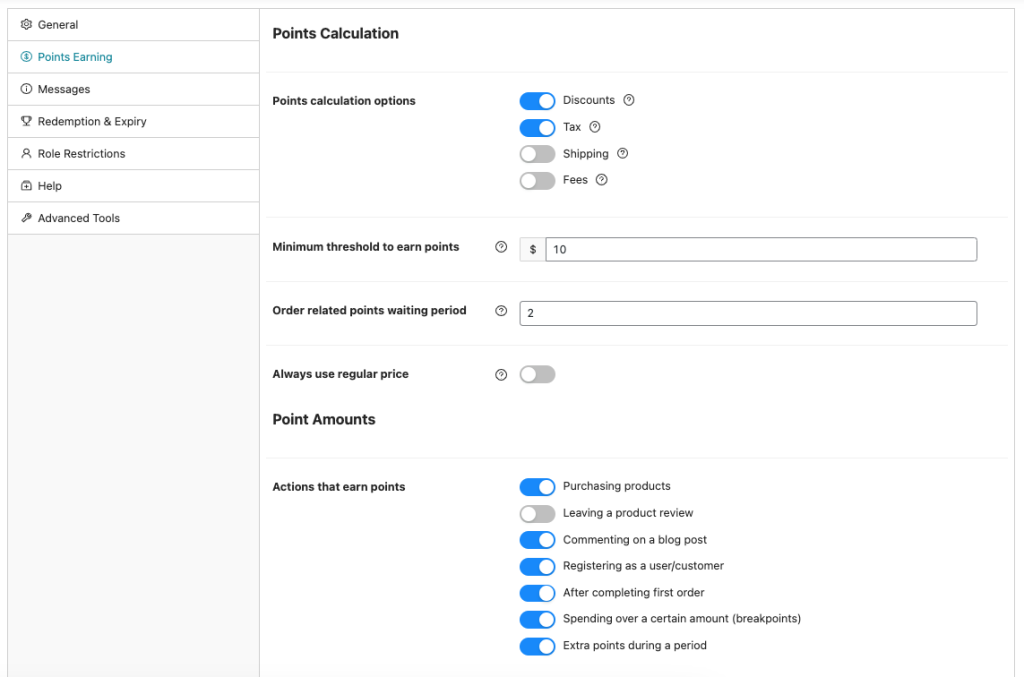
When you head over to the settings at Coupons > Loyalty Program > Settings > Points Earning, you’ll notice that the “Purchasing Products” option is good to go by default:
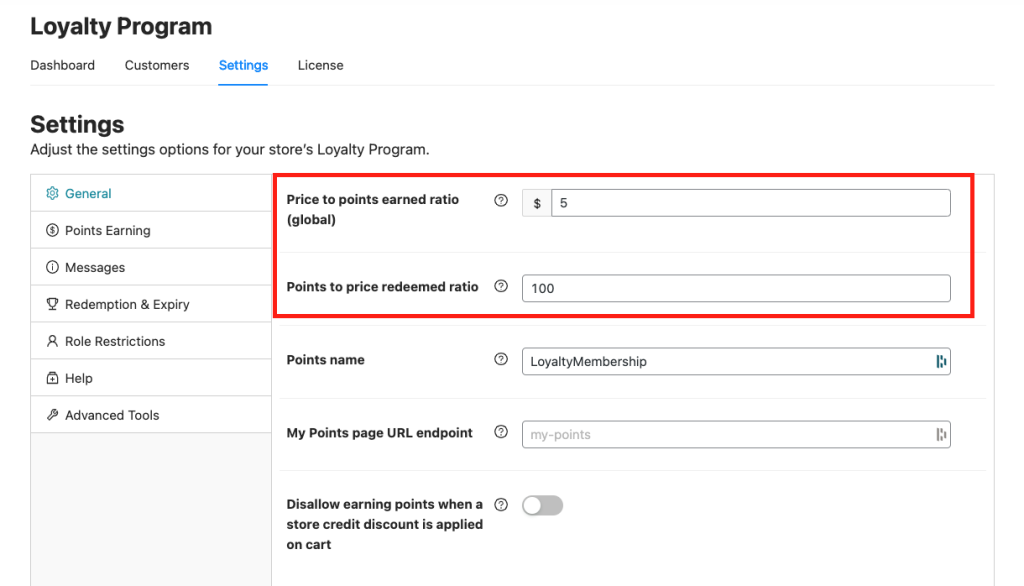
To begin, you’ll need to pin down two important details:
- Price to points earned ratio
- Points to price redeemed ratio
The first setting is all about the ratio of points earned to the price, which is just a fancy way of saying how many points your customers score for each buck they spend. For example, if you set it at 1, that means they pocket 1 point for every dollar they spend.
But let’s say you set it up to 5—in that case, they’d rake in 5 points for every single dollar they spend:
Next is the points-to-price redeemed ratio. This setting is all about giving the system a heads-up on the actual value of a point. In simple terms, you’re telling it how many points are needed to swap for one unit of currency.
So, for example, if you input 100 in this field, that’s like saying your customer would have to bid farewell to 100 points to pocket $1.
Once you’ve got the general settings sorted, you’re all set to dive into configuring the “Points Earning” and “Message” settings. If you’re keen on the details, feel free to dive into this guide for more.
Step 2: Set how your customers can use their points and when those points will expire
Now that we’ve checked off the first three tabs, let’s proceed with the redemption process.
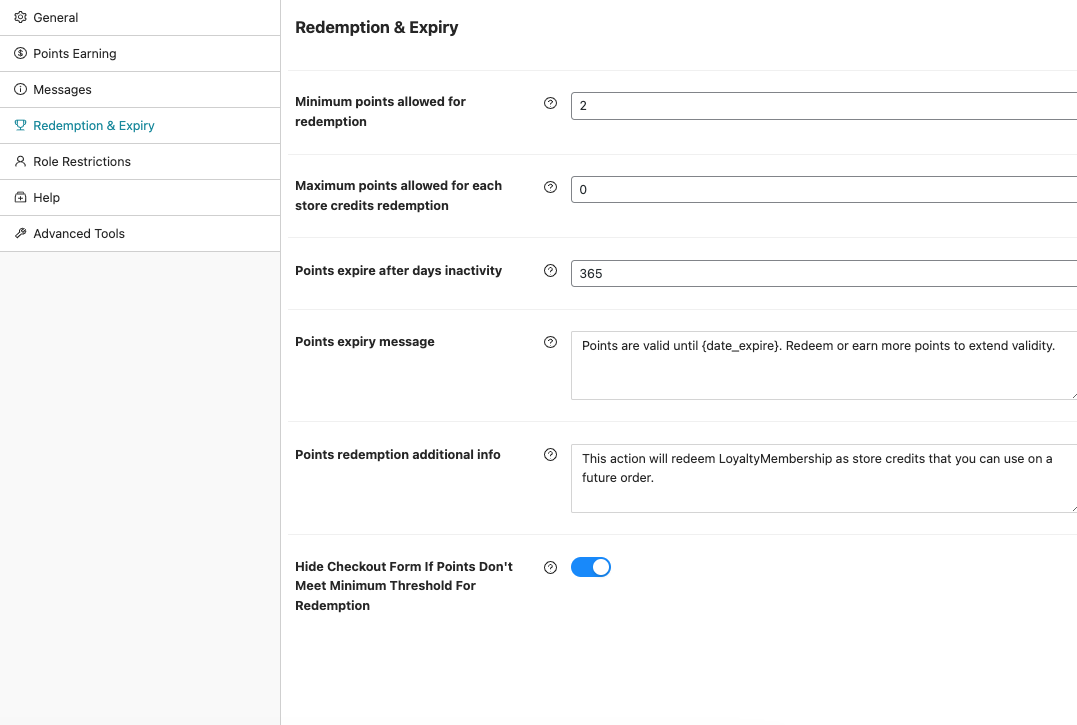
To do so, head to the “Redemption & Expiry” tab. Here, you will see several fields that will allow you to configure how your customers can cash in their points and when these points will expire:
The fields here are pretty straightforward and easy to grasp. However, let’s talk about the three important settings in this section:
- Minimum Points for Redemption. This sets a rule that customers need to earn a certain number of points before they can use them for store credit. Think of it as a starting line for using points.
- Maximum Points for Redemption. Think of this as a limit on how many points someone can use at once for store credit. It’s there to prevent using too many points at once.
- Points Expiry. Here, you decide how long points can hang around without being used. Once this time is up, those points say their goodbyes and can’t be used anymore.
Step 3: Configure your customer’s earning actions
As mentioned, the WooCommerce Loyalty Program puts you in the driver’s seat when it comes to earning points. You’ve got the power to decide which actions can help customers rack up those points.
Basically, you can turn certain actions on or off to determine how customers earn points:
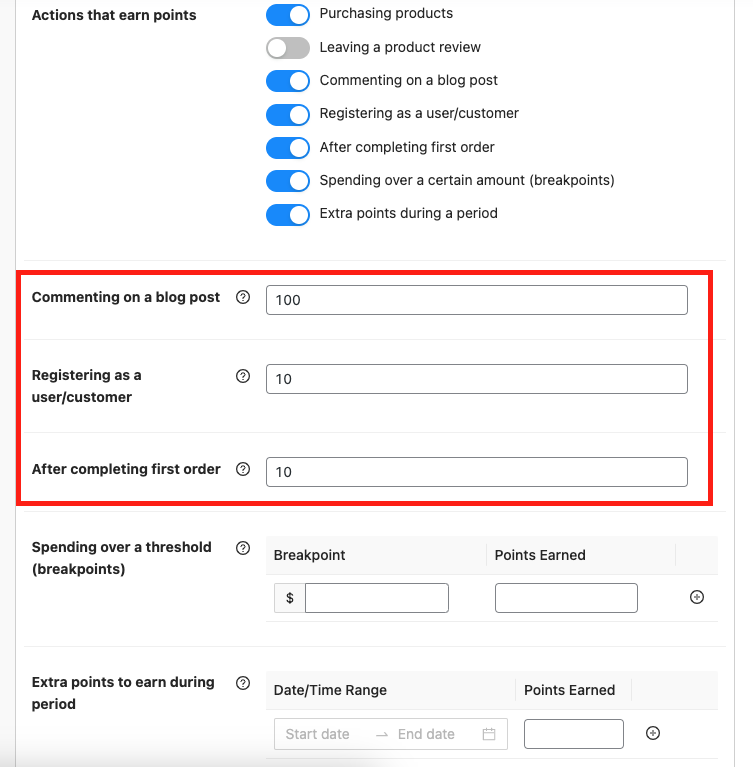
On top of that, you can also give out bonus points for activities that don’t involve buying anything. For example, when a customer signs up for an account or leaves a comment on a blog:
Step 4: Setup loyalty program role restrictions
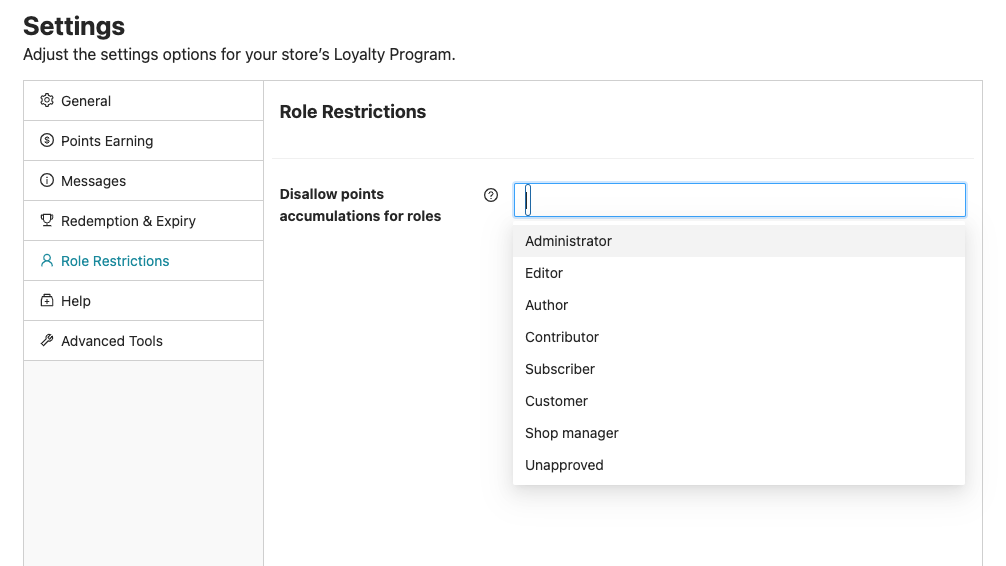
Finally, since the goal of this tutorial is to create a loyalty membership program, don’t forget to get your Role Restrictions setting squared away.
It’s pretty straightforward. In this section, you just need to specify which roles won’t be able to join or take part in your loyalty program:
If you include a role here and a user with that role logs in, they won’t come across anything related to the loyalty program. Essentially, it’s like they’re not part of the loyalty program at all.
Bonus Tip: Need inspiration for your rewards? Browse real membership benefits examples from other WooCommerce stores to see what kinds of perks actually keep customers engaged.
Conclusion
Loyalty membership programs are essential for any WooCommerce store looking to build a dedicated customer community and boost repeat sales. Yet, creating your own loyalty program can be a tough nut to crack if you don’t have the right tools.
Fortunately, with the WooCommerce Loyalty Program, you can easily do so in four steps:
- Determine the value of each point
- Set how your customers can use their points and when those points will expire
- Configure your customer’s earning actions
- Setup loyalty program role restrictions
Do you have any questions about loyalty membership programs? Let us know in the comments!


