When you’re running an online store, you’ll likely encounter customers who occasionally want to return a product. When that happens, it’s smart to offer a first order store credit in WooCommerce. This way, you’re not only making customers happy, but you’re also taking their shopping experience up a notch.
Giving first order store credit can help increase customer loyalty and ensure repeat business. Shoppers will be able to redeem the credits in your store only, rather than your competitors.
In this post, we’ll explain the importance of offering store credit in WooCommerce. Then we’ll walk you through how to give store credit after the first order in WooCommerce. Let’s jump in!
Why Offer First Order Store Credit In WooCommerce
There are a few reasons to offer store credit to your WooCommerce customers.
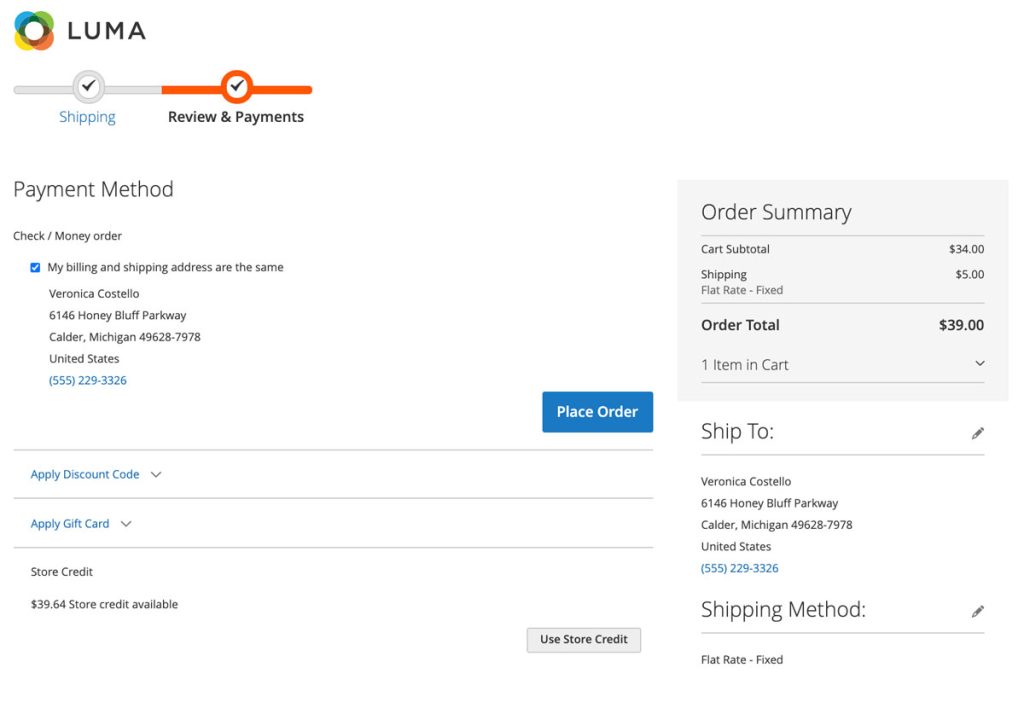
Maybe you want to give your customers a little extra incentive to shop with you again.
Or maybe you had to cancel an order and don’t want to issue a refund. Whatever the reason, giving store credit is a great way to show your appreciation for your customers.
There are also multiple ways to leverage store credit for your WooCommerce store. The most common include:
- Returns and exchanges: Rather than a complete refund for products, you can offer store credit for first orders.
- Gift cards: Customers can buy store credit and then gift it to someone else.
- Loyalty rewards: Returning customers can earn credit by making repeat purchases.
It’s also an excellent way to encourage them to shop with you again. If you had to cancel an order, giving store credit is a great alternative to issuing a refund. By offering first order store credit, you can incentivize shoppers to purchase with you, and then return in the future to collect their balance.
7 Steps To Give Store Credit After First Order In WooCommerce
Now that we understand more about giving store credits, let’s take a look at how to go about it in WooCommerce.
Below is a complete guide on how to give WooCommerce store credit after the first orders:
Step 1: Enable WooCommerce store credit
The first step is to learn how you can enable WooCommerce store credit. To do this, you can use our Advanced Coupons plugin:
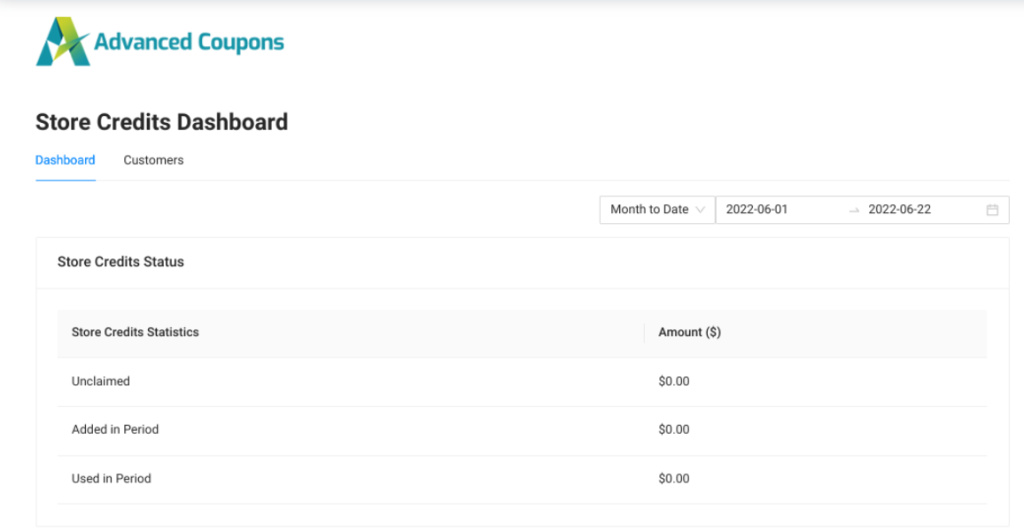
Once it’s installed and activated on your website, you can navigate to Coupons > Manage Store Credits:
Here, you can view the unclaimed and used credits in your store. Under the Customer tab, you’ll find a comprehensive list of your customers where you can manage their credit balance. To adjust the credit balance, you can select the Adjust button:
In the pop-up window that appears, you can enter the store credit you want to apply. When you’re done, click on Make Adjustment.
Now your customers will be able to view their store credits from their My Account page. They will also be able to apply the store credits in their balance toward purchases.
Step 2: Offer store credit as a refund
If your customer places their first order and then later decides to return the product, it’s a good idea to offer them store credit as a refund.
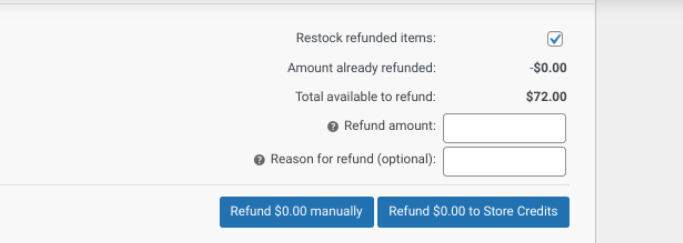
To do this, you can navigate to the Edit Order page, and then select the Refund option:
The amount of reimbursement will be adjusted to a credit balance. Then you can click on the Refund $X in Store Credits button.
Step 3: Offer store credit as a gift card
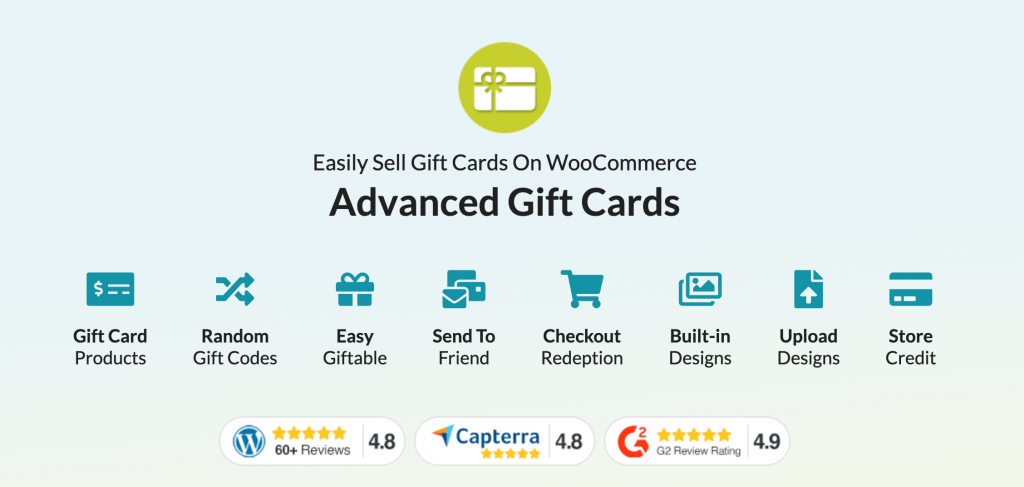
As we mentioned, another option for first order store credit is to offer it in the form of a gift card. To do this, you can download our Advanced Gift Cards plugin:
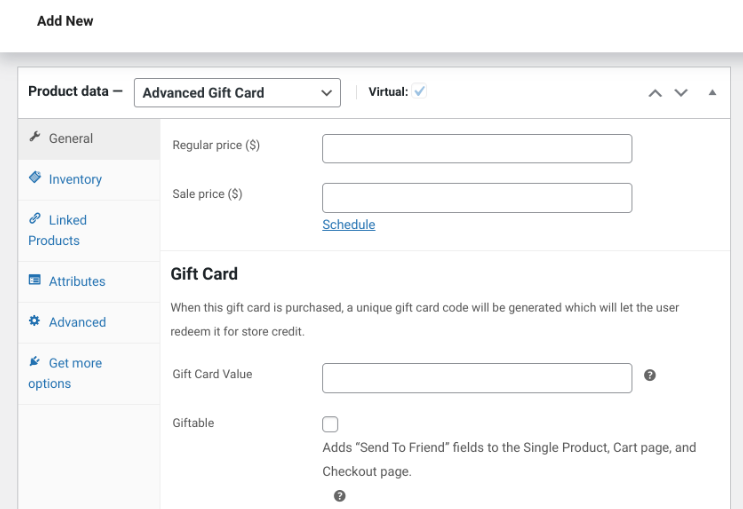
This tool lets you easily create gift cards for your WooCommerce store. Once installed and activated, you can add a new product to your store. Under Product Data, select Advanced Gift Card:
You can set a Regular price and a Gift Card Value. The latter will determine the amount of store credits available on the gift card. Next, you can select the Giftable box.
You can also choose from three designs for your gift card. When you’re done, save your changes by clicking on the Publish button.
Step 4: Install the Uncanny Automator plugin
At this point, we’ve shown you how you can add credits to user accounts. However, this is a manual process that can get time-consuming over time.
Fortunately, to automate it, you can use Uncanny Automator:
This tool lets you add WooCommerce store credits to user accounts when they meet certain requirements. Note that to add Advanced Coupons credits using Uncanny Automator, you’ll need the premium version of the Uncanny plugin.
Step 5: Create a new recipe and select a trigger to automate store credit
After you download and install the plugin on your website, the next step is to create a new recipe and select a trigger. The tool lets you connect with third-party tools and services to trigger certain reactions from specified actions.
In this case, we want to configure Advanced Coupons to apply for store credits every time someone places their first order in WooCommerce. To do so, navigate to Automator > Add new:
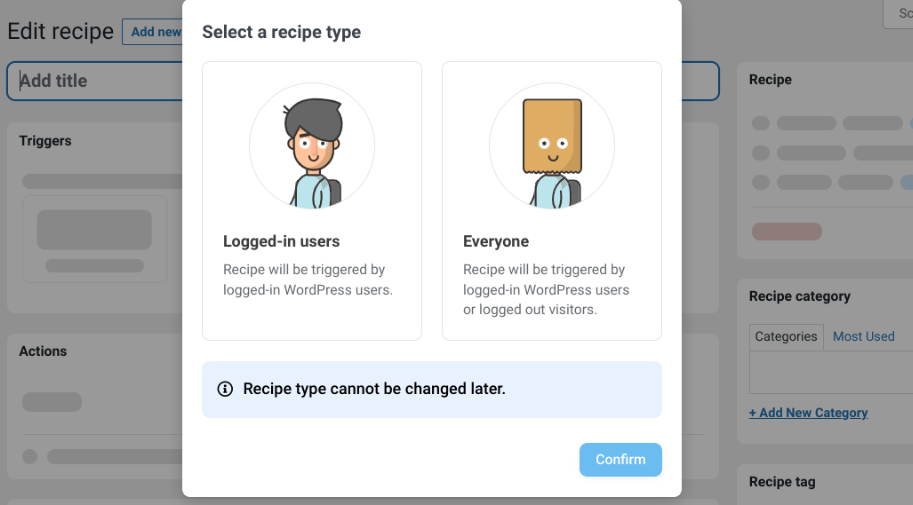
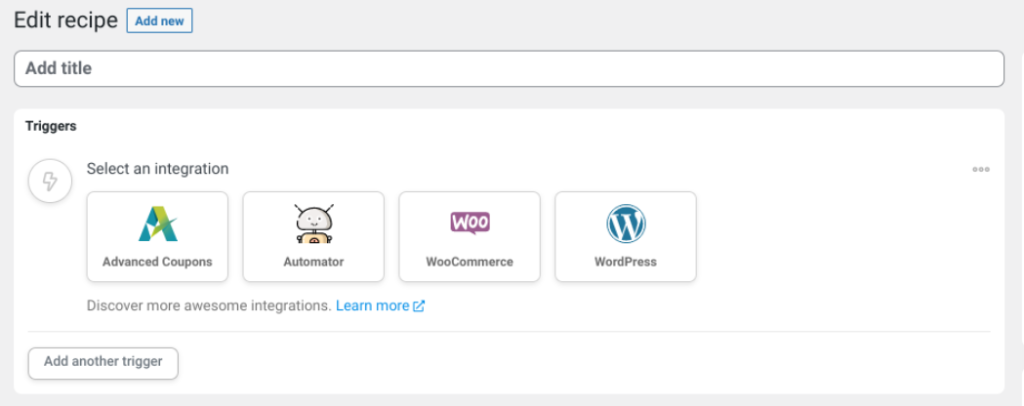
You can choose which users the recipe should apply to. Select Logged-in users, followed by Confirm. Now you can create a name for your recipe. Under Triggers, select WooCommerce:
Choose that option that readers: “A user completes, pays for, lands on a thank you page for an order with a product”.
Step 6: Configure the trigger conditions
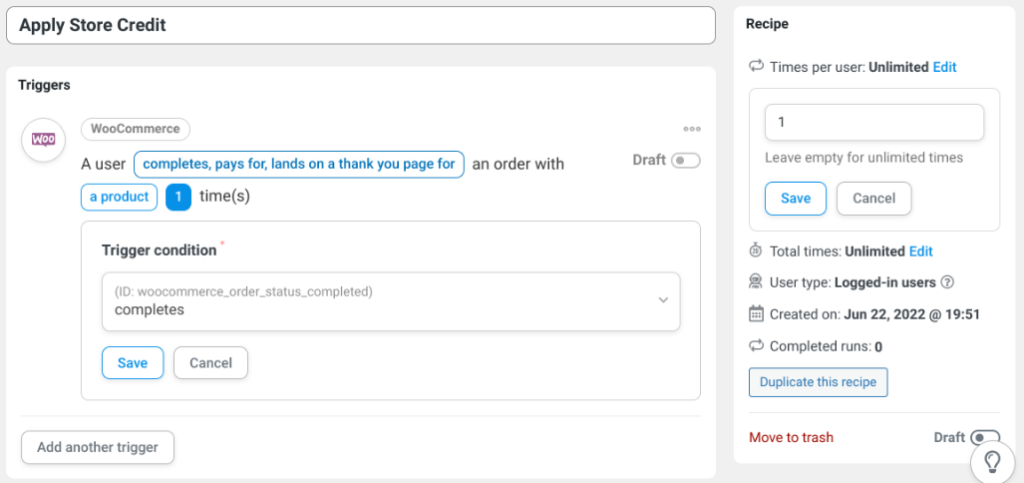
Next, you can configure the conditions for the trigger. We suggest selecting the completes option to ensure only customers who complete their purchase receive store credits:
You can also configure the conditions for first order store credits. Under the Recipe section on the right, change the Times per user option to “1”. When you’re done, you can move on to actions.
Step 7: Set the recipe’s action
Next, navigate to the Actions section. Click on the Add Action button and select the Add a specific amount of store credit to the user’s account option.
Now you’ll be able to determine how many credits Uncanny Automator will add to the customer’s account when they trigger the recipe. When you’re done, publish your changes. That’s it!
Conclusion
Offering shoppers WooCommerce credit can be an excellent way to build loyalty and encourage return business. However, if you want to enable the first order store credit functionality for your site, you’ll need to use a couple of plugins.
As we discussed in this post, Advanced Coupons and Uncanny Automator can help streamline your WooCommerce automation. Simply follow these easy steps:
- Enable WooCommerce store credit
- Offer store credit as a refund
- Offer store credit as a gift card
- Install the Uncanny Automator plugin
- Create a new recipe and select a trigger to automate store credit
- Configure the trigger conditions
Do you have any questions about giving first order store credit in WooCommerce? Let us know in the comments section below!


