If you run a large business, you might have multiple shopfronts across a region, country, or even the entire world. Without a clear directory of these locations, your potential customers might not be able to find your stores. Therefore, creating a store locator in WooCommerce is essential.
Fortunately, it’s straightforward to create a store locator and feature it on your website. You can easily display information such as locations, contact details, and maps for each store. By doing so, you can appeal to more customers and increase your sales.
In this post, we’ll discuss what a store locator is and why you might want to make one. Then we’ll explain how to create this feature for your WordPress website. Let’s get started!
What Is A Store Locator And How Can Your Business Benefit From Using One?
A store locator enables customers to find physical locations for your stores. It showcases each shop’s operating hours, phone numbers, locations, and sometimes photos.
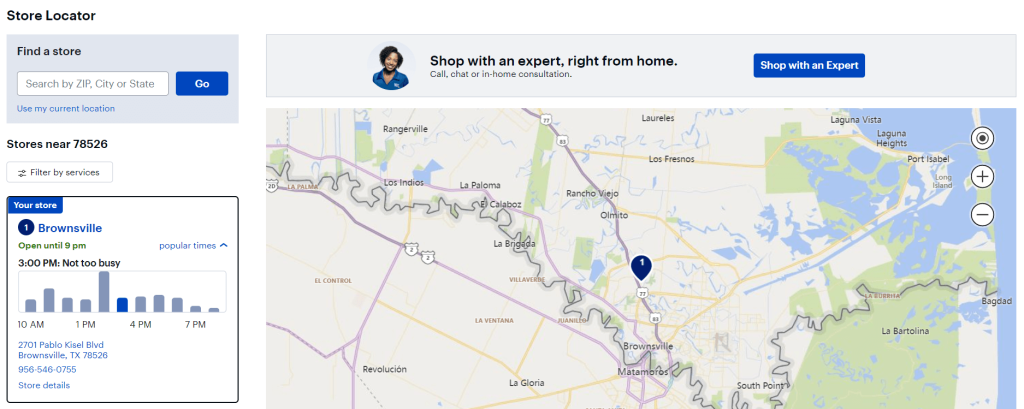
The locator is usually a separate page on your website. There, you might find the different stores in list format or as icons on a larger map. The page may also include a search bar so that customers can look for the shops closest to their locations:
Store locators condense information and speed up the research process. Customers can select their ideal stores based on locations and needs.
Additionally, consumers can see which products and services you offer at each location. Therefore, using your store locator can save them time and improve your overall customer experience. Moreover, the page is shareable so users can send the different locations to other people.
Furthermore, a store locator can provide a Search Engine Optimization (SEO) boost. If you optimize this page for search engines, you can potentially attract new customers to your business.
Finally, unlike a blog, a store locator is a passive traffic source. After the initial setup, the store locator continues driving traffic. However, you should periodically review your location page to ensure that it shows up-to-date information.
How To Set Up A Store Locator In WooCommerce (In 3 Steps)
By now, you should already understand the advantages of creating a store locator in WooCommerce. We’re now going to show you how to set one up in three easy steps:
Step 1: Install and activate Business Directory Plugin
We’ll be working with Business Directory Plugin in this tutorial. This tool enables you to create a variety of different listings and directory pages, including a store locator:
There is a free version of the plugin. However, you’ll need a Pro plan or higher to access the Google Maps module. It currently costs $199.50 per year.
First, you’ll need to install and activate Business Directory Plugin. You’ll also want to install the Google Maps module.
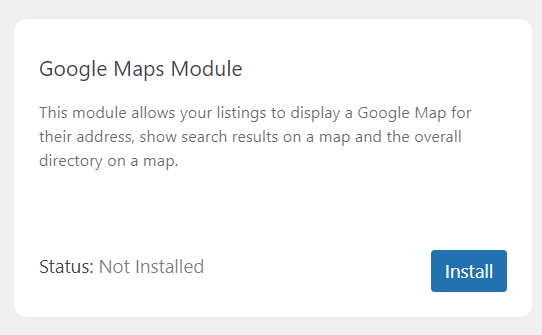
You can add it by navigating to Directory > Modules in your WordPress dashboard. Then scroll down until you find Google Maps Module:
Click on Install, and the module will display Status: Active. You’re now ready to start working on your store locator page.
Step 2: Create a store locator page and configure your settings
Business Directory Plugin should prompt you to create a directory page for your store locator automatically. You can click on Create required pages for me, and the plugin will take care of the rest.
Alternatively, you can add the shortcode “[businessdirectory]” to any WordPress page. Doing this will transform it into a directory page that you can use for your store locator.
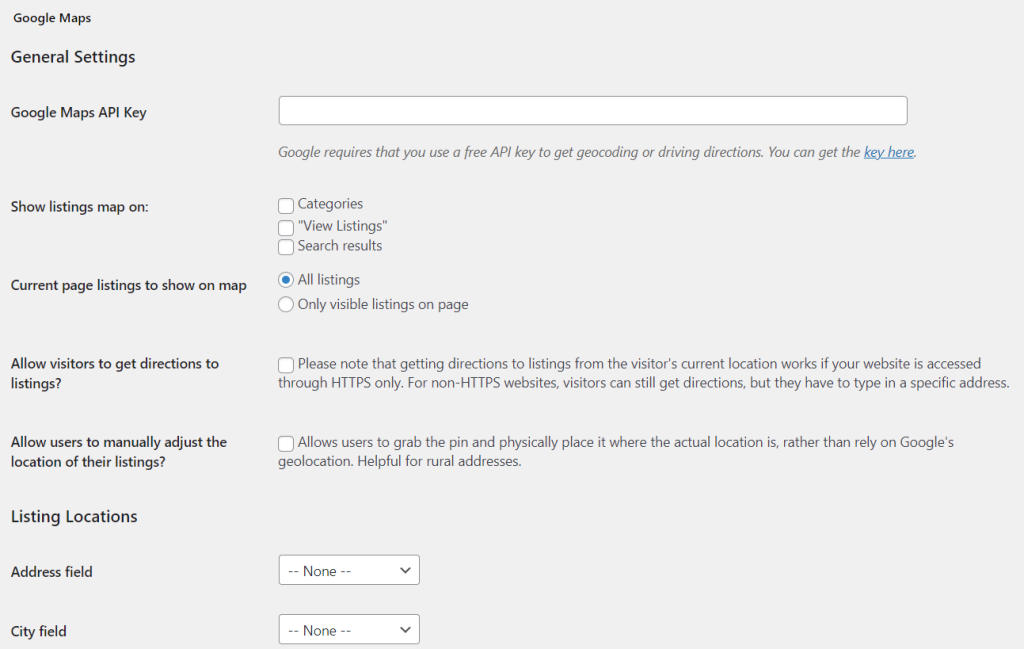
Next, you’ll need to configure your Google Maps settings. Navigate to Directory > Settings > Module Settings:
You’ll need to enter your Google Maps API key. You can find this code by following the official documentation on the Google Developers site. Without this API key, your store locator page won’t be able to draw information to display maps for your different shopfronts.
On this page, you can also decide where your listing maps will display. Additionally, you can check the “Allow visitors to get directions to listings” box to further help customers find your different stores. However, note that you will need a website that uses HTTPS to enable this feature.
When you’re happy with your configurations, click on Save Changes.
Then, you can move on to the next step.
Step 3: Add your store locations
Next, you’ll decide on the information that will display in your store locator. Head to Directory > Form Fields > Add New Form Field.
Here you’ll choose the different fields for your store locations:
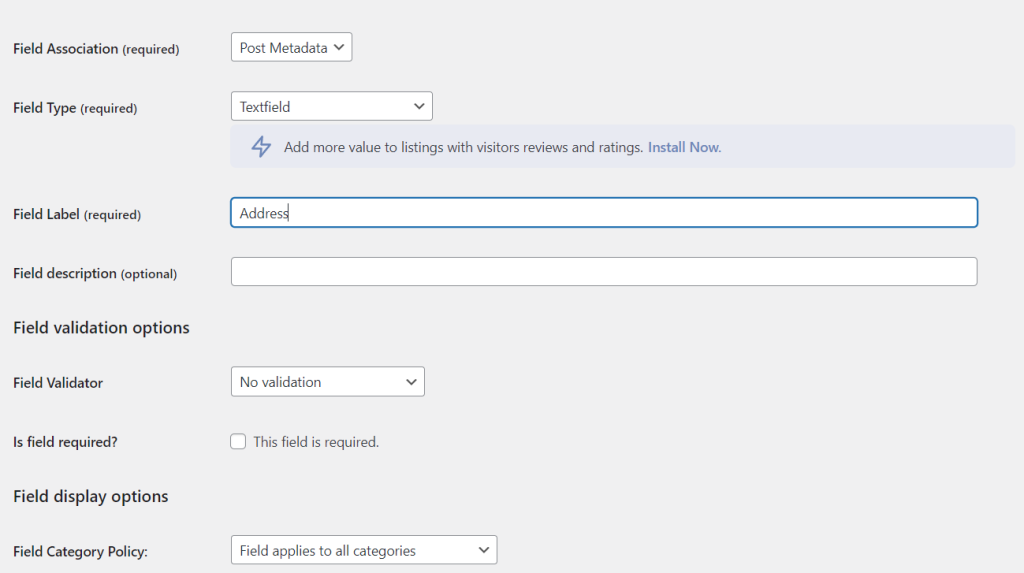
For example, you might add each store’s address, state, zip code, and country. Then click on Add Field to save your changes.
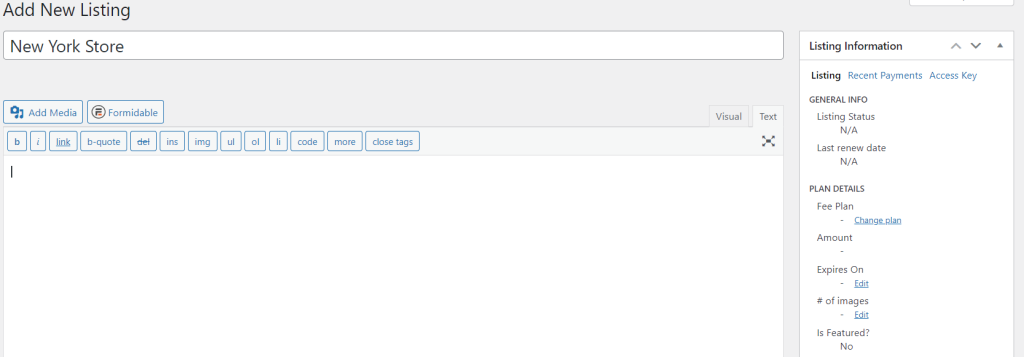
Now it’s time to add your different locations to your store locator. Jump across to Directory > Add New Listing. Here you can add all of the information about your shopfront:
Make sure that you enter all the details accurately. Otherwise, you risk misdirecting your customers to the wrong locations!
Once you’ve finished adding one location, click on Publish to save it. Then follow the process for each of your shopfronts to fill out your store locator.
Alternatively, you might have a multinational company. In this case, you likely have multiple locations, and adding them would be time-consuming.
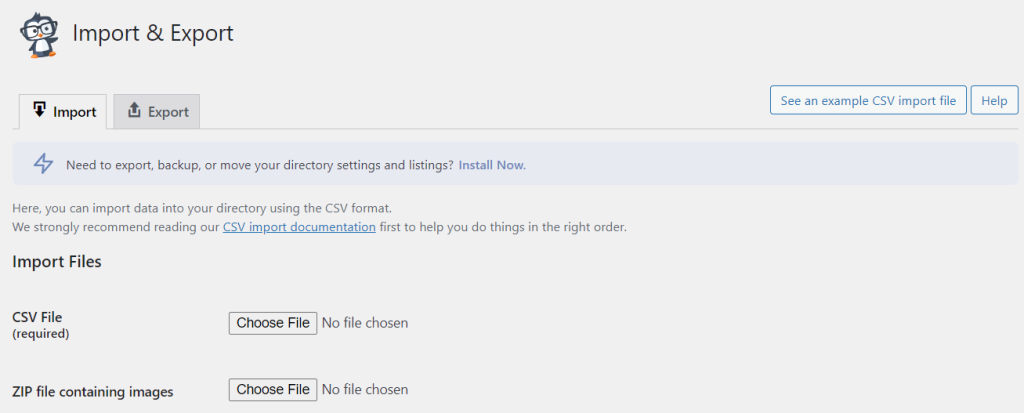
By importing the location data in a Comma-Separated Values (CSV) file format, you can streamline the process. To do this, navigate to Directory > Import & Export. Then select Choose File:
That’s it! You should now have a functional store locator on your site. We’d suggest taking a look at it on the front end of your site and double-checking for any errors.
Conclusion
If you have multiple shop locations, you’ll likely want to advertise this fact to your customers. Using a store locator, you can show contact details, addresses, and maps for your different shopfronts. By doing so, you can attract consumers to your various locations and increase your sales.
To recap, you can create a store locator in WooCommerce by following these steps:
- Install and activate Business Directory Plugin.
- Create a store locator page and configure your settings.
- Add your store locations.
Do you have any questions about setting up a store locator in WooCommerce? Let’s talk about them in the comments section below!





Thankful to you for sharing this awesome article this is the blog that provides lots of good information thanks for providing such good information.