Customers can be entirely unaware that you have promotions running. You can send customers emails or post coupon notices on your store but a subset of users may miss every signal. That’s where a WooCommerce coupon popup comes to the rescue.
If there’s one useful thing about popups is that they’re hard to miss. Implementing a WooCommerce popup is a great way to ensure that all of your visitors are aware if you’re offering a discount, Plus, coupon popups are relatively easy to implement.
In this article, we’ll show you how to create a WooCommerce coupon popup using OptinMonster and how to control cart conditions using Advanced Coupons. Let’s get to it!
Why Use Coupon Popups In WooCommerce
Let’s be honest, popups don’t have a sterling reputation.
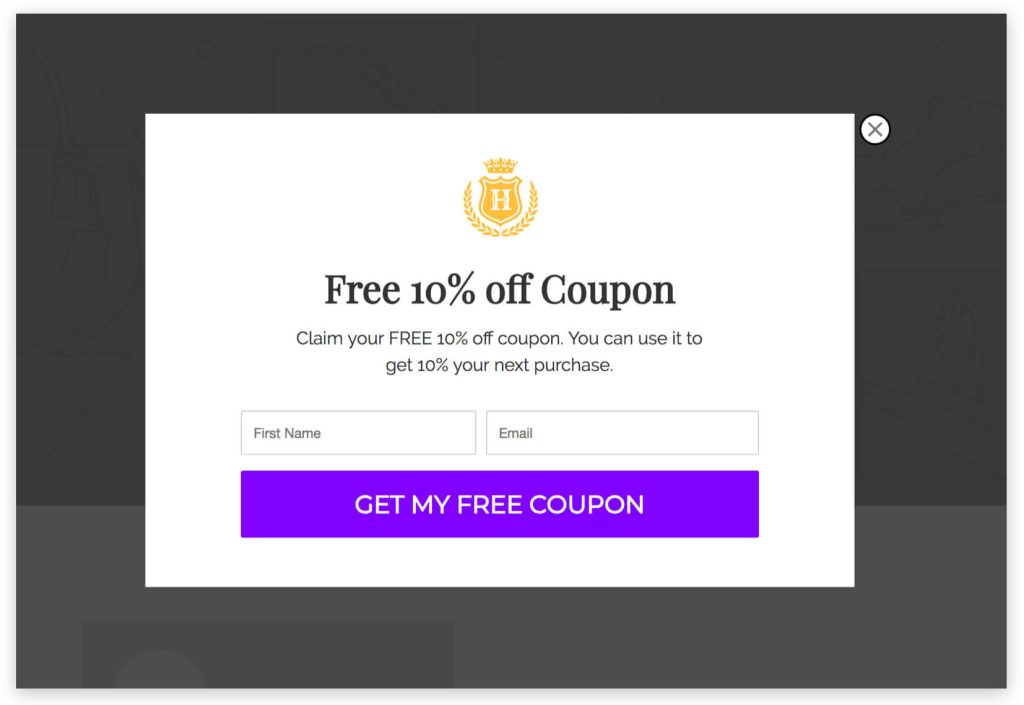
For a long time, popup ads were the bane of most internet users’ existence. Nowadays, popups are much more demure and reputable websites don’t use them for ads. Instead, a lot of websites use popups to advertise discounts or to get you to sign up for an email list:
Modern popups don’t appear in new windows. They’re in-page elements that show up over your content, as if on a different layer. That simple change makes modern popups a lot more user-friendly.
If you look at popups by the numbers, it’s impossible to deny that they’re an effective marketing tool. A study of high-performing popups found that they averaged a conversion rate of around 9.28%. Less-optimized popups average conversion rates of around 3.1%.
Either number is fantastic from a marketing perspective. WooCommerce coupon popups can be the perfect way to show visitors offers they might otherwise miss on. However, they also provide you with a great opportunity to get email subscribers and promote specific products.
How To Make A WooCoommerce Coupon Popup (4 Steps)
There are a lot of tools that you can use to create and publish WooCommerce popups and deals.
One of our favorites is called OptinMonster because it provides you with a broad library of popup templates that you can use. The plugin also enables you to create email opt-in forms and floating bars.
To use OptinMonster, you’ll need to register for a free account on their website. Once you do, you’ll be able to connect that account with your WordPress website using the OptinMonster plugin. Do so and then move on to step number one.
Step 1: Generate a WooCommerce coupon code
Before you do anything else, let’s go ahead and generate the coupon code that you’ll share using your WooCommerce popup. For this process, we’re going to use the Advanced Coupons plugin, which adds a broad range of features to WooCommerce’s built-in coupon functionality.
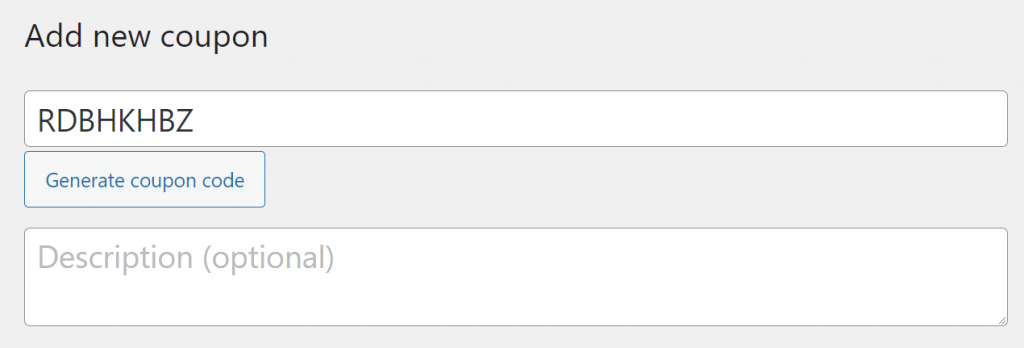
Access your WordPress dashboard and go to Coupons > Add New. Click on Generate coupon code and write a description for your coupon:
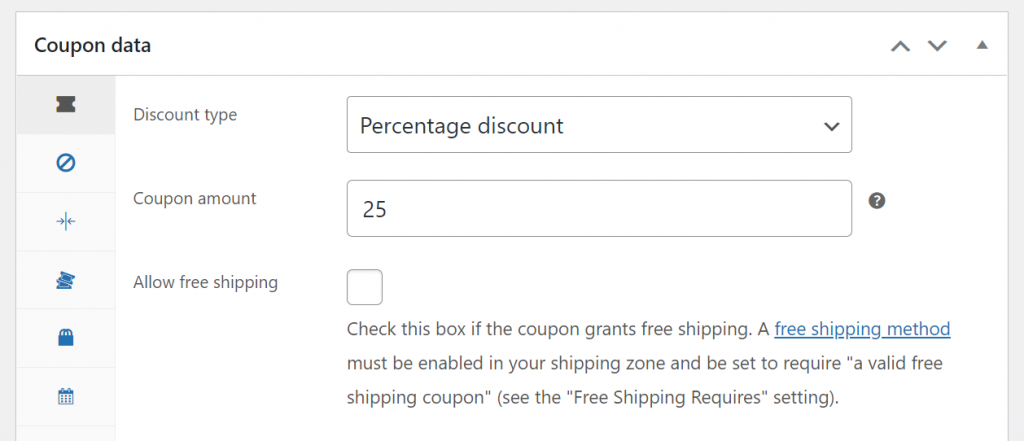
Take note of that coupon code because you’ll need it when you get to work on your WooCommerce popup. For now, scroll down to the Coupon data meta box and select the discount type and amount for your coupon:
A 25% discount coupon with no conditions can be a dangerous thing, though. That’s why it’s essential that you never forget to set some coupon restrictions and/or cart conditions.
Step 2: Configure your coupon conditions
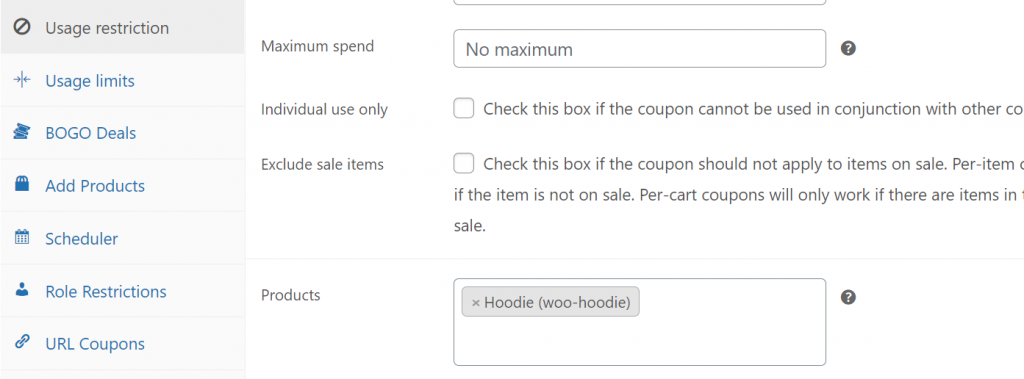
If you jump to the Coupon data > Usage restrictions tab, you’ll be able to decide which products or item categories the discount coupon should apply to:
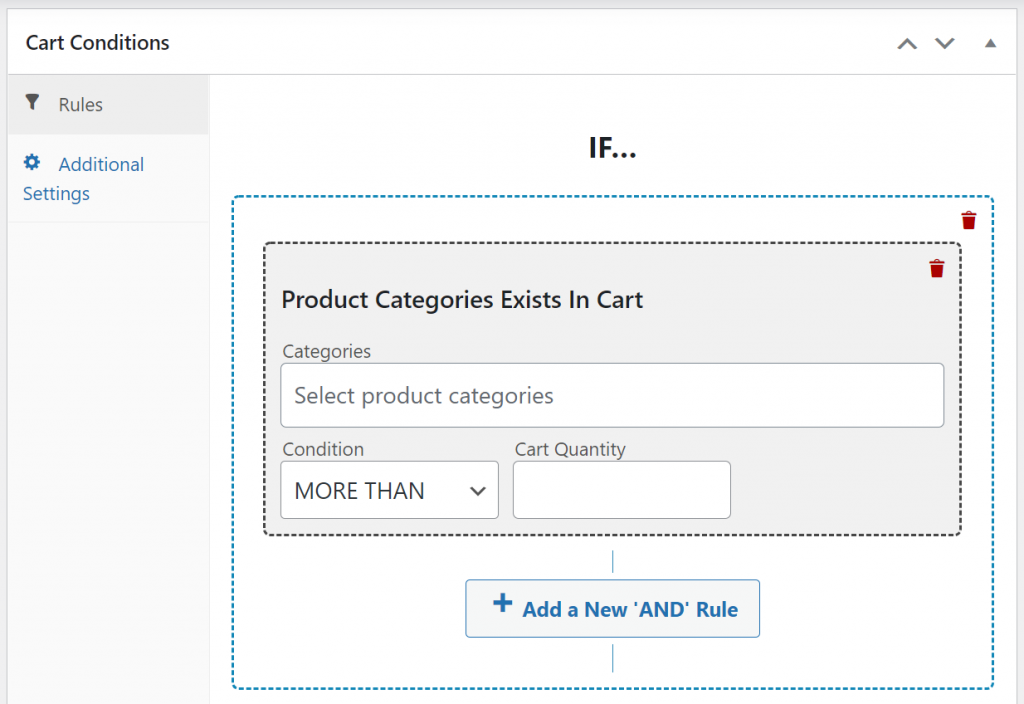
Another option is to use the cart conditions system that comes as part of Advanced Coupons Premium. That system enables you to set up and/or rules using a broad range of predetermined conditions:
Once you decide what type of coupon you want to create, it’s time to get to work on your popup.
If you’re not sure about what type of discount to offer, take a look through our blog’s archives. We regularly publish tutorials on how to create specific types of offers, such as welcome coupons or auto-applying discounts.
Step 3: Create a WooCommerce popup
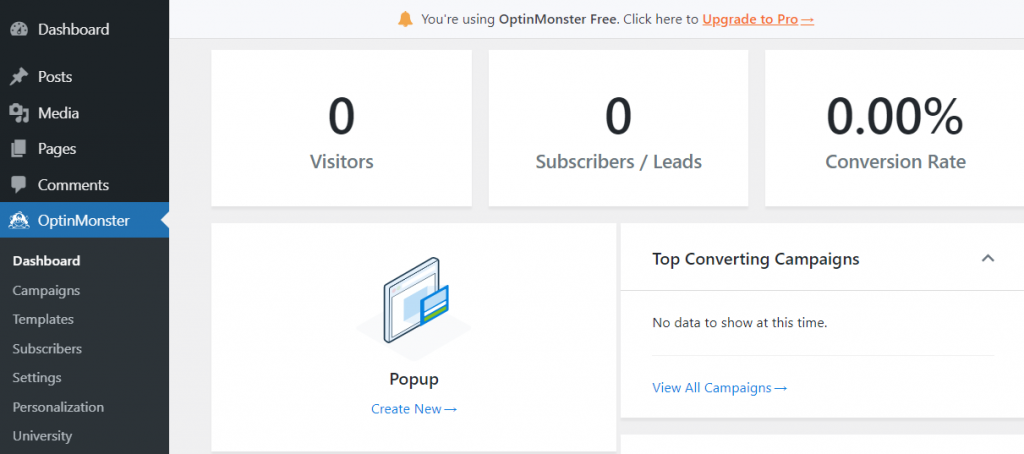
Creating popups using OptinMonster is remarkably simple. To get started click on OptinMonster on your WordPress dashboard menu and select the Create New option under Popup:
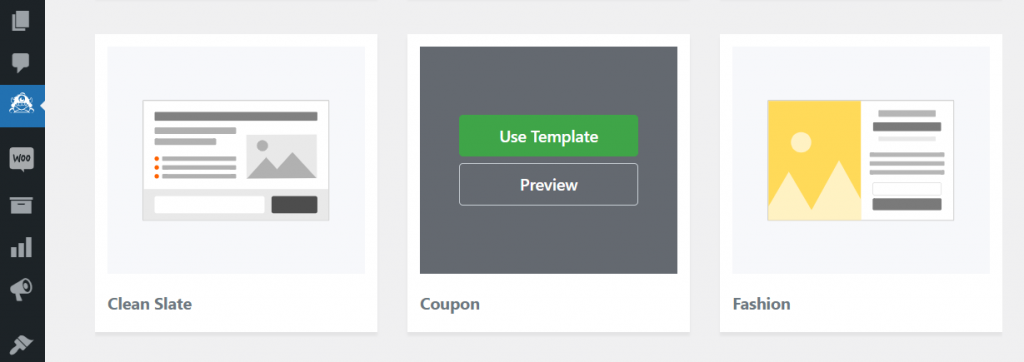
OptinMonster will show you a list of templates that you can use to get a headstart on your WooCommerce popup design. There are dozens of options to choose from, although some of them are limited to premium OptinMonster accounts.
For this tutorial, we’re going to use the Coupon template but you can go for any option that you want. Mouse over your preferred design and click on Use Template:
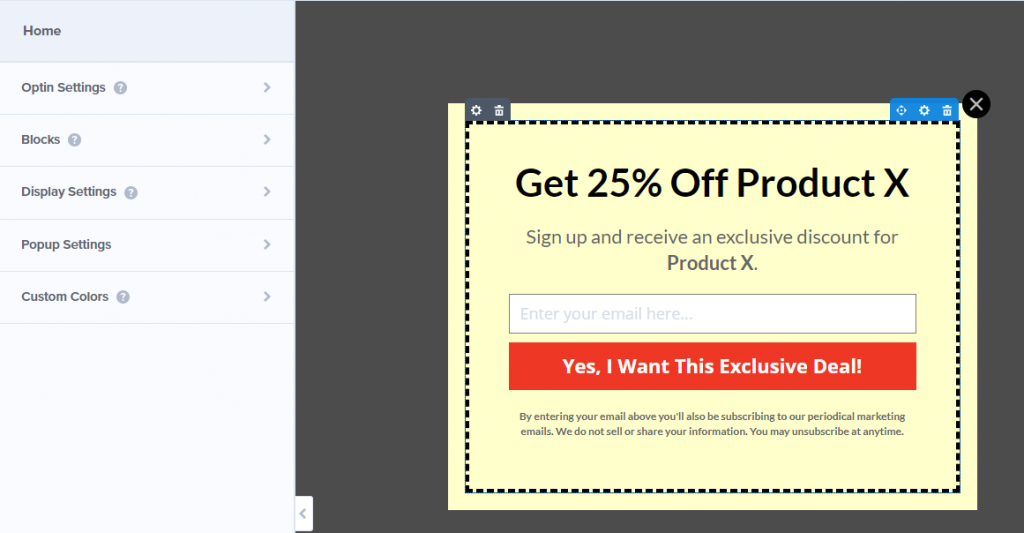
The plugin will ask you to set a name for your popup for your own records. Now you’ll see a design that looks like this alongside the OptinMonster editor:
Designing your coupon popup
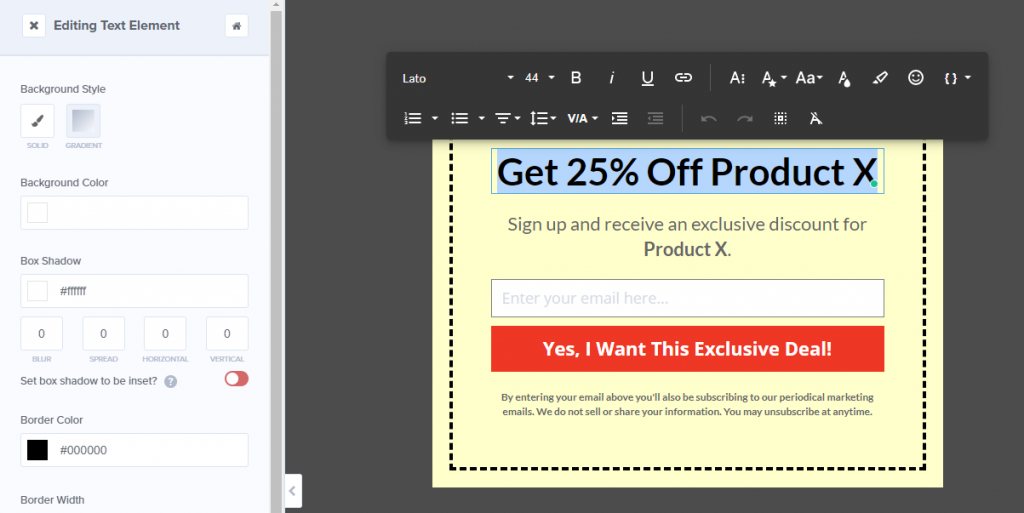
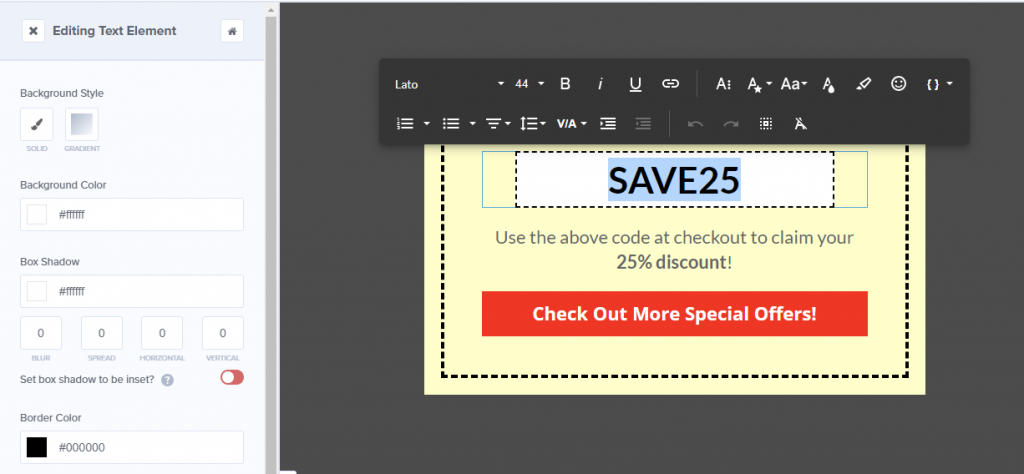
You can select any element in the design to edit it. If you select the text, you’ll see all the options you’d expect from a text editor:
The two most important elements in our design are the email field and the confirmation button. For our WooCommerce popup, we want an email signup form that displays a coupon code once visitors sign up.
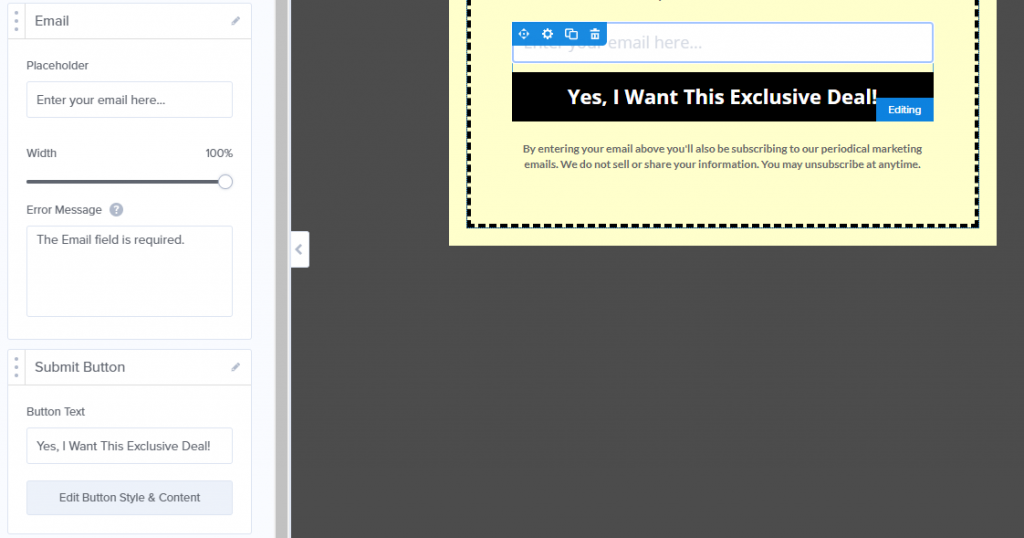
Select the email field and you’ll be able to edit its placeholder text and the submit button underneath it:
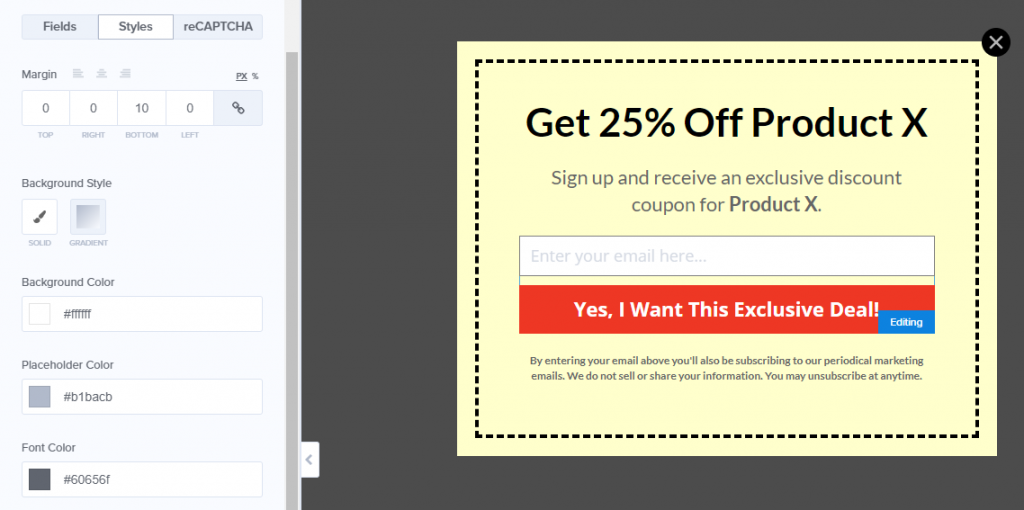
On top of editing the text of your WooCommerce popup, you can also tweak its style. Each element includes its own Styles tab with plenty of unique options:
Once you’re satisfied with your popup’s design.
Click on the Success tab next to Optin at the top of the screen. That will show you what your visitors will see once they enter their email and hit the confirmation button within the first leg of your popup:
Since you already have a coupon, replace the placeholder text that you see in the Success popup with that code. Now you can go ahead and save your coupon design but don’t close the editor yet.
Step 4: Configure your WooCommerce coupon popup’s display conditions
Ideally, your WooCommerce coupon popup won’t show up for every visitor every time they visit your store. OptinMonster enables you to configure display conditions for each popup that you create, so let’s go ahead and do that.
Return to the Optin tab and click on the Display Settings option on your left-hand menu.
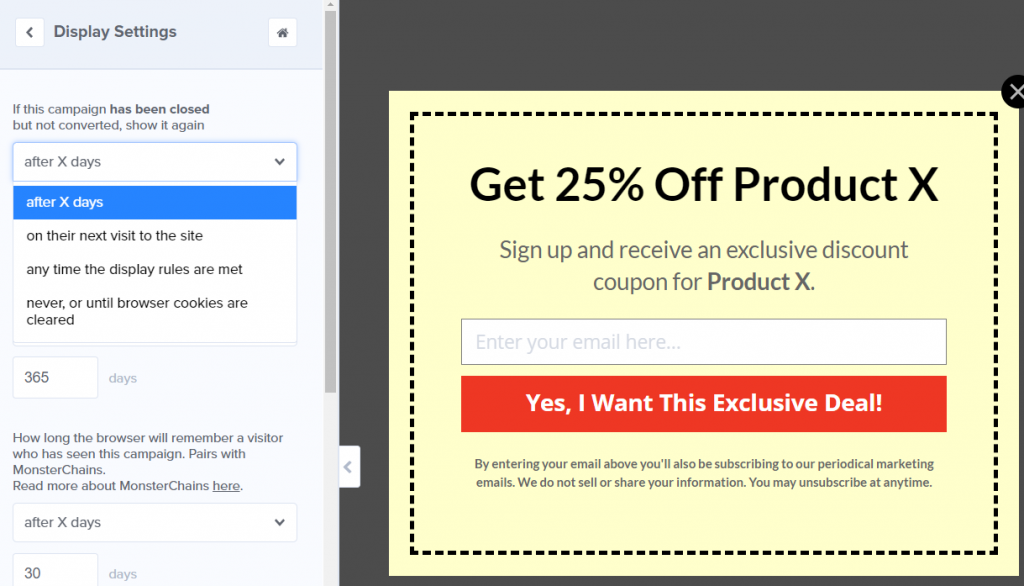
OptinMonster includes an option to decide when to show the popup again for customers that close the offer without converting:
Since most coupons aren’t permanent offers, we recommend that you select the never, or until browser cookies are cleared option. That way, if a visitor isn’t interested, they won’t have to see the popup again.
Save the changes to your popup again and go ahead and publish it. Now your WooCommerce coupon popup should be live for everyone that visits your website.
Conclusion
WooCommerce coupon popups are one of the best tools at your disposal to ensure that visitors don’t miss out on your offers. With the right tools, you can even use those popups to grow your email list, which provides you with an avenue to stay in touch with your customer base.
If you want to create popups that work seamlessly with WooCommerce, we recommend OptinMonster. It works perfectly alongside Advanced Coupons, enabling you to do this in just 4 easy steps:
- Generate a WooCommerce coupon code.
- Configure your coupon conditions.
- Create a WooCommerce popup.
- Configure your WooCommerce coupon popup’s display conditions.
Do you have any questions about how to create a WooCommerce coupon popup? Let’s talk about them in the comments section below!


