There are almost as many types of coupons as there are online stores. Some coupons will be exclusive, but others may apply to anyone who visits your e-commerce shop. In the latter scenario, you’ll need to know how to create a WooCommerce auto apply coupon.
An ‘auto-apply’ coupon is simply a promotion that is activated for the customer, without any actions required on their behalf. This saves time for both you and your users, and offers a host of other benefits – plus, it’s easy to set up.
In this post, we’ll discuss auto-apply coupons in more detail, and then show you how to create and customize them on your WooCommerce site. Let’s get to work!
An Introduction To WooCommerce Auto Apply Coupons
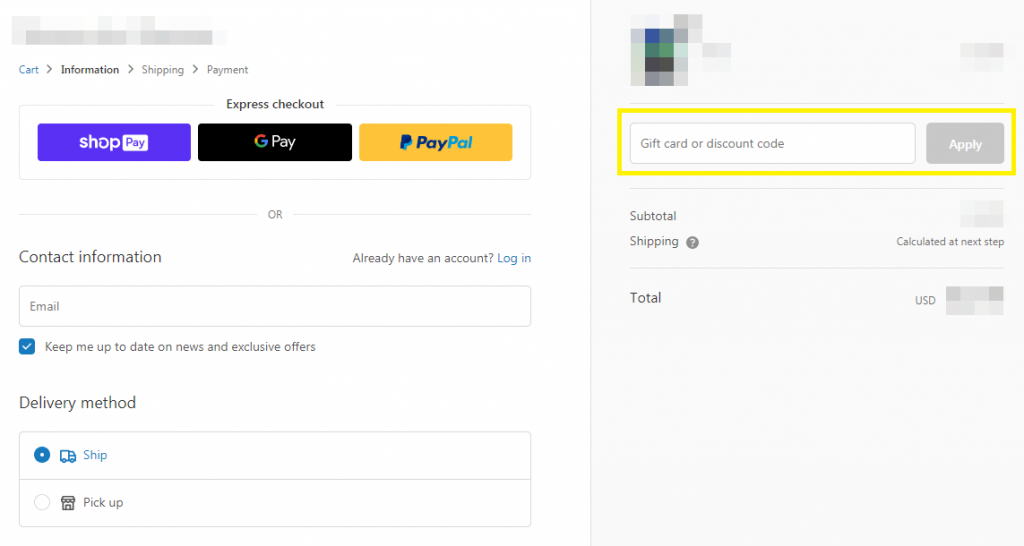
Many coupons require direct action on the part of the customer. They’ll need to acquire a code and enter it during the checkout process in order to take advantage of a particular promotion.
This exclusivity has certain benefits.
You can offer specialized deals to different types of customers, or require a certain level of engagement. For instance, you might send out a coupon code via your email mailing list, to reward those leads and customers who have signed up.
There are other times when you’ll want a discount to apply to everyone who visits your store. You could accomplish this by placing a coupon code in a prominent place, such as a banner at the top of your site, and inviting everyone to use it.
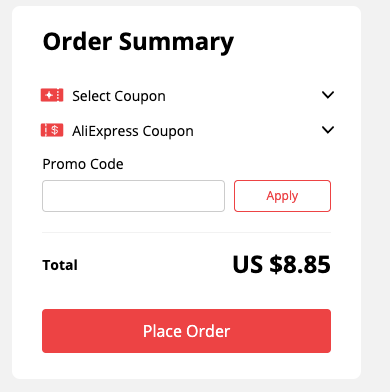
However, it’s usually better to create an ‘auto-apply’ coupon. This will activate the promotion for any customer who qualifies for it – with no action required on their part.
That way, no one who can take advantage of the deal, will miss it.
Plus, you’ll be offering customers a simpler and more streamlined experience, and providing a nice surprise for those who weren’t aware of the deal beforehand.
When To Use A WooCommerce Auto Apply Coupon
So, when might you want to make a WooCommerce auto-apply coupon? There are no hard-and-fast rules about when this kind of discount is appropriate. However, some of the most common uses include:
- Holiday and seasonal promotions that you want every customer to benefit from
- Store-wide sales – i.e., 5% off all items in the shop
- Specialized deals that only apply when certain conditions are met – for example, 10% off purchases of $50 or more
- Reduced or free shipping deals
In general, if you want only a certain segment of customers to be able to use a particular discount, it’s best to go with a traditional coupon code.
You can make that code available only to select people. For most other deals, it’s a good idea to implement the auto-apply feature, so that no one misses out on them.
Creating WooCommerce Auto Apply Coupons (In 4 Steps)
At this point, you’re probably wondering how you can set up auto-apply for your WooCommerce site’s promotions. The good news is that this is a simple task. Let’s walk through how it works (we’re assuming that you already have a WooCommerce store set up and ready to go).
Step 1: Create a new coupon
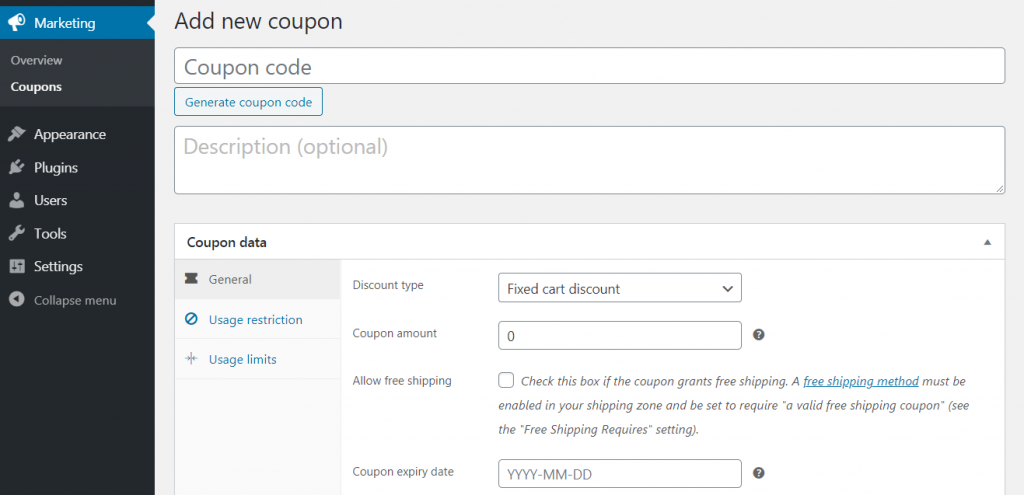
First and foremost, you’ll want to set up your coupon. To do this, head to Marketing > Coupons in your WordPress dashboard, and add a new coupon:
This will take you to an editor where you can customize your deal. The first thing you’ll want to do is create a coupon code – this can be whatever you like. Even though you’ll be enabling auto-apply, you’ll still need a code.
You can also include a description for internal purposes. This won’t be seen by customers, so it’s useful for organizing your store’s coupons.
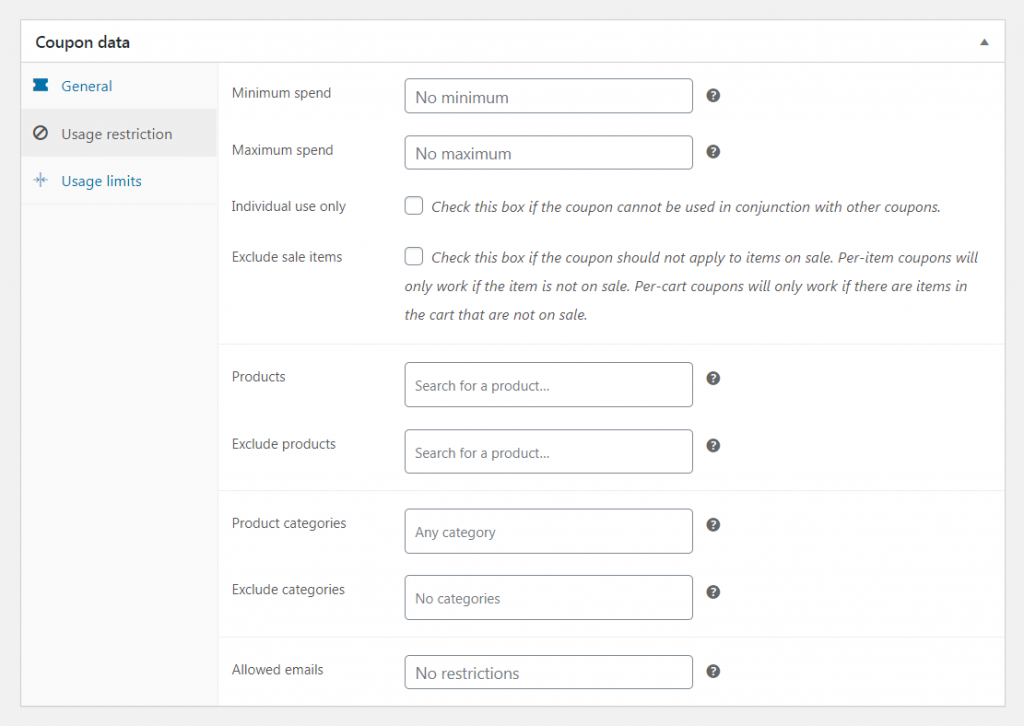
After that, you can configure your coupon in the Coupon data section:
This is where you can select a discount type, determine how much customers will save, give your coupon expiration date, and more. You can also set usage restrictions and limits – for example, you may only want to let each customer use the coupon once or put a cap on the discount.
Step 2: Customize your coupon with advanced options
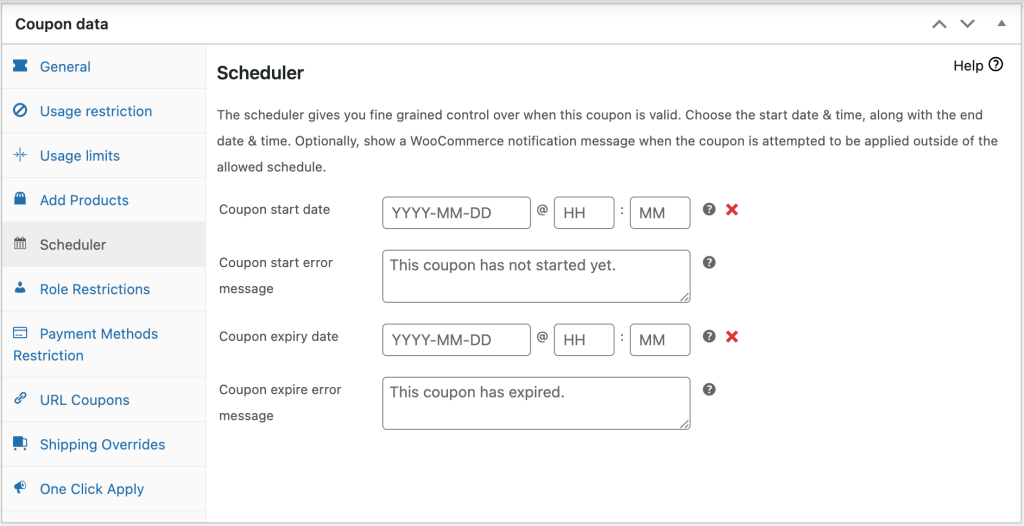
If you’re working with the default Woocommerce coupon options, that’s about it. If you have Advanced Coupons installed, however, you’ll have a variety of additional choices:
You can do many things here, such as:
- Set up Buy One Get One deals
- Choose specific products for your deal to apply to
- Schedule your deal in advance
- Restrict your promotion to particular user roles (such as wholesale customers)
- And much more
Which options you take advantage of will depend on the kind of auto-apply coupon you want to create.
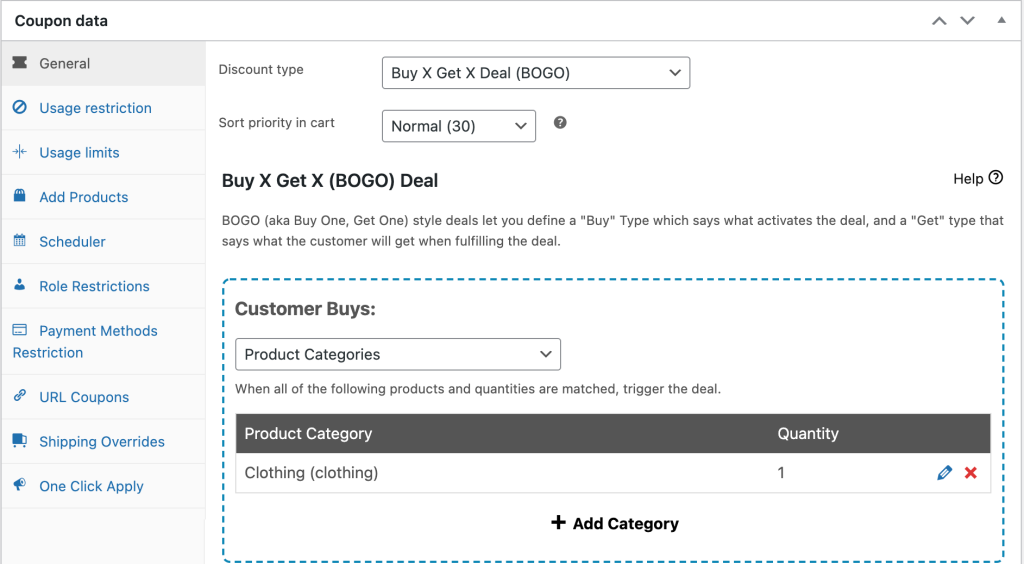
For example, let’s say you want to offer a ‘buy one get one free’ deal on all the clothing items in your store. To do that, you could go to the General tab and choose the Buy X Get X Deal (BOGO) discount type then select the Customer Buys “Product Categories”:
This would enable you to choose the Clothing category so that the deal is only triggered when a customer adds that type of item to their cart. You could then select the same options under Customer Gets, enabling the customer to include a second clothing item in their order for free.
Step 3: Set up cart conditions
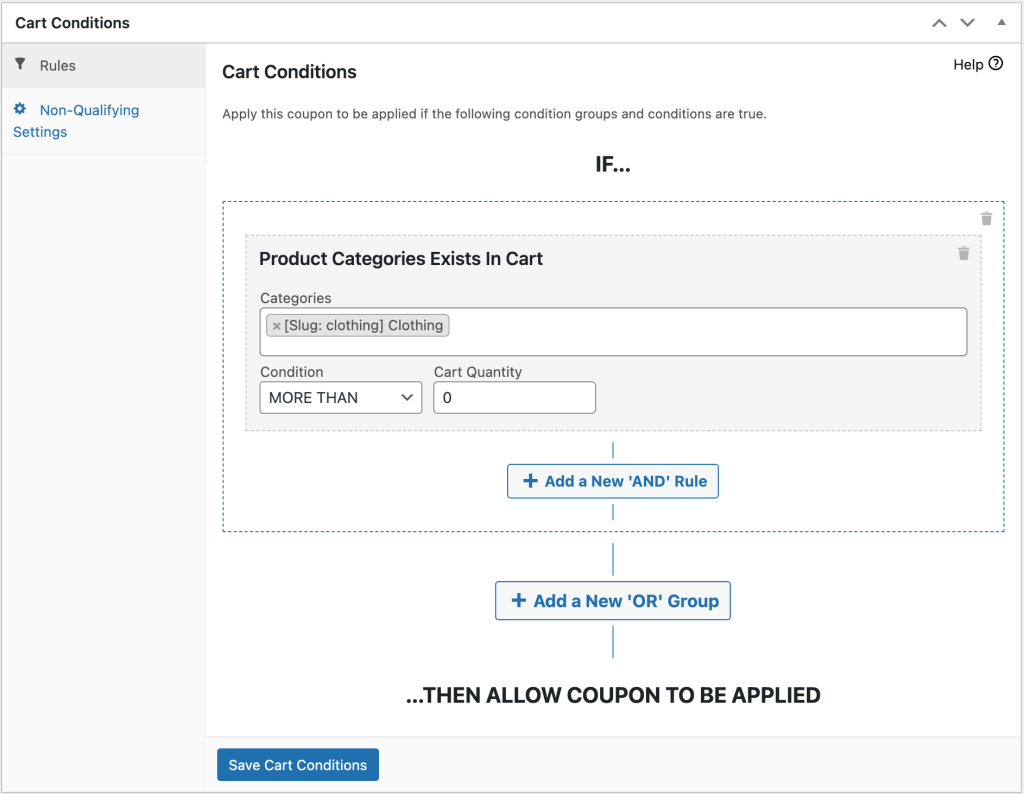
The above options let you customize your coupon to do just about anything you’d like. If you want even more fine-tuned control over your promotion, though, you can check out the Cart Conditions section:
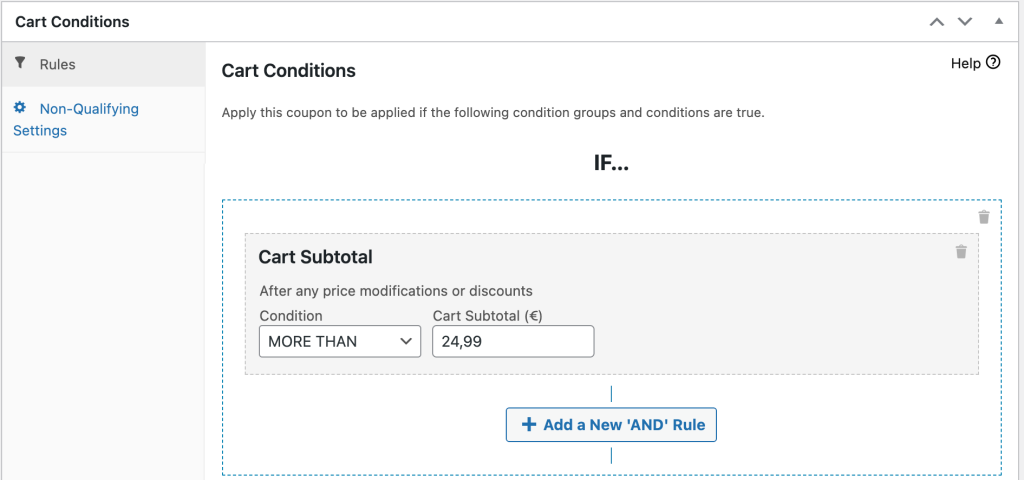
This feature lets you use If/Then statements to customize exactly how your coupon works. As an example, let’s say you want your BOGO deal to only take effect when a customer is spending $25 or more. You could do this by selecting Cart Subtotal from the drop-down menu, and hitting the Add button:
Then, you could enter “More Than” and “24.99” into the following fields. Once this condition is added and saved, the coupon will only be available to customers with cart subtotals of $25 or higher.
This is only the tip of the iceberg – you can do a lot with cart conditions. For more details and examples, you can check out the Advanced Coupons documentation.
Step 4: Enable auto-apply
At this point, your coupon is customized and ready to go.
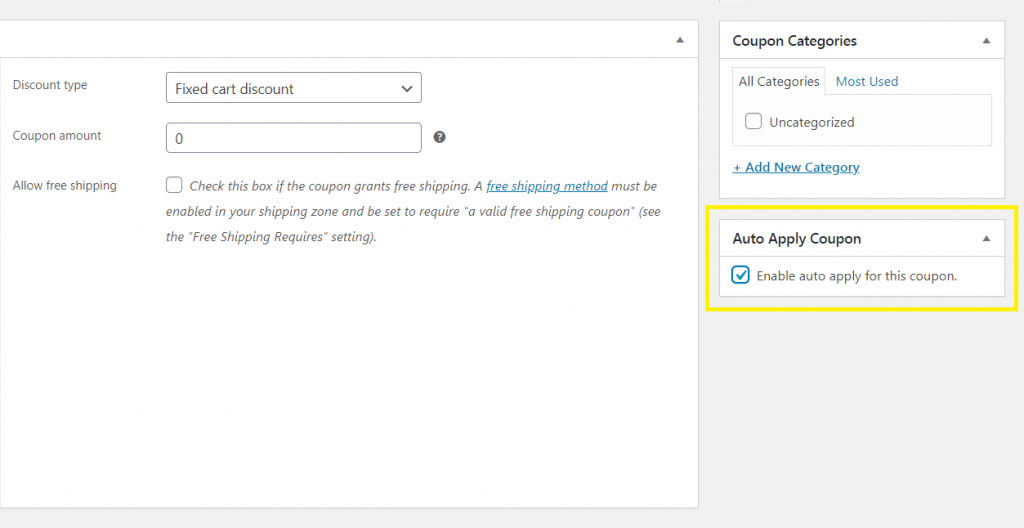
All that’s left is to make it an auto-apply coupon. This is actually the simplest step of all. In the right-hand menu, you’ll find an option labeled Enable auto-apply for this coupon:
Simply check that box, and you’re all set! Once your coupon is published, it will apply automatically to all customers who meet its requirements and conditions.
Of course, just because your coupon auto-applies doesn’t mean you shouldn’t promote it.
A good next step is to make sure customers are aware of the promotion – advertise it on your site, send it out to your email list, post about it on social media, and so on. Getting people excited about the deal should drive them to your site to check it out – making your coupon well worth the effort.
Conclusion
Running an effective e-commerce store is all about providing an excellent customer experience. One of the best ways to do that is by making things easy on buyers – for example, automatically applying coupons rather than making customers do that work themselves.
As we’ve seen, it’s simple to make a WooCommerce auto-apply coupon. All you’ll need is the Advanced Coupons plugin and follow the following steps:
- Create a new coupon.
- Customize your coupon with advanced options.
- Set up cart conditions.
- Enable auto-apply.
Do you have any questions about how to customize your new coupon? Ask away in the comments!


