Sales are a great way to grow your business and attract new customers. However, if you aren’t strategic with your promotions, you could fail to boost conversions on your online store. One way to prevent this is by running WooCommerce scheduled sales for your business.
With Advanced Coupons, you can get more control over your sales. For example, you can activate coupons on specific days and times. This way, you can create a sense of urgency around your offers and drive more traffic to your store.
In this post, we’ll take a closer look at the benefits of scheduling sales in WooCommerce. Then, we’ll show you how to do this in three easy steps. Let’s get started!
The Benefits Of WooCommerce Scheduled Sales
When you schedule sales, your offers and discounts will only be applicable for the specific date and time that you choose. You can use coupon schedules to set rules for different days of the week and even different hours of the day.
For instance, you can create a coupon that gives customers 50 percent off between 6 p.m. and 8 p.m. this Friday evening. Many e-commerce stores use these limited-time offers for end-of-season sales and holiday promotions.
Running sales is an excellent way to boost revenue and grow your business. Additionally, it can help you improve customer retention since you’re offering discounts to reward loyal customers.
When you schedule sales, you can create a sense of urgency by positioning your offers as limited and exclusive. This can drive high levels of traffic to your store as shoppers try to secure deals quickly.
Plus, if you time sales wisely, you can cash in on peak spending times when it can be easier to encourage customers to buy more.
How To Set Up WooCommerce Scheduled Sales (In 3 Steps)
WooCommerce provides a basic scheduling feature that lets you set an expiry date for your coupons. This would be sufficient for basic coupon automation.
However, if you want to set precise day/time coupon schedules, you’ll need a third-party plugin like Advanced Coupons:
Our plugin comes with a ton of features to help you improve your marketing campaigns!
On top of the scheduler feature, you can use Advanced Coupons to create unique BOGO deals, cart conditions, and more. Additionally, with features like auto-apply coupons, you can make it even easier for customers to enjoy your deals.
Our coupon scheduler enables you to create a timeframe for your customers to redeem their discounts. Let’s take a closer look at how it works:
Step 1: Create a new coupon
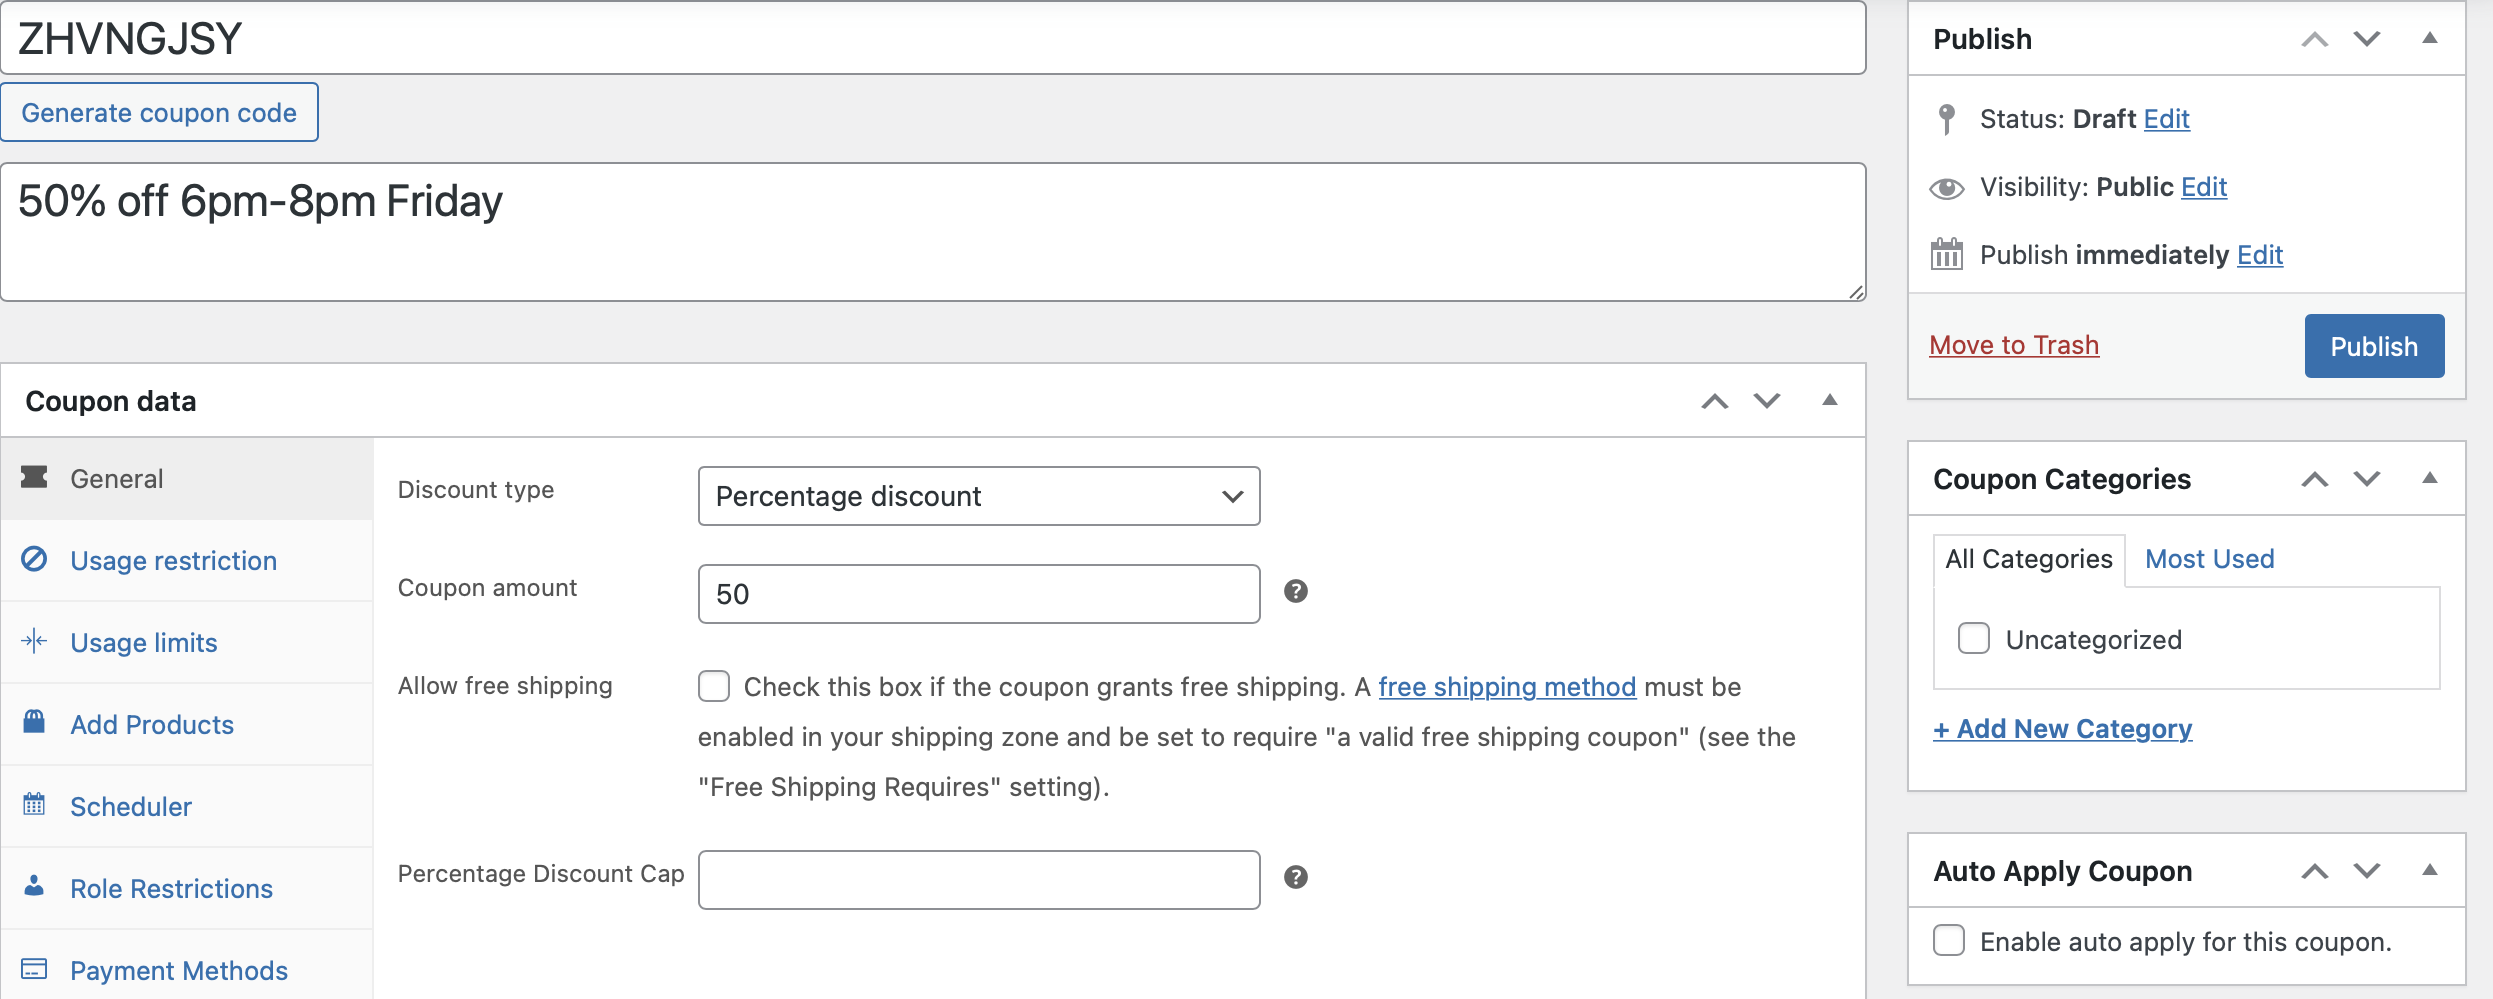
Once you have Advanced Coupons, you can head to Coupons > Add Coupon to create your offer:
Here, you can enter your coupon code, or we can generate one for you using a random string of letters and numbers. Then, fill in the Coupon Data section, setting parameters for your offer. For example, you can select a discount type and choose your coupon amount.
Additionally, you can set a percentage discount cap and determine usage limits for your coupon. You can decide how many times your coupon can be used before it’s void. Plus, you can determine how many items the discount can be applied to in your customers’ shopping carts.
Step 2: Schedule your coupon
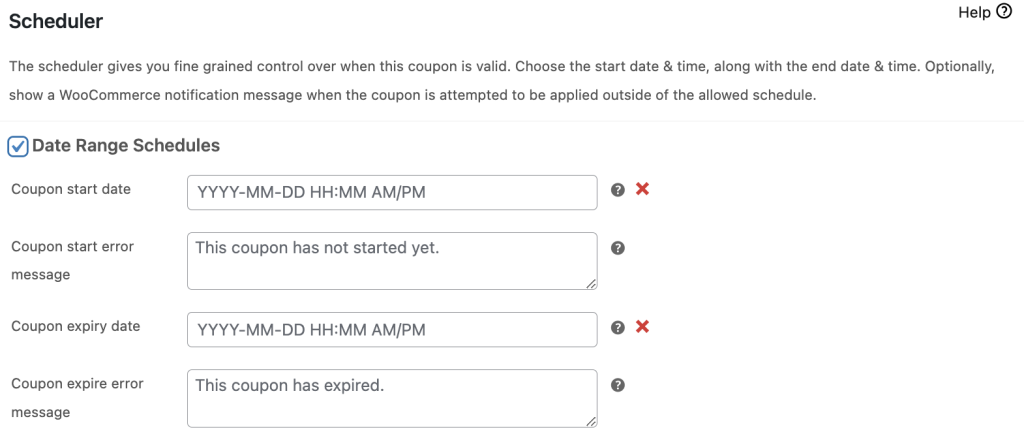
Next, switch to the Scheduler tab to set up WooCommerce scheduled sales.
Here, you’ll have two options to schedule your coupons:
- Date Range Schedules, which are available with the free plugin,
- or the Day & Time Schedules feature, which gives you more control over your coupons.
We’ll go ahead and use the second option for this tutorial. Note that you’ll need the premium version of Advanced Coupons to access this feature.
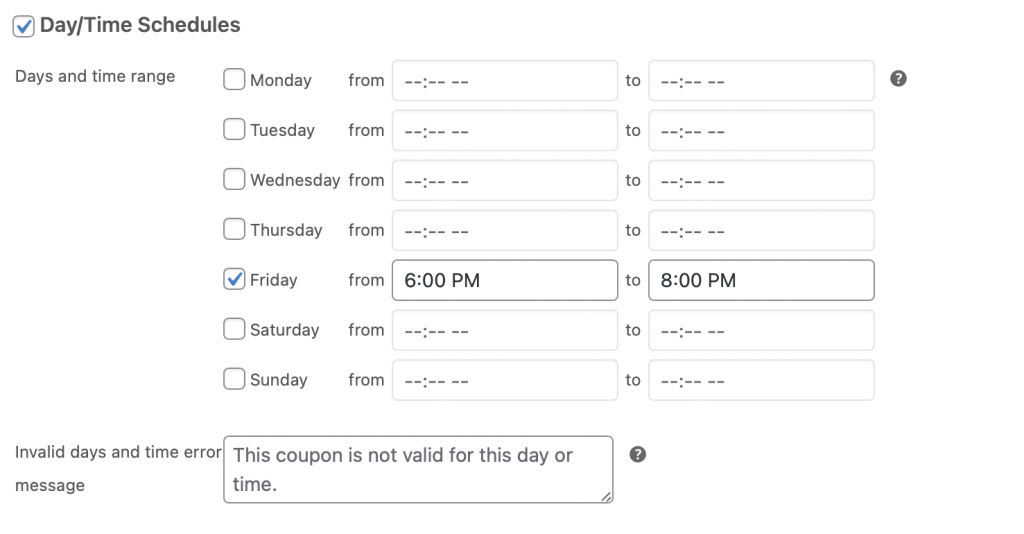
Simply tick the box beside Day/Time Schedules to access your timetabling options:
Then, choose the days when you want to run your sale. You can also specify a time when you want your coupons to become available. The smallest possible sale window that you can create is one minute.
Step 3: Set your error message
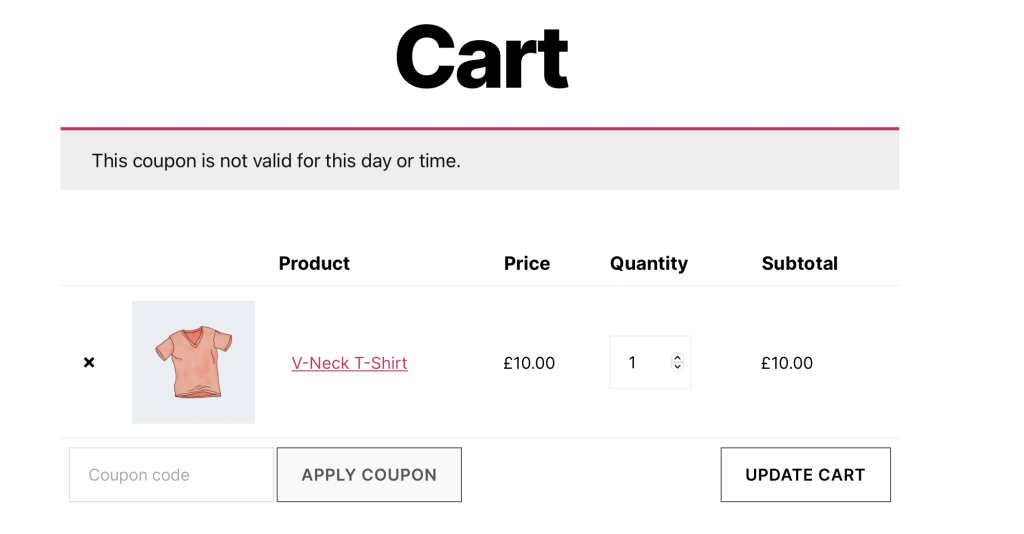
Using the Advanced Coupons scheduling feature, you can display a notification message when visitors try to use the discount outside the permitted day or time. To do this, enter your text in the Invalid Days and Time Error Message field (shown above).
Here’s what this notification may look like on the customer’s cart page:
It can be a good idea to draw customers to some other benefit to minimize their disappointment in not being able to use the discount. For instance, you can point them toward a new offer or coupon or promote a new release to keep them engaged.
Once you’re happy with your settings, you can save or publish your new coupon.
Conclusion
Sales are a great way to boost revenue. However, it’s important to make the most of every opportunity. Using Advanced Coupons, you can schedule sales for specific days and times. This way, you can prompt shoppers to secure deals quickly.
To recap, here are three steps to set up WooCommerce scheduled sales:
Do you have any questions about scheduling sales? Let us know in the comments section below!


