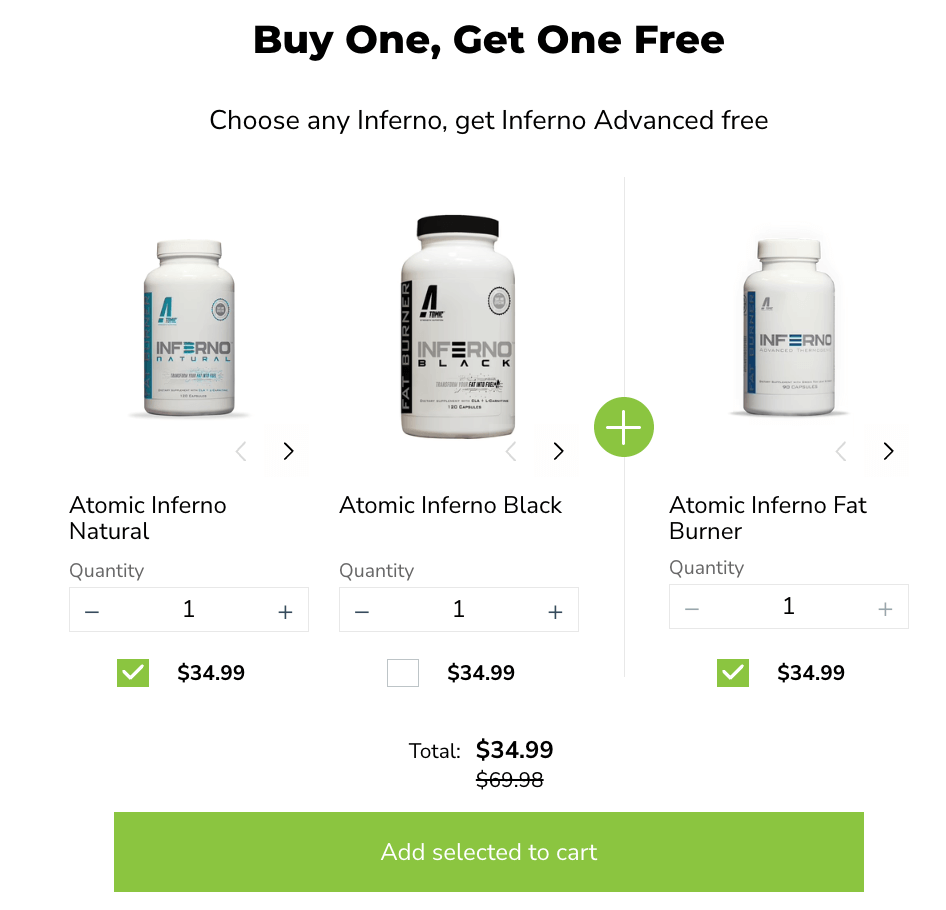
In the world of e-commerce, offering attractive incentives to customers is crucial for driving sales and building customer loyalty. One popular promotion strategy is the Buy One Get One Free coupon.
BOGO deals provide customers with the perception of getting something for free or at a significant discount, while still allowing the store to make a profit. Unlike the normal 50% off discounts, BOGO discounts provide a different layer of incentive which helps drive sales even further.
In this article, we will dive into the concept of Buy One Get One free coupon. We will also explore how to create and configure a BOGO coupon in WooCommerce using Advanced Coupons. Let’s get into it!
Understanding The “BOGO” Concept
Before we dive into the details of creating a BOGO coupon, let’s first understand what it actually means.
BOGO is an acronym for “Buy One, Get One.” It is a type of pricing deal that retailers use to give discounts to customers, making it appear as if they are getting something for free or at a reduced price.
However, in reality, the store still makes a profit when the total quantity of the deal is considered.
For example, a common BOGO deal is “Buy 2 T-Shirts and Get 1 T-Shirt Half Price.”
On the surface, it seems like the customer is getting a shirt at a 50% discount. However, when you consider the other two shirts, the actual discount is around 16.66%. This strategy allows businesses to provide attractive incentives to customers without sacrificing significant profit margins.
How To Create A Buy One Get One Free Coupon In WooCommerce
To create and configure a BOGO coupon in WooCommerce, you will need to use a third-party plugin that adds the necessary BOGO features to your store.
In this case, I recommend Advanced Coupons Premium:
This plugin adds extra features to your standard coupon interface and fully implements multiple different types of BOGO coupons in WooCommerce. Additionally, it simplifies the process of setting up BOGO deals on your WooCommerce store.
In this guide, we’ll cover 5 easy steps to create a buy one get one free coupon using Advanced Coupons:
Step 1: Create a new coupon.
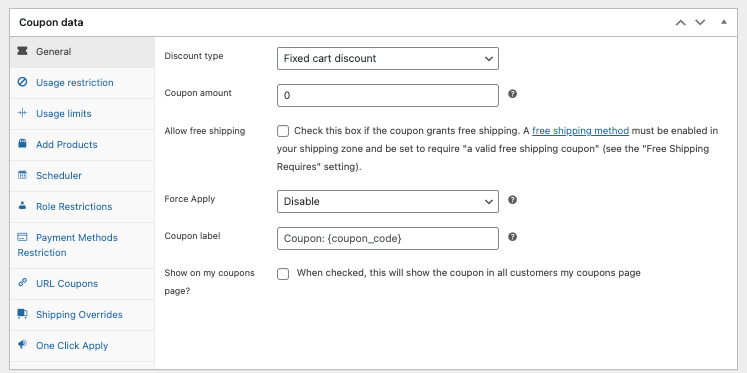
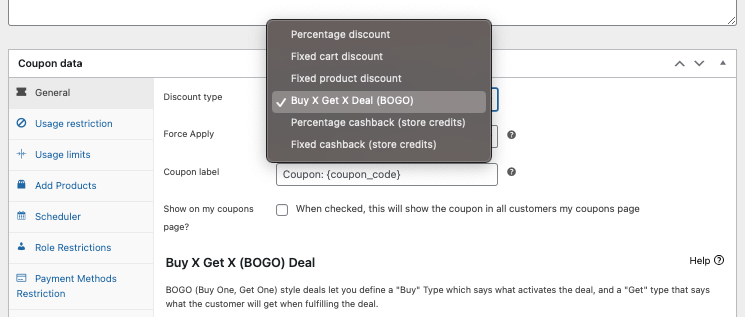
Assuming that you’ve got Advanced Coupons up and running, simply navigate to Coupons > Add New > Coupon Data:
Since we’re setting up a BOGO deal, choose “Buy X Get X Deal (BOGO)” under Discount Type. This option lets you define the conditions for the BOGO deal:
Step 2: Choose the “buy” type.
After selecting the discount type, you’ll see two sections below:
- Customer Buys
- Customer Gets
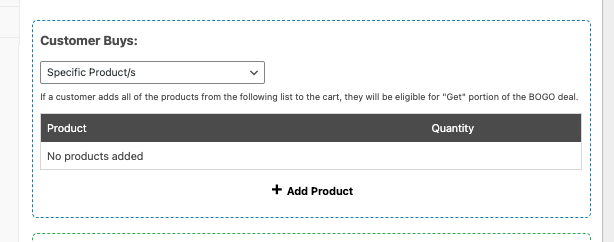
First, select the “Buy Type” under the “Customer Buys” section. This determines what triggers the BOGO deal:
As you can see, you have several options to choose from:
Specific products
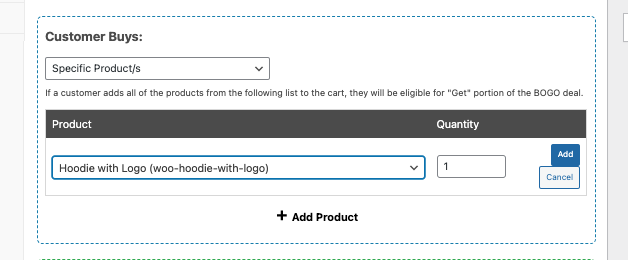
The “specific product” buy type allows you to trigger a BOGO deal when specific products are in the customer’s cart. You can specify the exact products and quantities required for the deal to become active. This is useful when promoting a particular model or variant of a product.
Any combination of products
The “any combination of products” buy type allows the customer to choose any combination of products from a specified list. As long as the total quantity requirements are met, the deal will be triggered. This is ideal for promotions where customers have flexibility in choosing the products.
Product categories
The “product categories” buy type allows you to set up the BOGO deal based on specific product categories. Customers can choose any product from the designated category or categories to trigger the deal. This is a great option when you want to promote multiple products within a particular category.
Any products
Lastly, the “any products” buy type triggers the BOGO deal when any product from your store is in the customer’s cart:
This provides maximum flexibility, allowing customers to choose any product to qualify for the deal.
Step 3. Configure the “get” type.
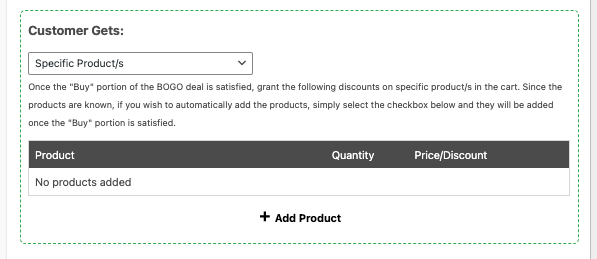
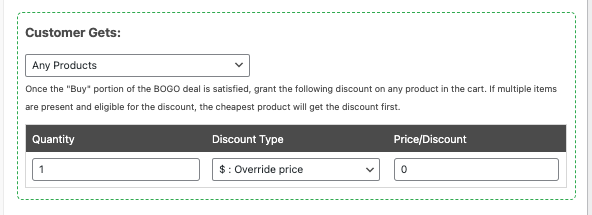
Once you have the “buy” type sorted, go ahead and specify the “Get Type” under the “Customer Gets” section. This, now, determines what the customer should get as part of the BOGO deal:
Just like the former, you also have several “get” types to choose from:
Any products
The “any products” get type allows you to specify any product that the customer will receive as part of the deal. You can set the:
- desired quantity,
- override the price,
- or provide a percentage discount on the product.
When the customer adds the specified product to the cart, the system will automatically adjust the pricing to satisfy the deal:
Any combination of products
The “any combination of products” get type, on the other hand, lets the customer choose any combination of products from a specified list.
The system will adjust the pricing of the chosen items to satisfy the deal. So, for example, if the customer adds multiple eligible products, the system will give them the cheapest item as part of the deal.
Product categories
The “product categories” get type works similarly to “any combination of products” get type, but it applies to entire categories instead.
The customer can choose any product from the designated category or categories, and the system will adjust the pricing accordingly. As with the previous type, the system will give the customer the cheapest item if they add multiple eligible products.
Step 4. Set up the BOGO notification message.
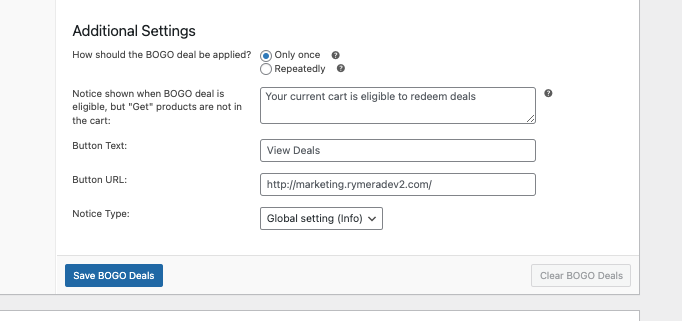
Now that you’re done with the technical setup, it’s time to set up the notification message:
The BOGO notification message is a helpful tool to guide customers on how to redeem the BOGO deal. You can customize the message to provide instructions and include a button that links to the appropriate page where customers can add the correct products.
This encourages customers to take action and ensures they understand the deal requirements.
Step 5. Automate your BOGO coupon.
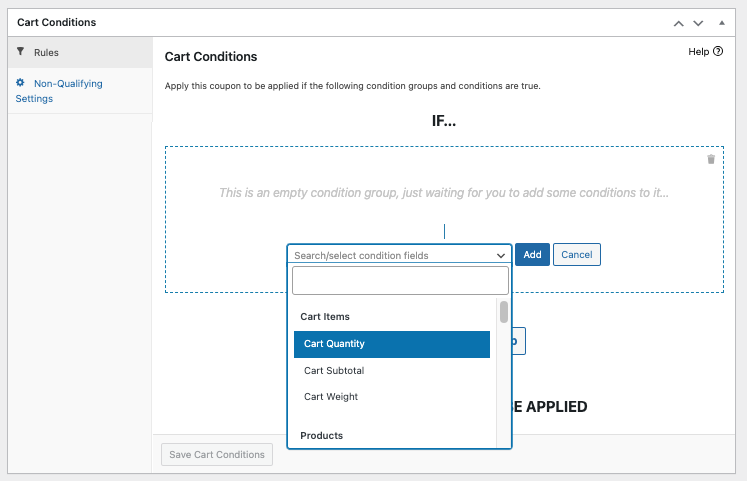
Finally, to take your BOGO coupons to the next level and enhance the user experience, you can automate the application of the deal using two additional features:
- Cart conditions — allow you to set specific conditions that must be met for the coupon to be applied
- Auto apply — automatically applies the coupon when the cart conditions are met
These features ensure that the BOGO coupon is applied automatically when the specified conditions are met, streamlining the purchasing process for your customers.
Conclusion
Creating a buy one get one free coupon can be a powerful strategy to attract customers, increase sales, and drive engagement on your WooCommerce store.
By following the steps outlined in this guide and utilizing the Advanced Coupons plugin, you can easily create and manage BOGO deals that align with your business goals:
- Create a new coupon.
- Choose the “buy” type.
- Configure the “get” type.
- Set up the BOGO notification message.
- Automate your BOGO coupon.
Do you have any questions about creating a buy one get one free coupon? Let us know in the comment section down below!

