Unfortunately, lots of e-commerce stores struggle with high cart abandonment rates. Offering a generous discount applied at checkout is a great way to combat this. However, your efforts could complicate your checkout process and confuse customers.
Luckily, you can avoid this by setting up an automatic discount applied at checkout. This way, you’ll be able to increase customer satisfaction while maintaining a streamlined ordering flow.
In this post, we’ll introduce you to automatic discounts applied at checkout and explain the benefits of using this strategy. Then, we’ll show you how to do this using WooCommerce coupons. Let’s dive in!
What Are Automatic Discounts?
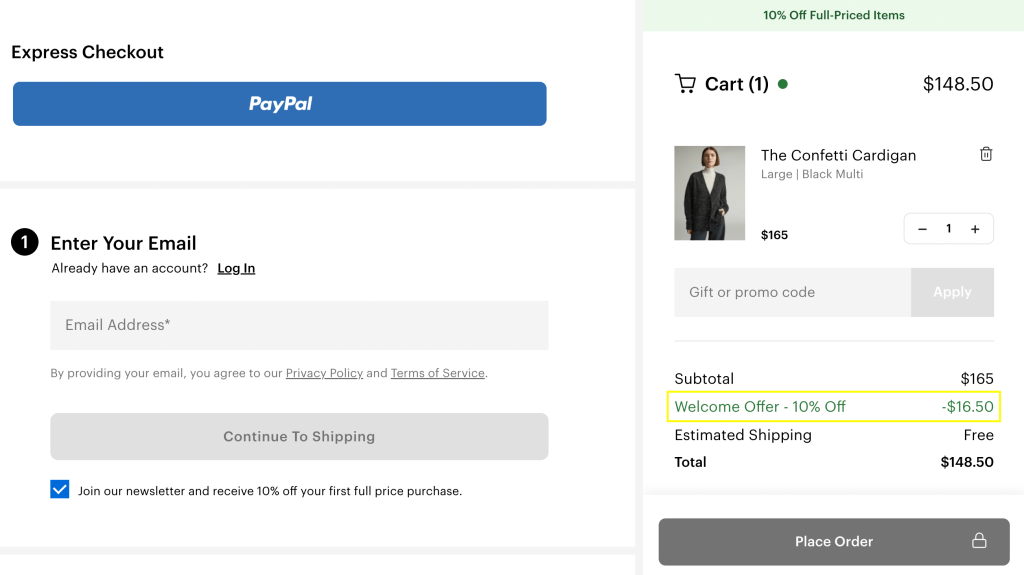
Automatic discounts are promotional offers that are instantly applied to a customer’s order without requiring them to enter a code or take a manual action. Shoppers automatically see savings during checkout, creating a hassle-free shopping experience. It’s also a great way to ensure customers don’t miss out on available deals if their cart qualifies.
Plugins like Advanced Coupons allow you to set specific cart conditions and restrictions to ensure only eligible customers receive the discount. For example, you may require shoppers to reach a minimum cart total, purchase specific items, or be logged in as returning customers. The combinations are endless; it just depends on how you want to tailor your offer.
Offering a discount applied at checkout is particularly helpful in these scenarios:
- Welcoming new customers with a first-order discount
- Encouraging larger purchases with tiered cart total requirements
- Running flash sales without needing to announce codes
- Rewarding loyal customers for repeat purchases
Why Offer Discounts Applied At Checkout?
Providing customers with discounts and coupons is a timeless marketing strategy. As ecommerce shopping continues to rise, making these discounts automatic and more convenient can be a game-changer for store owners.
Usually, customers need to enter a unique code at checkout in order to receive a discount. This coupon model makes sense when you’re targeting very specific users, such as newsletter subscribers or loyalty program members.
However, for the most part, this extra step can create friction in the shopping process—your customer might enter the code incorrectly or miss out on the deal completely. Automatic discounts remove that friction, ensuring that:
- Shoppers don’t miss out on eligible offers
- The checkout process is smooth and seamless
- Customers feel rewarded instantly, without confusion
Tools like Advanced Coupons give you full control. With cart conditions and advanced coupon settings, you can automatically apply discounts based on cart quantity, cart total, customer user roles, and so much more.
Most store owners we’ve supported over the years implement a hybrid approach where they use both automatic coupons for flash sales and sitewide offers, and manual codes for hyper-targeted promotions. This is a common (and often effective) dual approach.
3 Key Benefits Of Applying An Automatic Discount At Checkout
Let’s look at a few additional benefits of opting for automatic discounts at checkout!
1. Reduce cart abandonment rates
As we mentioned, cart abandonment is a huge problem for all e-commerce businesses. What’s more, the number one reason for abandoned carts is extra costs that are too high.
Therefore, one excellent way to increase conversions is by offering an automatic discount that allows for free shipping. You could give this deal to new shoppers or to those who spend a certain amount:
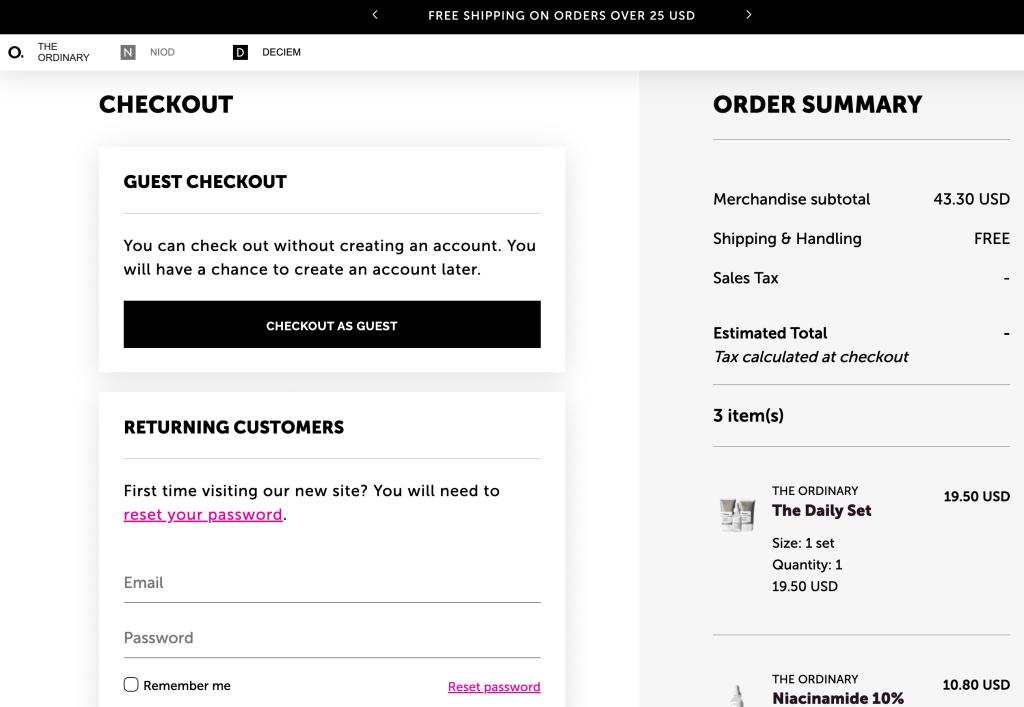
This way, you can likely boost your average order value (AOV) while increasing overall transactions.
2. Boost customer loyalty
If you’ve successfully convinced a customer to make their first purchase in your store, you should definitely be celebrating. Not only because you’ve made a sale, but also because this particular customer now has the potential to become a returning shopper.
You can reach pre-existing customers via email campaigns, social media marketing, etc. This way, you can advertise your promotions on various channels.
However, customers may be disappointed if they’re not sure how to apply a discount they saw advertised in your marketing materials. On the other hand, if the discount is applied automatically at checkout, then they won’t have to worry about it.
This can increase customer satisfaction and boost customer loyalty.
If you’re looking for additional ways to keep your customers coming back, you might want to consider our WooCommerce Loyalty Program plugin:
You can use this tool to set up a loyalty program in just five minutes. Then, you’ll be able to manage customers and coupons more effectively.
Moreover, this will make it easier for you to apply automatic discounts for specific users and user groups. WooCommerce Loyalty Program is also compatible with the Advanced Coupons plugin, which we’ll use later on in this article for the tutorial.
RELATED READ: How To Start A WooCommerce Loyalty Program (Tutorial)

3. Streamline the checkout process
Another benefit of using a discount applied at checkout is that it can help streamline the ordering process. This can improve the overall user experience (UX) and keep your customers happy.
This is crucial since a complicated checkout process is another top cause of cart abandonment. For example, if a user sees that you offer discounts on first orders, but they can’t figure out how to apply it, that could translate to a lost sale.
Even worse, it might hurt your reputation, as users may think your website is confusing or dishonest. Furthermore, a straightforward checkout process can help reduce the number of requests your customer support team receives.
This can free up lots of time. As a result, your team may be able to focus on other tasks and improve your store’s overall customer service.
How To Apply An Automatic Discount At Checkout (In 3 Steps)
Now that you know about the many benefits of using automatic discounts at checkout, we’re going to show you how to create this type of discount using the Advanced Coupons Premium plugin:
Assuming that you already have this powerful plugin installed and activated, let’s go ahead and set up automatic discounts applied at checkout:
Step 1: Create and customize your coupon
If you want to create an automatic discount in WooCommerce, the first step is to install and activate the Advanced Coupons Free plugin. Then, if you want additional features such as extra cart conditions (which will be featured later), you’ll need to select a plan and install Advanced Coupons Premium.
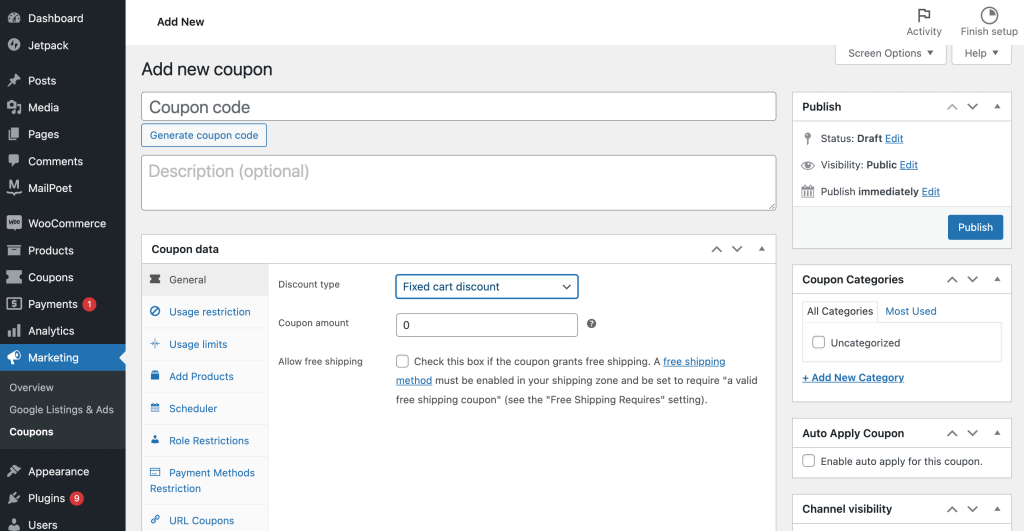
Once you’ve set up your tools and activated your license in settings, you’re ready to get started. To begin, go to Coupons > Add New:
In the coupon editor, you’ll be able to generate a coupon code. This is a crucial step, even though you’re creating a discount that will be applied automatically.
Here, you can also give your coupon code a description and configure your deal under the Coupon data section. By default, the Discount type will be set to Fixed cart discount:
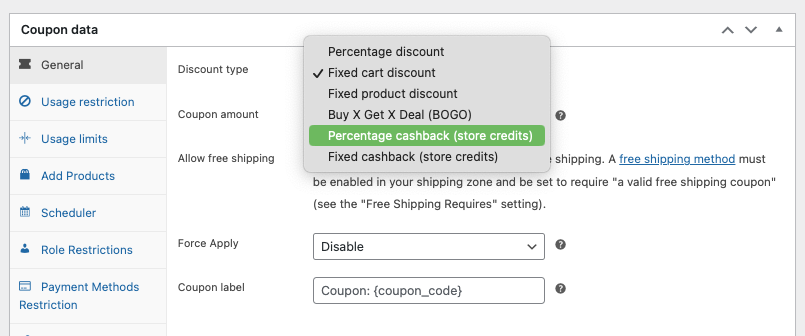
However, you may want to modify this to a Percentage discount or another choice. If you choose this option, be sure to enter a Percentage Discount Cap.
Next, you’ll want to take some time to customize your coupon settings. For instance, you may want to configure a Buy One Get One (BOGO) deal or create a coupon that’s only relevant to certain products or product categories.
These are just a few of the many potential coupon options. When you’re done with the Coupon data section, scroll down to Cart Conditions.
Step 2: Set up cart conditions
Although an automatic discount applied at checkout is likely meant for a large group of customers, you’ll still want to limit who receives this deal.
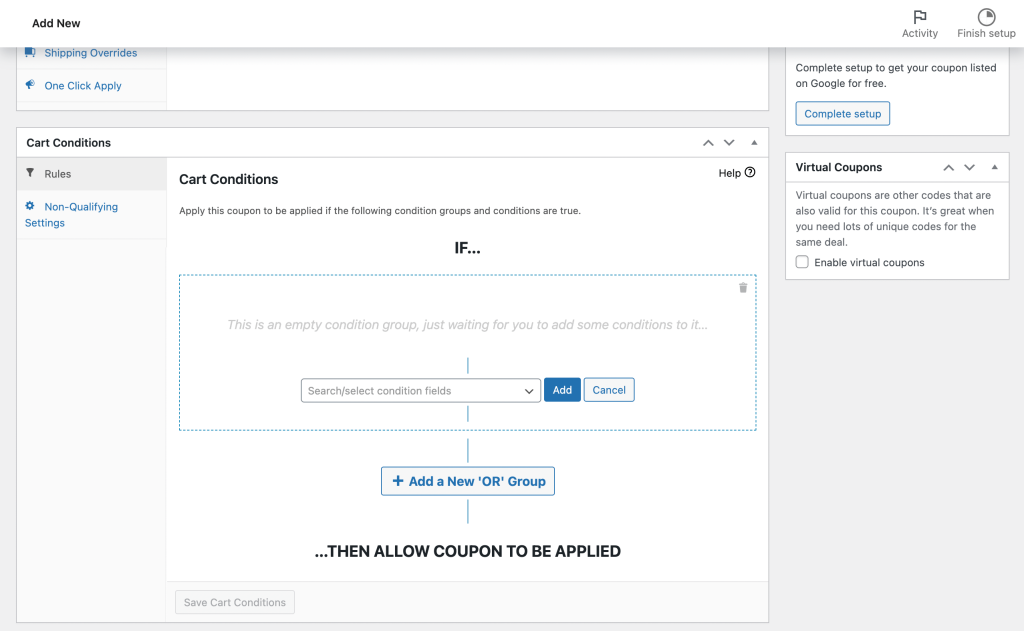
You can further refine your coupon settings under the Cart Conditions section:
On the above screen, you can set up if/then conditions. You can create these simple ‘rules’ based on certain order features, such as Cart Items, Products, Product Categories, and Customers:
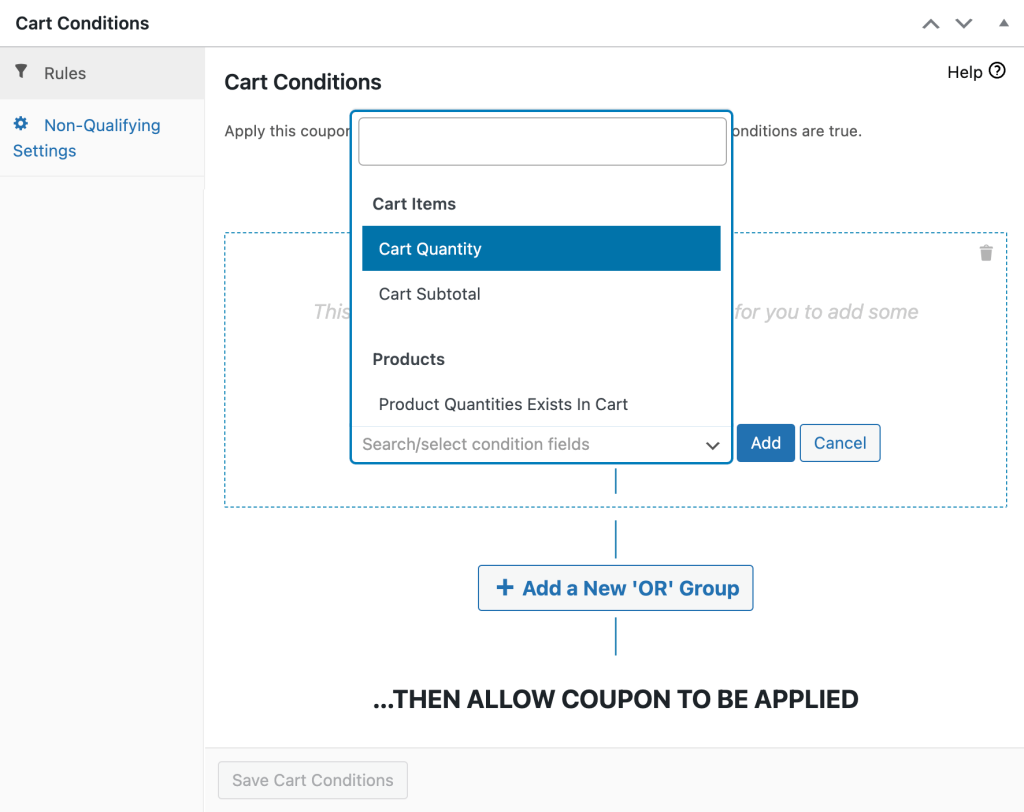
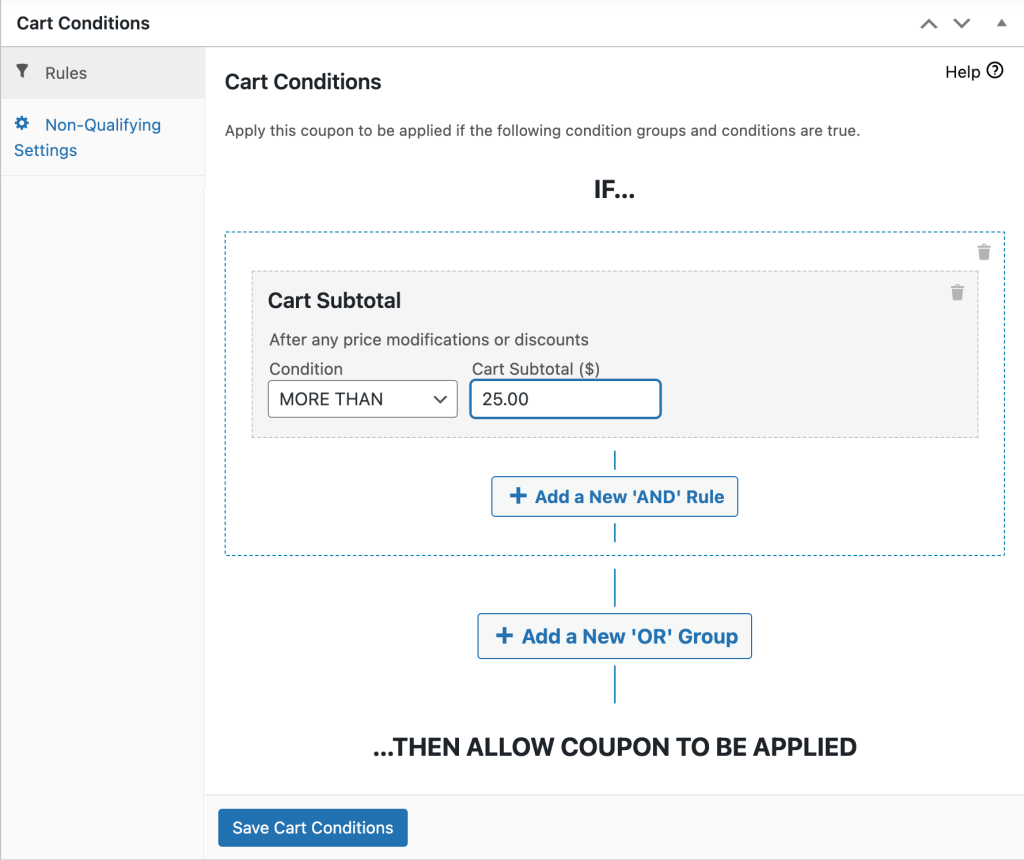
Simply select a condition in the dropdown menu and click on Add. Then, you’ll be prompted to complete the setup for your unique rule. For instance, if you choose Cart subtotal, you’ll then need to choose your Condition and a Cart Subtotal value:
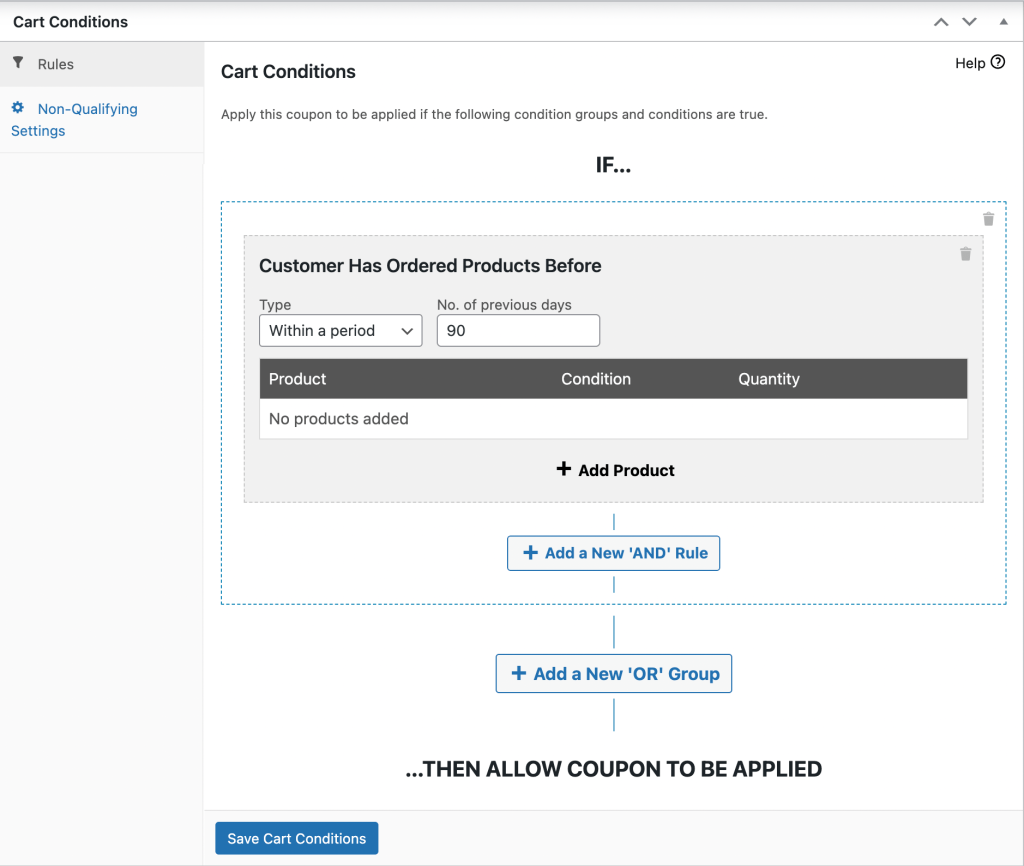
Alternatively, you might want to encourage repeat customers by rewarding people who come back within a period of 90 days:
When you’re happy with your selections, make sure to click on Save Cart Conditions.
Step 3: Enable auto-apply coupons
Finally, all that’s left to do is enable auto-apply coupons.
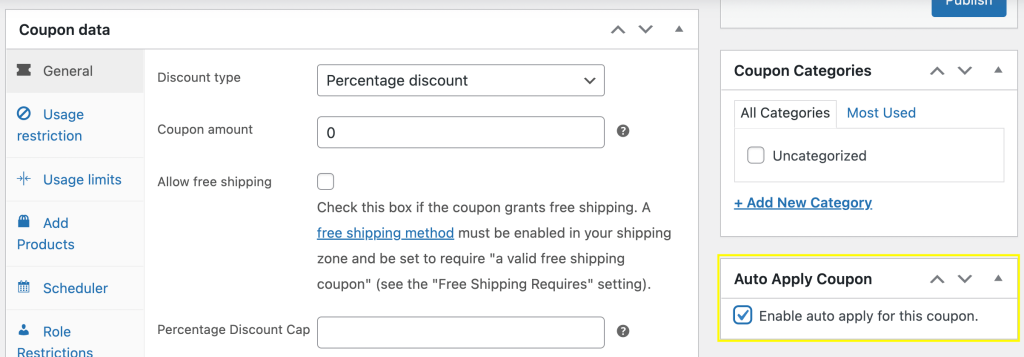
To do this, simply locate the Auto Apply Coupon panel on the right-hand side of your screen. Then, check the box next to Enable auto apply for this coupon:
It’s as simple as that! To activate your new coupon click on the blue Publish button.
Best Practices For Launching Discounts Applied At Checkout
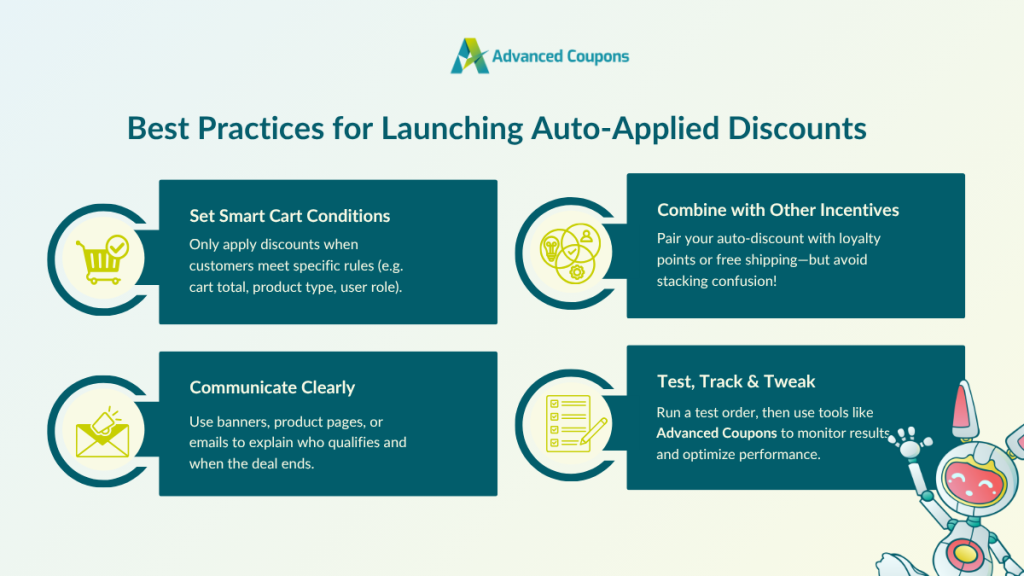
Launching auto-applied discounts is a powerful way to streamline the shopping experience. However, it’s important to set them up strategically to get the best results. Here are some best practices to keep in mind:
1. Set smart cart conditions
Setting cart conditions or coupon restrictions helps protect your profit margins and ensure only qualified customers get the discount. Tools like Advanced Coupons allow you to fine-tune how, when, and who qualifies for the offer.
For example, you can choose to auto-apply deals only when:
- Orders reach a certain cart total or quantity
- Specific products or product categories are in the cart
- The customer has made more than two purchases
- The customer belongs to a specific user role (like “Wholesale Buyer”)
2. Communicate clearly
If you’re offering a discount applied at checkout, you’ve likely set specific conditions for shoppers to qualify. Make sure you clearly communicate these requirements to avoid confusing customers. You can use a mix of website banners, email campaigns, or product page callouts to inform customers of who qualifies and until when the offer runs.
3. Consider combining with other incentives (strategically)
Sweeten the deal by pairing a discount applied at checkout with loyalty points or free shipping. Many WooCommerce store owners we’ve worked with combine auto-applied deals with a loyalty program to reward customer behavior and increase retention. Just make sure the offers don’t stack unintentionally or create confusion.
4. Test, track, and iterate
Before activating the coupon, consider placing a test order on your store to ensure the discount works as expected. This is especially important if you’ve set specific cart conditions or roles eligible for the offer. After the promotion, monitor how discounts perform. If you’re using Advanced Coupons, you’ll gain access to a comprehensive dashboard that summarizes coupon usage data and redemption. This allows you to assess which promotions are working.
Frequently Asked Questions
What does discount applied at checkout mean?
Discounts applied at checkout are offers that automatically reduce the order total during the checkout process. Shoppers don’t need to enter a code or take additional action to claim the offer. It’s a strategy used by ecommerce stores to reduce friction at checkout and create a more seamless shopping experience.
How do you phrase a discount offer?
Keep it clear, short, and value-driven. Mention conditions and spend requirements if applicable. Here are some examples:
- “Enjoy 10% off – no code needed!”
- “Free shipping applied automatically on orders over $50.”
- “Buy 2, get 1 free – discount applied at checkout!”
What does checkout mean in retail?
Checkout is the final step of the purchase process, where a shopper completes their order. In eCommerce, this refers to the page where customers finalize their cart, enter payment and shipping details, and confirm their order.
Conclusion
If you’re looking for a way to encourage your customers to complete a transaction, an automatic discount applied at checkout might do the trick. This simple approach can help you reduce your cart abandonment rates and boost customer loyalty. This article walked you through everything you need to know, including:
- What automatic discounts are
- The key benefits of applying discounts at checkout
- How to create an auto-apply discount in WooCommerce
- Best practices to ensure your discount campaigns are effective
- Common FAQs
If you’re ready to launch this strategy, Advanced Coupons makes it incredibly seamless and easy in WooCommerce. This powerful plugin lets you set smart cart conditions, create auto-apply coupons, and craft advanced deals like BOGO, shipping overrides, URL coupons, and so much more!
Do you have any questions about using an automatic discount applied at checkout? Let us know in the comments section below!


