Attracting brand-new customers to your WooCommerce store can be hard. Instead of having to start from scratch constantly, you’ll want to find ways to encourage one-time customers to become repeat visitors. One way to do so is by offering a discount on second order!
This is where the Advanced Coupons plugin comes in handy. With it, you can easily create coupons for second orders that can incentivize your customers to keep coming back.
In this guide, we’ll show you how to create coupons for second orders in WooCommerce using this powerful plugin. We’ll also discuss the benefits of offering discounts for repeat customers and how it can help improve your bottom line. So, let’s get started!
Why A Discount On Second Order Can Be a Smart Strategy
If you’ve been running your WooCommerce store for any amount of time, you know how hard it can be to get more customers. Unless you’re very lucky, you’ll need to make an investment of time and resources in SEO, various marketing techniques, and improving your website User Experience (UX).
To some extent, you’ll need to continue these efforts over the lifespan of your store. However, once customers start rolling in, you’ll also need to put some of your focus on retaining them. Keeping existing customers around is far more cost-effective than attracting new ones.

There’s no golden ticket to retaining customers.
One of the things that can help, though, is to use simple techniques that encourage buyers to come back to your store soon after making a purchase. You want to stay at the forefront of their minds, and let them know you can be their go-to place for purchasing whatever kind of products you offer.
Here’s what this might look like in practice. A new customer shows up at your store and makes a purchase. Soon afterward, they receive a coupon offering them a discount on their second order. This is a smart strategy because:
- It targets an audience that already has a proven interest in your store.
- You’re grabbing customers’ attention while your shop is still on their minds.
- After an order is placed, you’ll be encouraging buyers to come right back and see what else you have to offer.
That second order can easily lead to more and more purchases over time, providing a strong Return on Investment (ROI) for that initial discount. All you need to do is set it up!
How To Give A Discount On Second Order In WooCommerce
So what do you need to do in order to provide customers with a second order discount?
Naturally, you’ll first need a WooCommerce site set up and full of products. Then, you’ll want to pick up Advanced Coupons:

Our add-on for WooCommerce gives you an unprecedented level of control over how coupons and other discounts work in your online store. This makes it perfect for giving a discount on the second order in WooCommerce. Let’s walk through how that process works, in only two steps.
Step 1: Set up your coupon
First things first – you need to set up your discount, which you can do by creating a coupon. For this, head over to WooCommerce > Coupons in your WordPress dashboard.
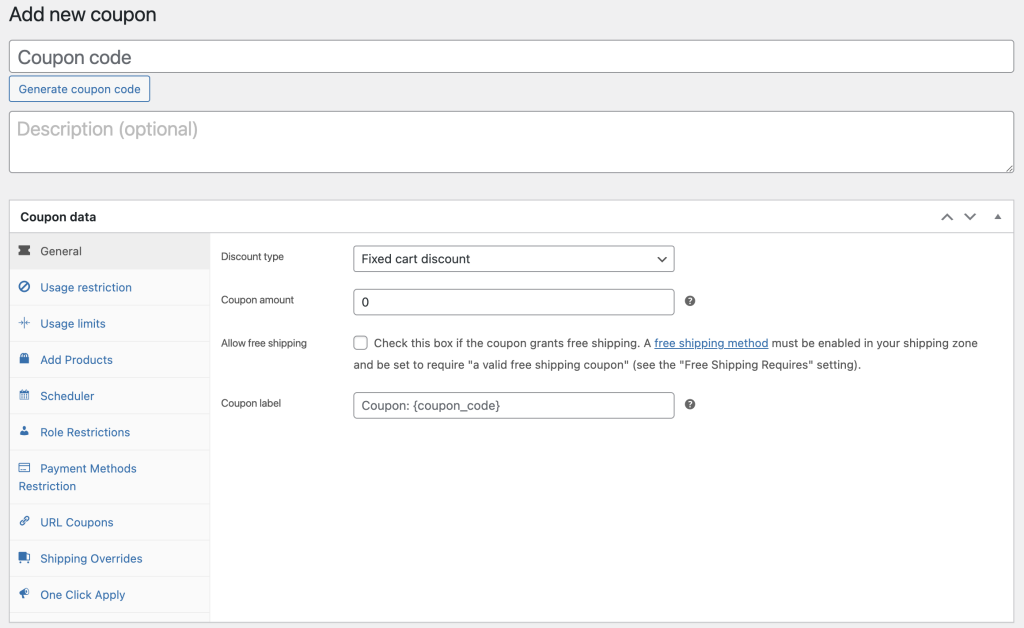
Create a code for your coupon, and give it a description if you like. To the right, you can also assign it to a category. Then check out the options in the General tab:
Here, you can customize the exact discount buyers will be offered.
If you want to offer a simple $10 discount, for example, you can select the Discount type “Fixed cart discount”, and enter “10” in the Coupon amount field. You can also set a percentage discount or a discount on an individual product (rather than the customer’s entire cart).
From there, you can go on to customize your coupon however you like. There are no other settings you have to change here. If you want, however, you can enable free shipping, limit the offer to certain types of customers, add specific products it will apply to, and more.
Step 2: Configure your cart conditions
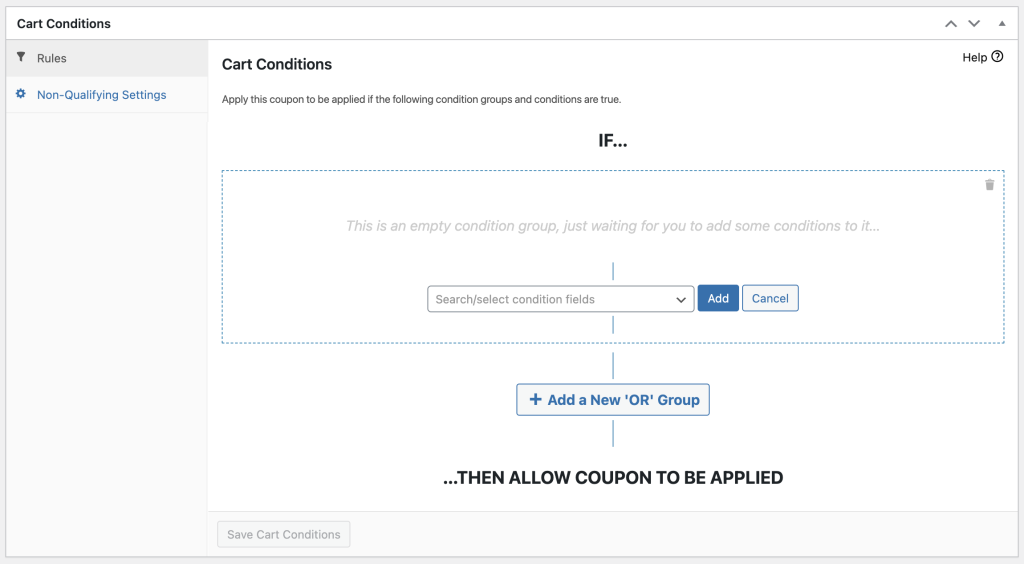
At this point, you have a new coupon-based discount ready to go. All that’s left is to configure it so that it will only apply in specific situations. That’s where Cart Conditions come into the picture:
In this area, you can set up customized rules that determine how and when your coupon is applied.
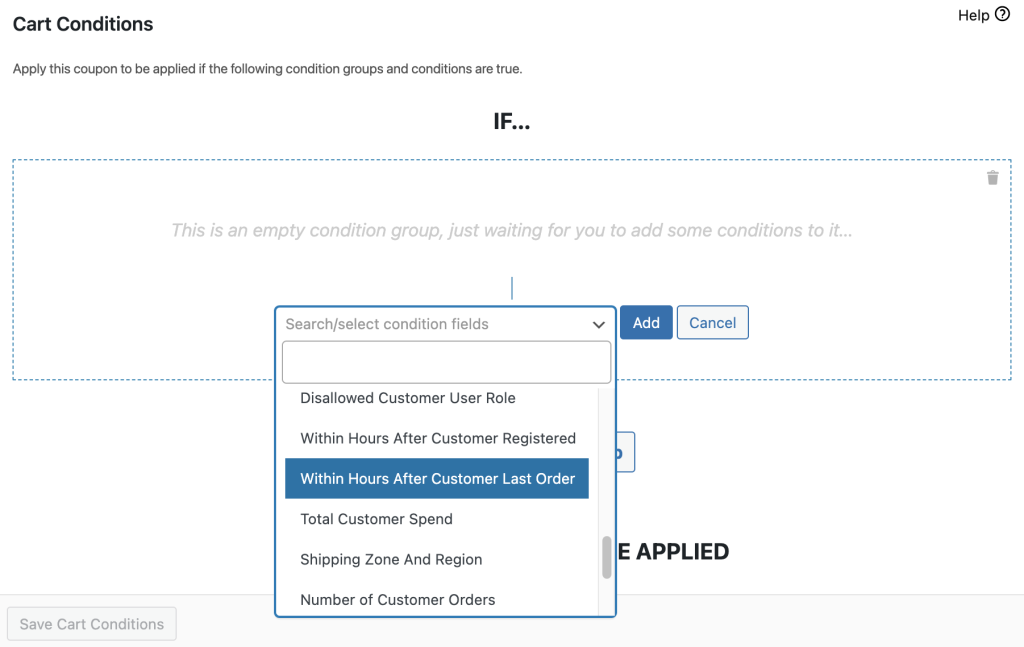
For example, you can select from the drop-down menu “Within Hours After Customer Last Order”:
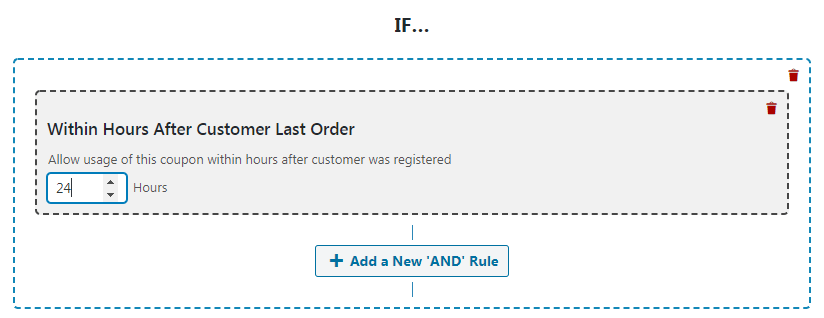
If you add this condition, you can then choose a specific number of hours:
So if we add “24” here, then the discount will only apply to customers who check out 24 hours or less after their previous order.
Alternately, we can select “Within Hours After Customer Registered”:
If you require customers to set up an account before placing an order, this will also help you identify buyers who recently made a purchase. Again, you can customize the exact number of hours after registration that the coupon will be active.
Customer Has Ordered Before Cart Condition
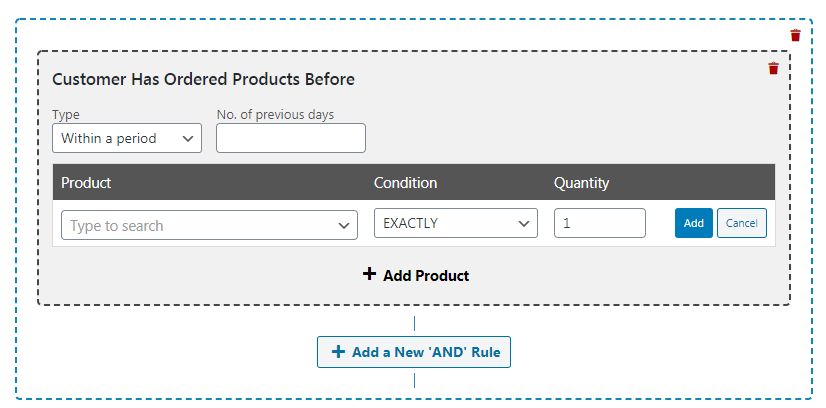
Let’s look at one more option. If you choose “Has Ordered Before”, you can then select one or more specific products and choose a set period of time:
With this method, you could set up a discount that will only apply to customers who have ordered specific items within the last three days (just to give an example). This is useful if you want your discount to only be valid for certain kinds of purchases.
Finally, keep in mind that you can combine cart conditions.
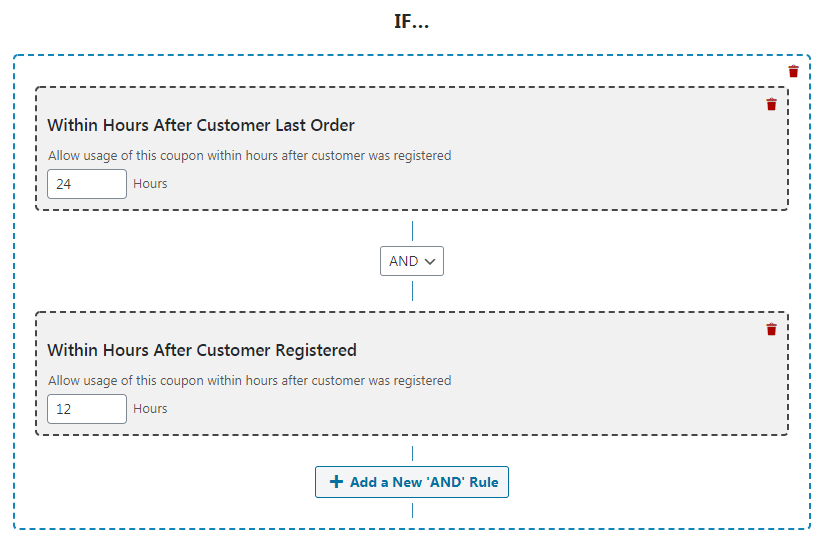
For instance, you could set your discount to apply both for customers who have placed an order within the last 24 hours and for customers who have registered an account in the past 12 hours:
With a little tweaking, you can get complete control over what scenarios will activate your discount.
After that, you just need to make sure customers know about the discount so they can take advantage of it. You could set up an email to be automatically sent after a customer places an order or creates an account, providing them with the coupon code.
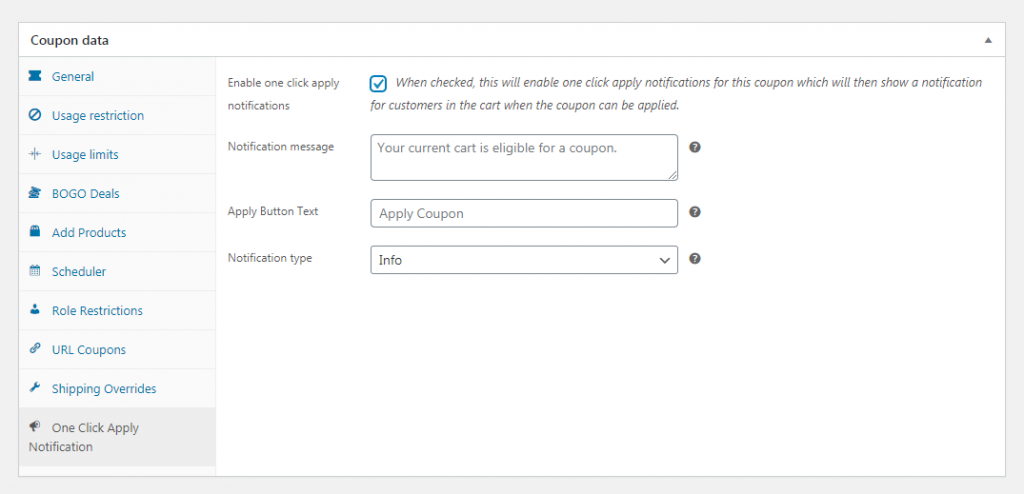
You can also go to the One Click Apply Notification, and enable the “one-click apply” settings:
This will let customers know about the discount right from their order pages, and let them activate it with a single click. You can even customize the message they will see. Last, but not least, remember to publish your coupon when you’re done building and configuring it.
Conclusion
There are a lot of e-commerce stores out there. Just because a customer buys from you once doesn’t mean they’ll come back. You need to provide them with an incentive to do so – such as a discount on the second order in WooCommerce.
As we’ve seen, this kind of coupon is easy to set up with Advanced Coupons. You just need to:
Do you have any questions about how to configure your discount’s cart conditions? Ask away in the comments section below!


