Low profit margins can be problematic for WooCommerce businesses. This is because customers tend to buy one or two products from your online store rather than purchasing multiple items like they would in brick-and-mortar businesses. This is why you need to explore WooCommerce bundle discounts!
Fortunately, using WooCommerce bundle discounts is a simple and highly effective way to drive more revenue when customers buy from your store. This marketing strategy can incentivize customers to add additional items to their carts, increasing the profit on each sale.
This article will explain WooCommerce bundle discounts and some of the benefits of giving them. We’ll also provide a step-by-step guide on getting started with bundle discounts in your online store. So, let’s jump straight into it!
An Introduction To WooCommerce Bundle Discounts
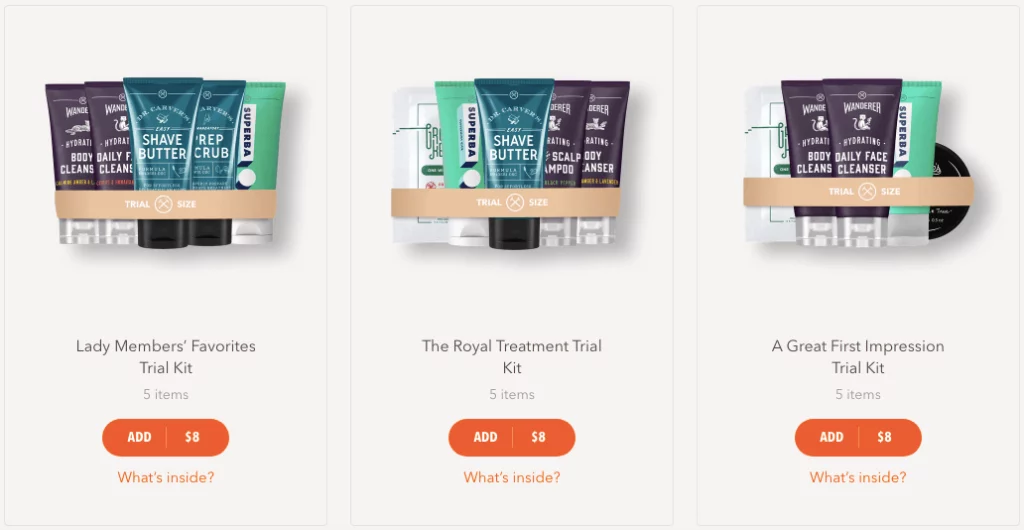
A bundle discount is a special offer that customers receive for purchasing a specific set of products. For example, a particular combination of items may cost $15 if bought individually, but when bundled together, it could come down to just $10.
This pricing strategy is highly effective because it clearly shows customers that they are getting a great deal. Even though they probably spent more than planned, the purchase has a better-perceived value.
One of the best-known examples of this pricing model is meal combos in fast food chains. For example, at McDonald’s, a single Big Mac typically costs $5.99.
Without bundle discounts, many customers would be happy with just the burger. However, the Big Mac Meal has a higher perceived value than just a Big Mac, so it’s a more popular option.
The same principle can apply to your WooCommerce store. You can group your products with similar items to increase your overall sales.
The Benefits Of Offering Bundle Discounts To Customers
There are several ways that product bundling can benefit e-commerce businesses.
First, it can help increase revenue. Since the customer is ordering multiple products in a single purchase, your acquisition and distribution costs will be much lower than if you sold each product separately.
These deals can also attract returning customers. If a consumer liked what they bought from you before, they may see the value in the bundle and make the purchase. Therefore, you won’t have to convince them of your store’s quality and reliability.
In addition to returning business, bundles can also help you reach new customers. Whether it’s through an email list or social media advertisement, the perceived value of the deal could tempt a prospect to consider making a purchase.
Bundling can also be a highly effective solution to many common logistical problems that e-commerce stores encounter. Implementing this pricing model lets your business quickly move a large amount of stock or sell off unsuccessful products.
You can simply bundle any items you need to get rid of with highly popular products. They are likely to sell a lot faster than when sold individually.
How To Use WooCommerce Bundle Discounts In Your Store
We’ve just talked about bundle discounts and how they can benefit your e-commerce business. Now let’s look at how you can put them into practice:
Step 1: Set up the Advanced Coupons plugin
To give bundle discounts in a WooCommerce store, you can use our Advanced Coupons plugin. Our user-friendly tool extends WooCommerce’s coupon features to increase flexibility and engagement.
WooCommerce’s standard coupon features don’t let you create specific discounts based on the products in the cart. This means there’s no way to set bundle prices.
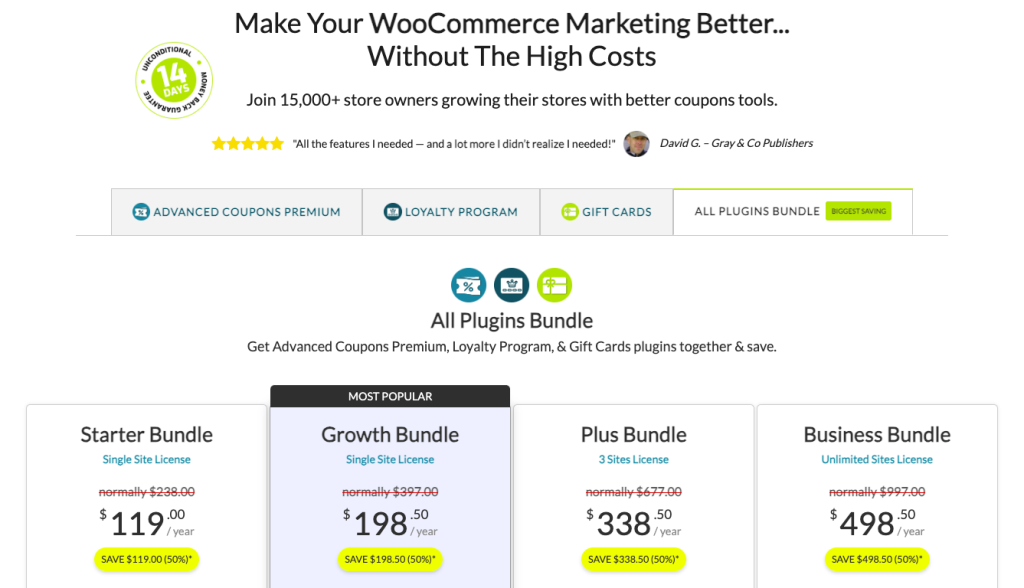
To start installing the plugin on your site, head over to our pricing page. Here you’ll find three plugins and the ‘All Plugins Bundle’ package (this is another example of a bundle discount!):
Advanced Coupons Premium includes all the features you need for this tutorial. Still, depending on your business, a different option may be best for you.
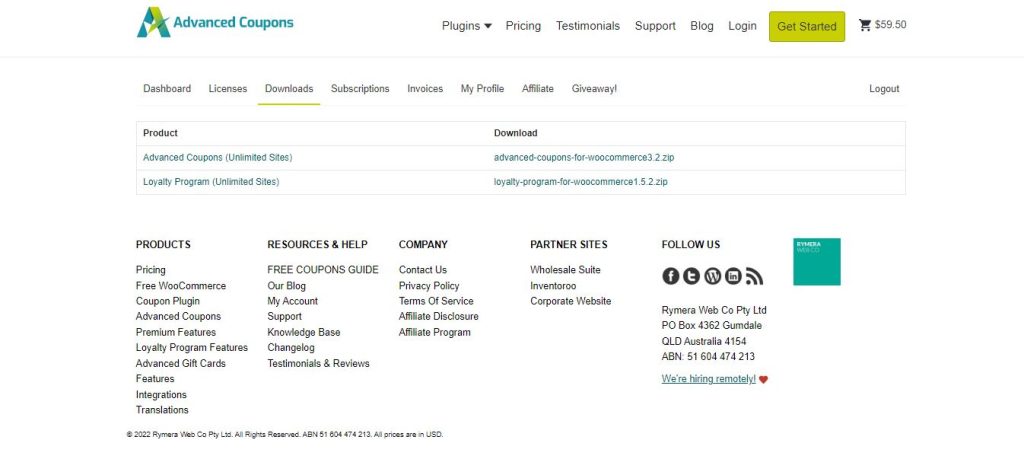
Once you’ve purchased the premium plugin, head to Downloads in your account dashboard. You can now download the.zip folder:
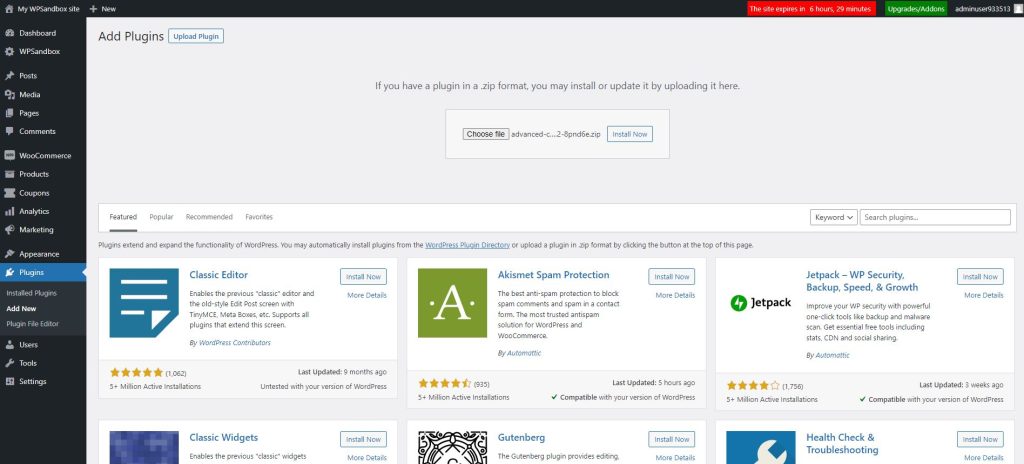
Next, head to your WordPress admin area and navigate to the Plugins page. Select the Upload Plugins button in the top left corner, and choose the .zip file you just downloaded. Then hit Install Now:
Finally, activate the plugin. It should now be ready to go!
Step 2: Add a new coupon
Now let’s create our first bundle discount. We can use the cart condition feature to see if a particular set of items is in the cart and apply a discount.
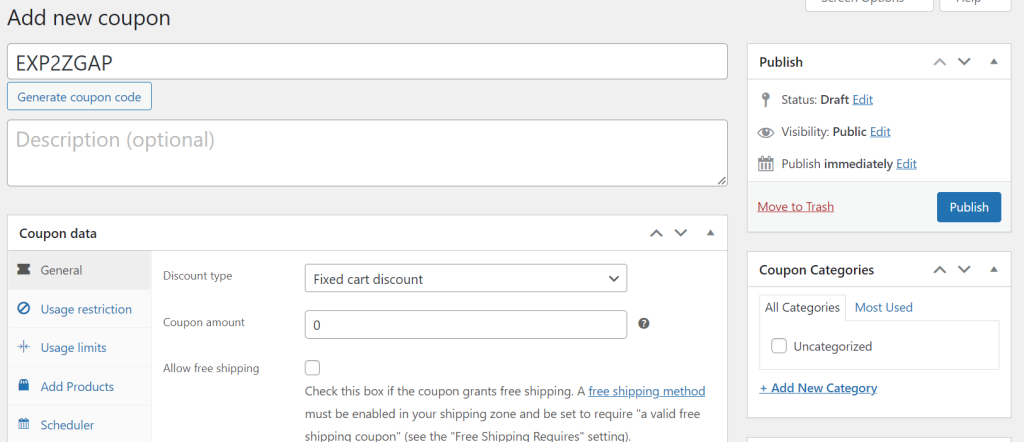
Select Coupons > Add New. This will open the coupon creation page. The first thing you’ll need to do is enter a coupon code. You can insert your own or select the button below the text box to generate a random code.
Next, you have the option to enter a description for the code. This isn’t required, but if you plan to have many coupons, it may help identify each one more easily. For the sake of this guide, we’ll leave it blank.
Next, scroll down to the Coupon data section of the page. Here, you have many options that provide significant flexibility when creating a coupon.
Under Discount Type, there are a few types of discounts to choose from. The one you choose will be unique to your requirements, so this is different for everyone.
You can also enter an expiration date. This is the date that you want the discount to stop being valid. Play around with all these settings until you’re happy with your discount setup.
Step 3: Use the cart conditions feature for bundle discounts
The next few tabs control when and to whom the coupon is applied. It’s worth looking through these settings in case some are relevant to you.
For this article, we’ll skip past them and move on to the Cart Conditions section. Here, you can choose which products will be included in your bundle.
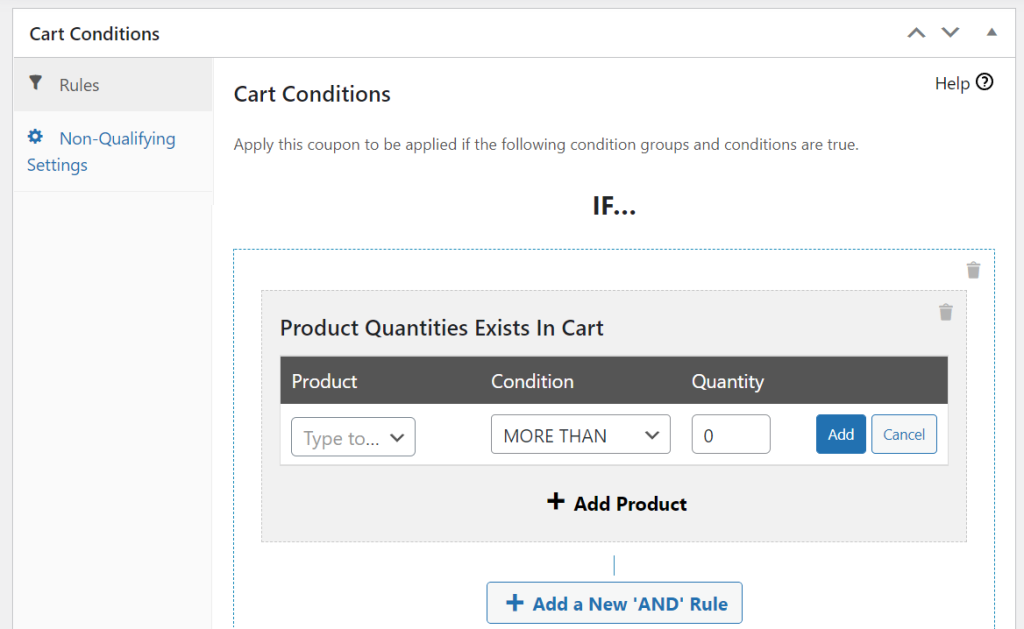
Click on the Search/Select Condition Fields drop-down menu in the Rules tab. You’ll need to select Product Quantities Exist in Cart to create a bundle discount. Now click on Add.
Choose More Than in the condition box, and then set the cart quantity to “0”. This setting means that if the relevant product is in the cart, the discount will be applied:
To add more items to your bundle, simply click on the Add a New ‘AND’ Rule button and repeat the process of adding a product, setting the conditions, and entering the quantity. Once you have added all the products, click on Save Cart Conditions in the bottom-right corner.
To verify that the coupon has been created correctly, hover over Coupons in the sidebar and select All Coupons from the popout menu. This will display a list of your coupons:
To test a coupon, hover over its code and click on View. This will take you to a live version of your site, where you can test that the coupon is working as it should.
Conclusion
One of the most simple and effective ways to increase profit margins for your WooCommerce business is by offering bundle discounts to customers. This setup encourages consumers to spend more on each purchase while feeling they’ve gotten a better deal. Plus, our Advanced Coupons plugin makes bundle discounts simple and easy to set up for WooCommerce stores.
To recap, you can create WooCommerce bundle discounts by following these steps:
- Install and activate the Advanced Coupons plugin.
- Add a new coupon.
- Use the cart conditions feature to make the coupon into a bundle discount.
Do you have any questions about offering WooCommerce bundle discounts? Let us know in the comments below!


