Creating discount vouchers for your WooCommerce store is an excellent way to incentivize customers to make more sales. However, you’ll also need to make it easy for shoppers to redeem your offers. That’s where link coupons can be enormously beneficial.
Advanced Coupons makes it easy to design coupons and share their links directly with customers. Then, shoppers simply need to click on the URLs to redeem the offers within your online store.
In today’s guide, we’ll introduce you to the benefits of link coupons. Then, we’ll show you how to create and distribute them in a few simple steps. Let’s jump in!
An Introduction To Link Coupons And Their Benefits
A link coupon is a straightforward concept: a customer clicks on a URL and, by doing so, auto-applies the discount or offer to their cart in your online store. Rather than manually entering a coupon code at the checkout screen, shoppers will be able to complete their purchases more quickly and easily.
Creating a user-friendly checkout experience is essential to the success of your online business. This is especially true when you consider that 17% of customers abandon their carts due to complicated checkout processes. Therefore, implementing link coupons is a vital step toward reducing cart abandonment.
Plus, WooCommerce URL coupons are super easy to make and implement. You’ll have more time to dedicate to growing your business by advertising your store and developing new products. This will put you in a better position to claim your share of the global $6.3 trillion e-commerce market.
How To Make Link Coupons In WooCommerce (In 3 Easy Steps)
You can use the free Advanced Coupons plugin to create simple and auto-applying link coupons. However, you won’t be able to set up advanced cart conditions for your vouchers. That’s why we recommend upgrading to Advanced Coupons Premium.
Once the plugin is installed and activated, you’re ready to start the tutorial!
Step 1: Create your coupon
The first step is designing your discount coupon. There are a few different approaches you can take here, from Buy One Get One (BOGO) deals to simple percentage discounts.
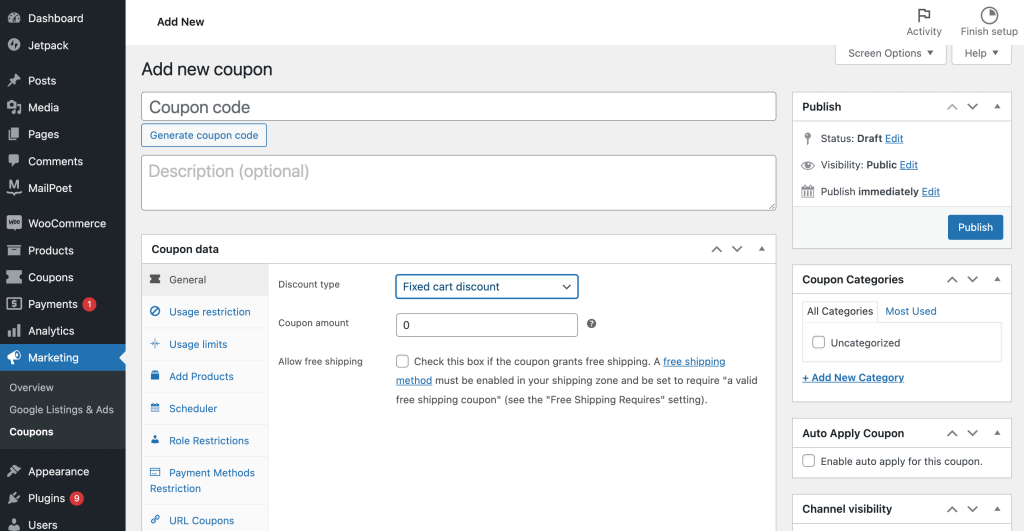
Head to Marketing > Coupons > Add coupon. Then, you can enter a custom voucher code or automatically generate one:
Next, head to Coupon data > General. You can choose your discount type here and apply free shipping if you like. We also recommend exploring each of the tabs to see if you want to apply usage restrictions, limits, role restrictions, and more.
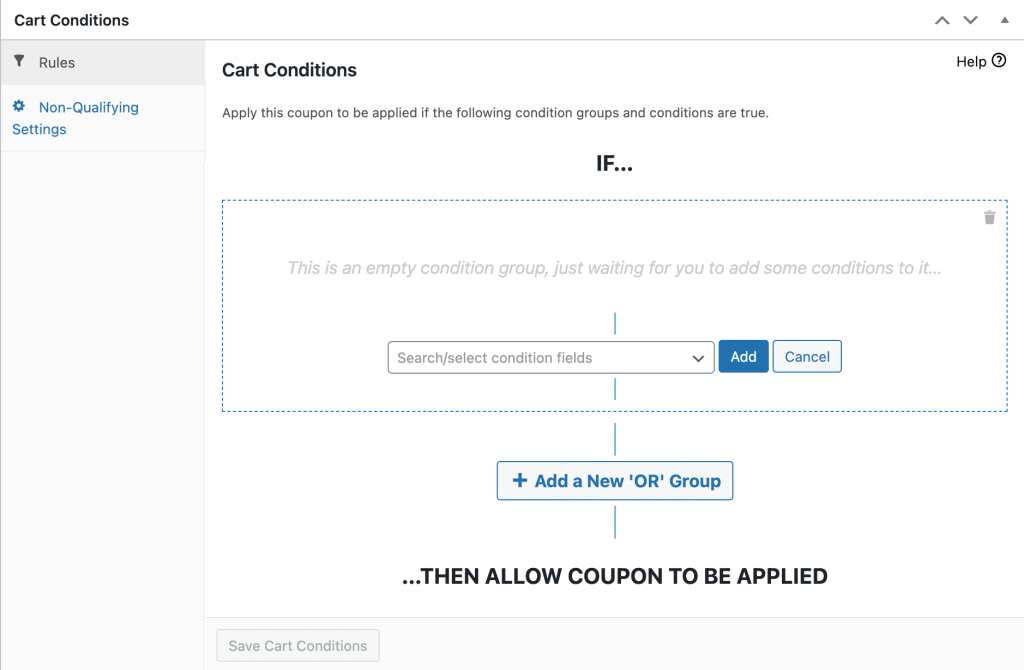
Under Cart Conditions, we suggest exploring the restrictions and rules you can apply to your coupon:
At this point, we recommend saving your coupon. Then, you can move on to customizing its success message.
Step 2: Customize the coupon’s success message
With a link coupon, customers will click on a URL from an external source. So, you’ll want to make sure that shoppers know the link has worked and that they can continue adding items to their carts. This is where success messages are so important.
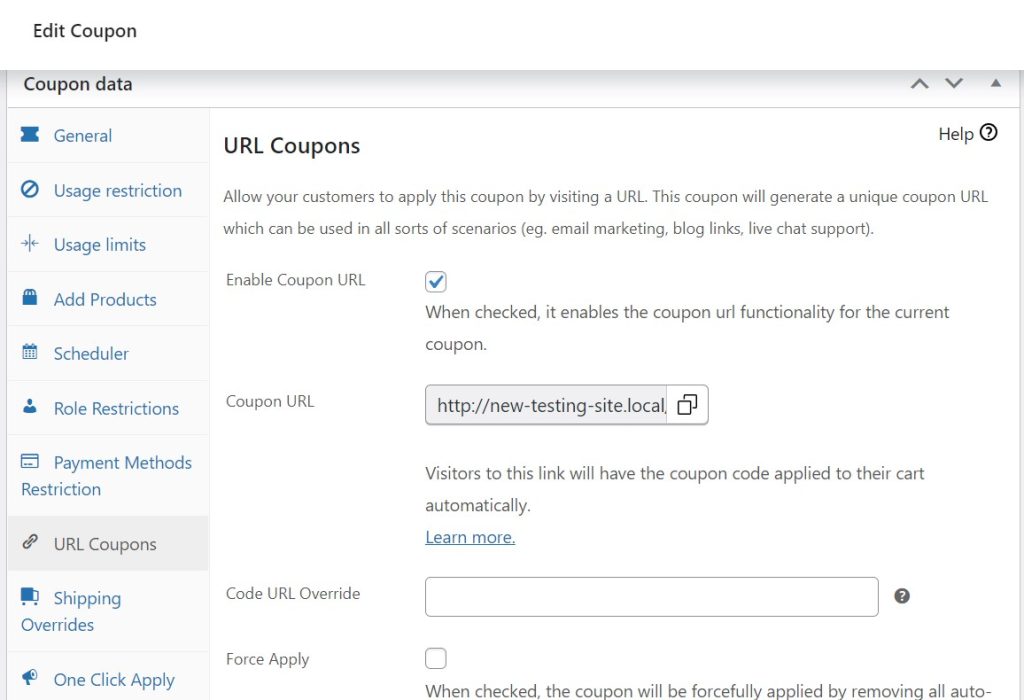
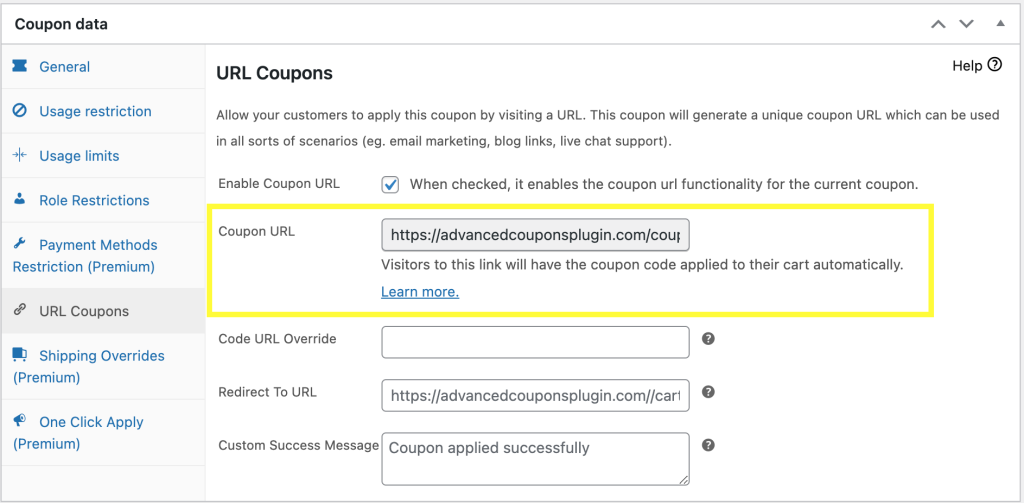
Head to Coupon data > URL Coupons. First, ensure the box is checked next to Enable Coupon URL. You can also determine where customers will be sent when clicking on the link under Redirect to URL:
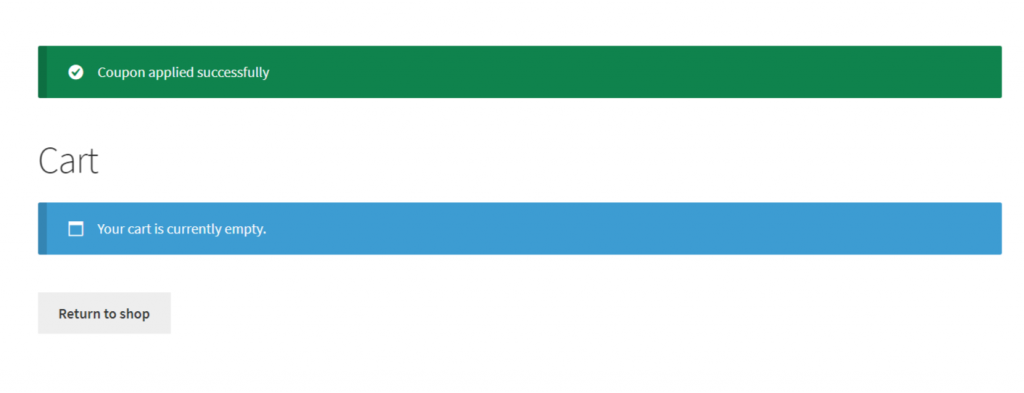
Scroll down to Custom Success Message. Here, you can control what shoppers will see once they’ve clicked on your link coupon. Your chosen message will look something like this on the front end:
Now, grab your coupon’s link from Coupon URL:
Finally, publish your coupon at the top of the page. You’re now ready to share it with customers!
Step 3: Share the link coupon with customers
There are several ways you can share link coupons with your shoppers. For example, you might create marketing emails and add a hyperlink on top of your Call to Action (CTA) or a button:
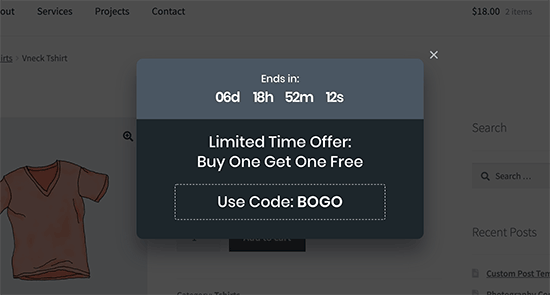
If you’d prefer to target visitors in your online store, you could add a clickable banner or popup message that will auto-apply your coupon:
It’s also easy to drop a link to your coupon in your social media posts, including Facebook and Instagram. Make sure to tell your audience what they’ll get from the sale, and they’ll be likely to click on the URL.
Overall, you don’t need to restrict yourself to just one marketing method. Feel free to advertise your link coupons across different platforms and see which works best for you!
Conclusion
Customers who have to enter voucher codes manually might feel frustrated or annoyed by the checkout process. The good news is that creating link coupons can streamline the buying journey and encourage more sales.
To recap, with Advanced Coupons Premium, you can easily create WooCommerce link coupons by following these three simple steps:
Do you have any questions about designing and implementing link coupons? Let us know in the comments section below!

