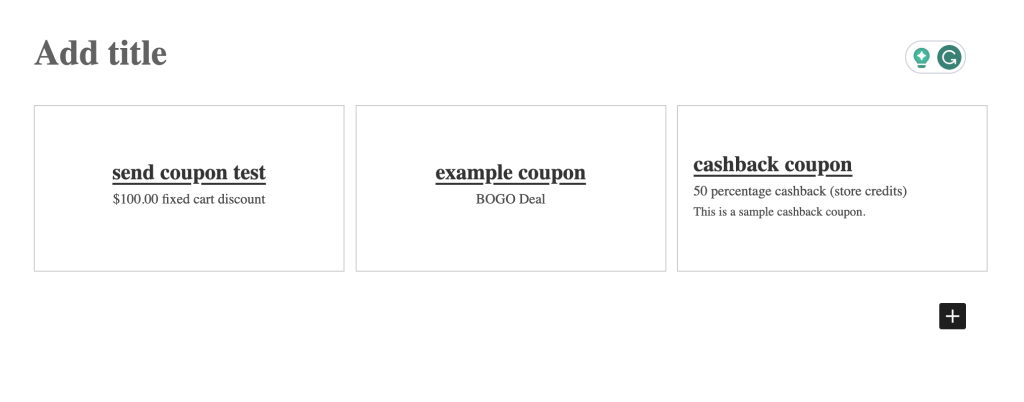
Discounts are an effective tool for promoting specific products and boosting sales. However, without a good way to showcase and modify your coupons, you may not be reaching your customers. Fortunately, Advanced Coupons’ new Gutenberg blocks make it easy to display coupons on your website.
Using the same functionality as the WordPress Block Editor, you can now insert a coupon block on any post or page and customize it with ease.
In this article, we’ll introduce WooCommerce Gutenberg blocks, talk about the features of the Advanced Coupons plugin, and provide a step-by-step guide for creating and displaying coupon codes using blocks. So, let’s dive right in!
An Introduction To WooCommerce Gutenberg Blocks
Gutenberg blocks were introduced with WordPress 5.0, and they provided a whole new way to build posts and pages. Also referred to simply as “WordPress blocks,” their creation marked a shift that greatly simplified the WordPress workflow.
In block-based WordPress, you can add, customize, and save page elements. You can also move around these blocks in a straightforward, drag-and-drop fashion.
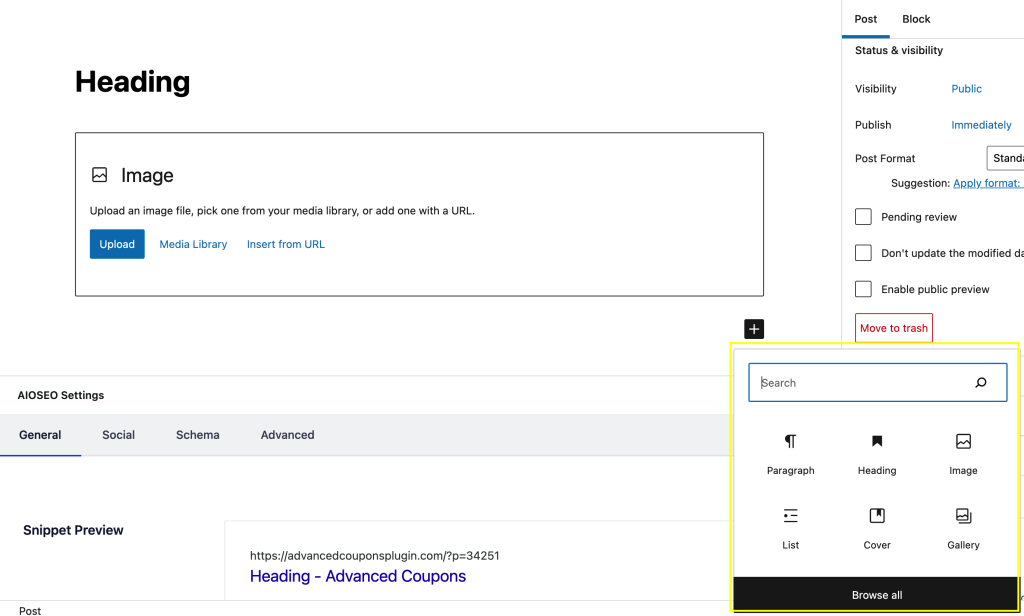
There are WordPress blocks for almost any purpose you can think of. Some of the most commonly used elements are Paragraph, Heading, and Image:
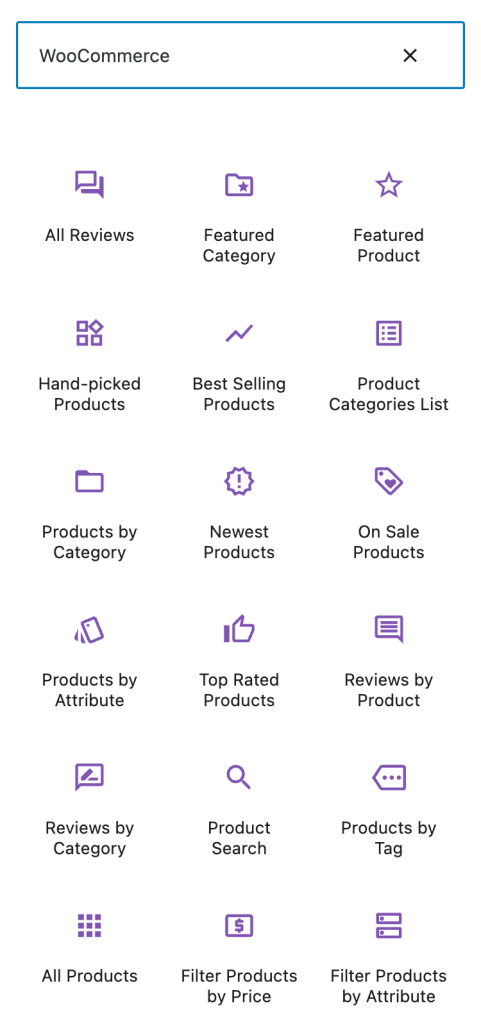
As WordPress plugins evolved, they began to develop their own blocks. For example, the most popular e-commerce tool, WooCommerce, also has its own suite of highly useful elements. When you search for them in the Blocks menu, they are characterized by WooCommerce’s signature purple:
Advanced Coupons, our plugin designed specifically with WooCommerce in mind, has recently debuted three new Gutenberg blocks. You can use them to feature coupons on your site wherever they will be most effective.
How To Use WooCommerce Gutenberg Blocks With Advanced Coupons (In 3 Steps)
Now, let’s cover how you can use Advanced Coupon’s new suite of WooCommerce Gutenberg blocks. Keep in mind that for this tutorial, you will need an active WooCommerce store.
Step 1: Install Advanced Coupons for WooCommerce
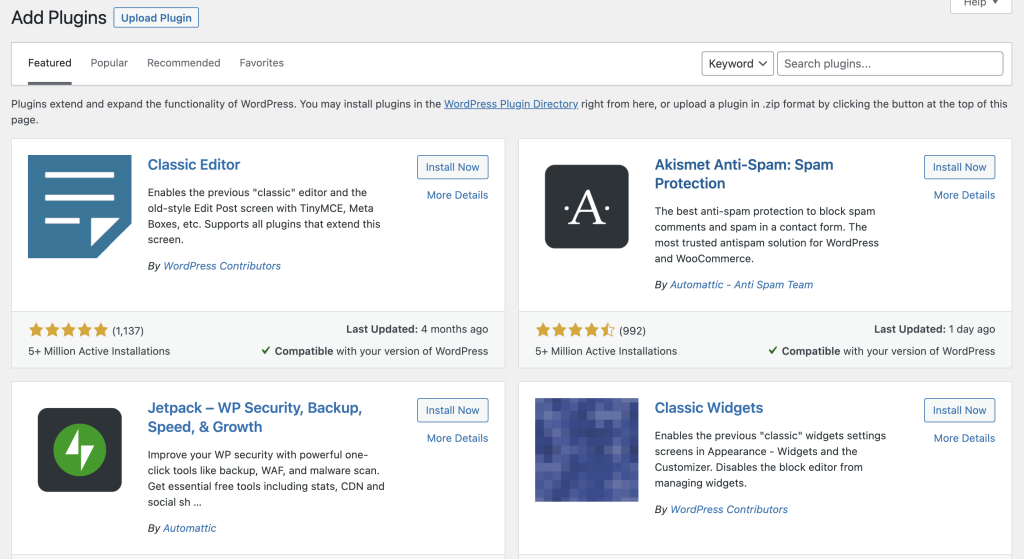
To get started with Advanced Coupons, simply install the free plugin in your WordPress dashboard. To do this, go to the Plugins tab and select Add New:
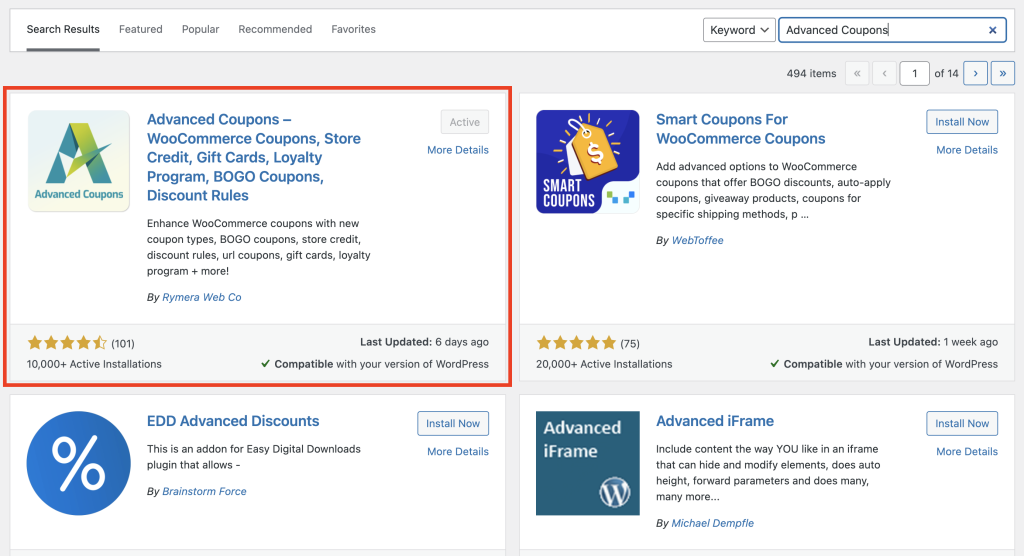
Then search for “Advanced Coupons”. When the plugin appears, click on Install Now.
Once the plugin is installed, click on Activate:
Then, you should now be taken back to your complete list of plugins. There, select Read The Getting Started Guide.
You should also notice a new Coupons tab in the left-hand menu. Now, WooCommerce will include both its basic coupon features as well as the improved options offered by the Advanced Coupons plugin.
Step 2: Create your coupons
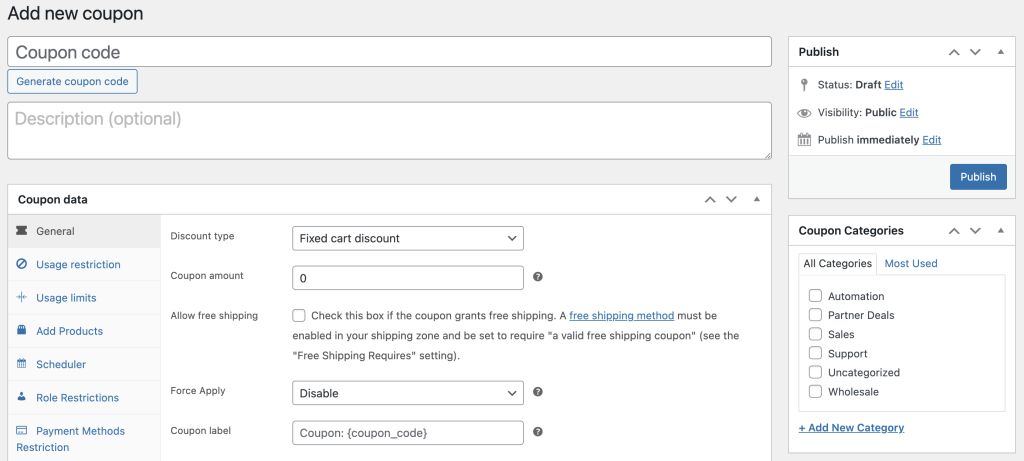
To create a coupon, go to the Coupons tab and select Add New:
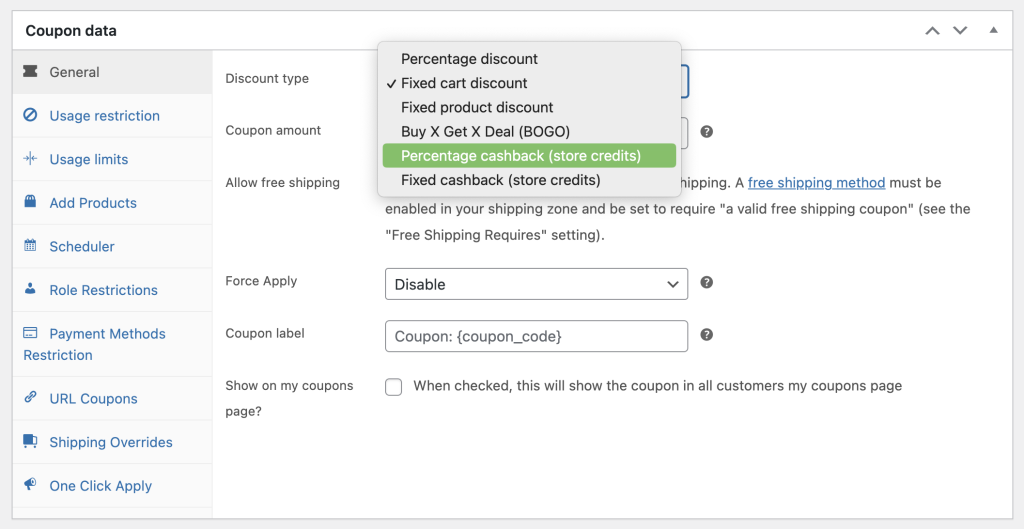
The following page is where you can create your coupons. You’ll have access to a variety of coupon types, including:
- Percentage discount
- Fixed cart discount
- Fixed product discount
- Buy X Get X Deal (BOGO)
- Percentage cashback
- Fixed cashback
You can customize each of these coupon types with the discount amount or percentage, choose specific items that will qualify, and add other conditions to make them work exactly how you want.
Note that some additional features and customization options are only available in the premium version of Advanced Coupons. However, the free version offers plenty of choices to get you started:
When you have selected the conditions you want for your coupon, you can click on Publish in order to add it to your active coupons. Now, you have all the pieces you need to share a coupon using Advanced Coupons’ new Gutenberg blocks.
Step 3: Display and customize your coupons
Once your coupons are ready and published, they become an available option within the Block Editor.
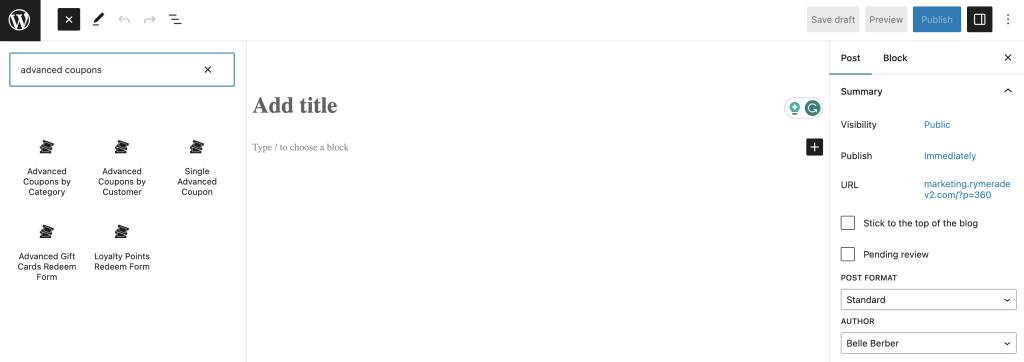
To insert a coupon, simply click on the plus symbol in the Block Editor, and scroll down or search for “Advanced Coupons” to access the new options:
As you can see, there are five options to choose from in the Advanced Coupons section. These coupon code Gutenberg blocks are:
- Advanced Coupons by Category,
- Advanced Coupons by Customer,
- Single Advanced Coupon,
- Advanced Gift Cards Redeem Form, and
- Loyalty Points Redeem Form.
Because we’re talking about coupons here, we’ll focus on the first three options:
Single Advanced Coupon
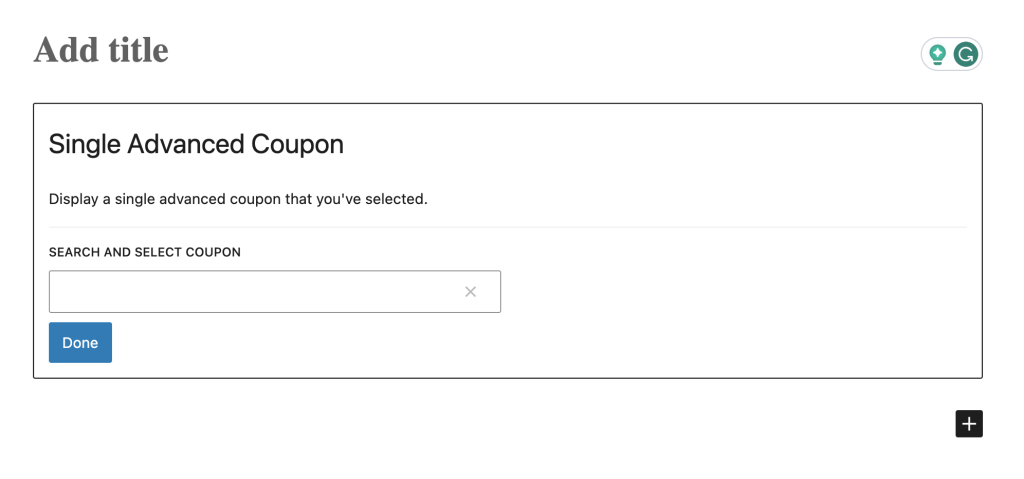
The Single Advanced Coupon Block will allow you to place one coupon on any page or post. To begin, search for and select which coupon you want to insert from the drop-down menu. This will create a clickable coupon box that you can move around like any other block.
The coupon block is comprised of a few components, which you can choose to hide or display using the toggle buttons in the right-hand menu under Block:
The name of the coupon is always displayed, but you can choose to hide or show the discount value, description, usage limit, and schedule.
In some cases, you may want to hide the actual discount value or type if this is already explained in the coupon’s name. Alternatively, you may want your customers to click on the coupon to see the result.
The description may also be redundant if you describe the deal in the coupon title, so you can hide this section as well. Displaying the expiration date of the coupon can be helpful, so customers know how long the deal is active:
On the other hand, hiding the schedule can also be effective for building urgency, and encouraging customers to take action.
Single coupons are a good option for highlighting a particular deal that is relevant on product pages, advertising a specific offer on landing pages, or introducing a new discount in its own post.
Advanced Coupons by Category
Adding a single coupon is probably the option you will use most often. However, what if you want to show more than one coupon in the same place?
The Advanced Coupons by Category option allows you to create a coupon collage by building a grid of multiple coupons. This can be used to display all applicable coupons in one place and is ideal for creating deals pages where you present all of your active coupons together.
When using the Advanced Coupons by Category Block, you will have a few more options to choose from.
First, you will need to select which category or categories of coupons you want to display. Keep in mind that you can always go back to the Coupons tab in your dashboard to add and change categories.
Next, decide what order to arrange the coupons in within the grid (by date, alphabetically, or by expiration). If you want your coupons displayed in a specific order, you can always rename them using numbers to correspond to their alphabetical arrangement:
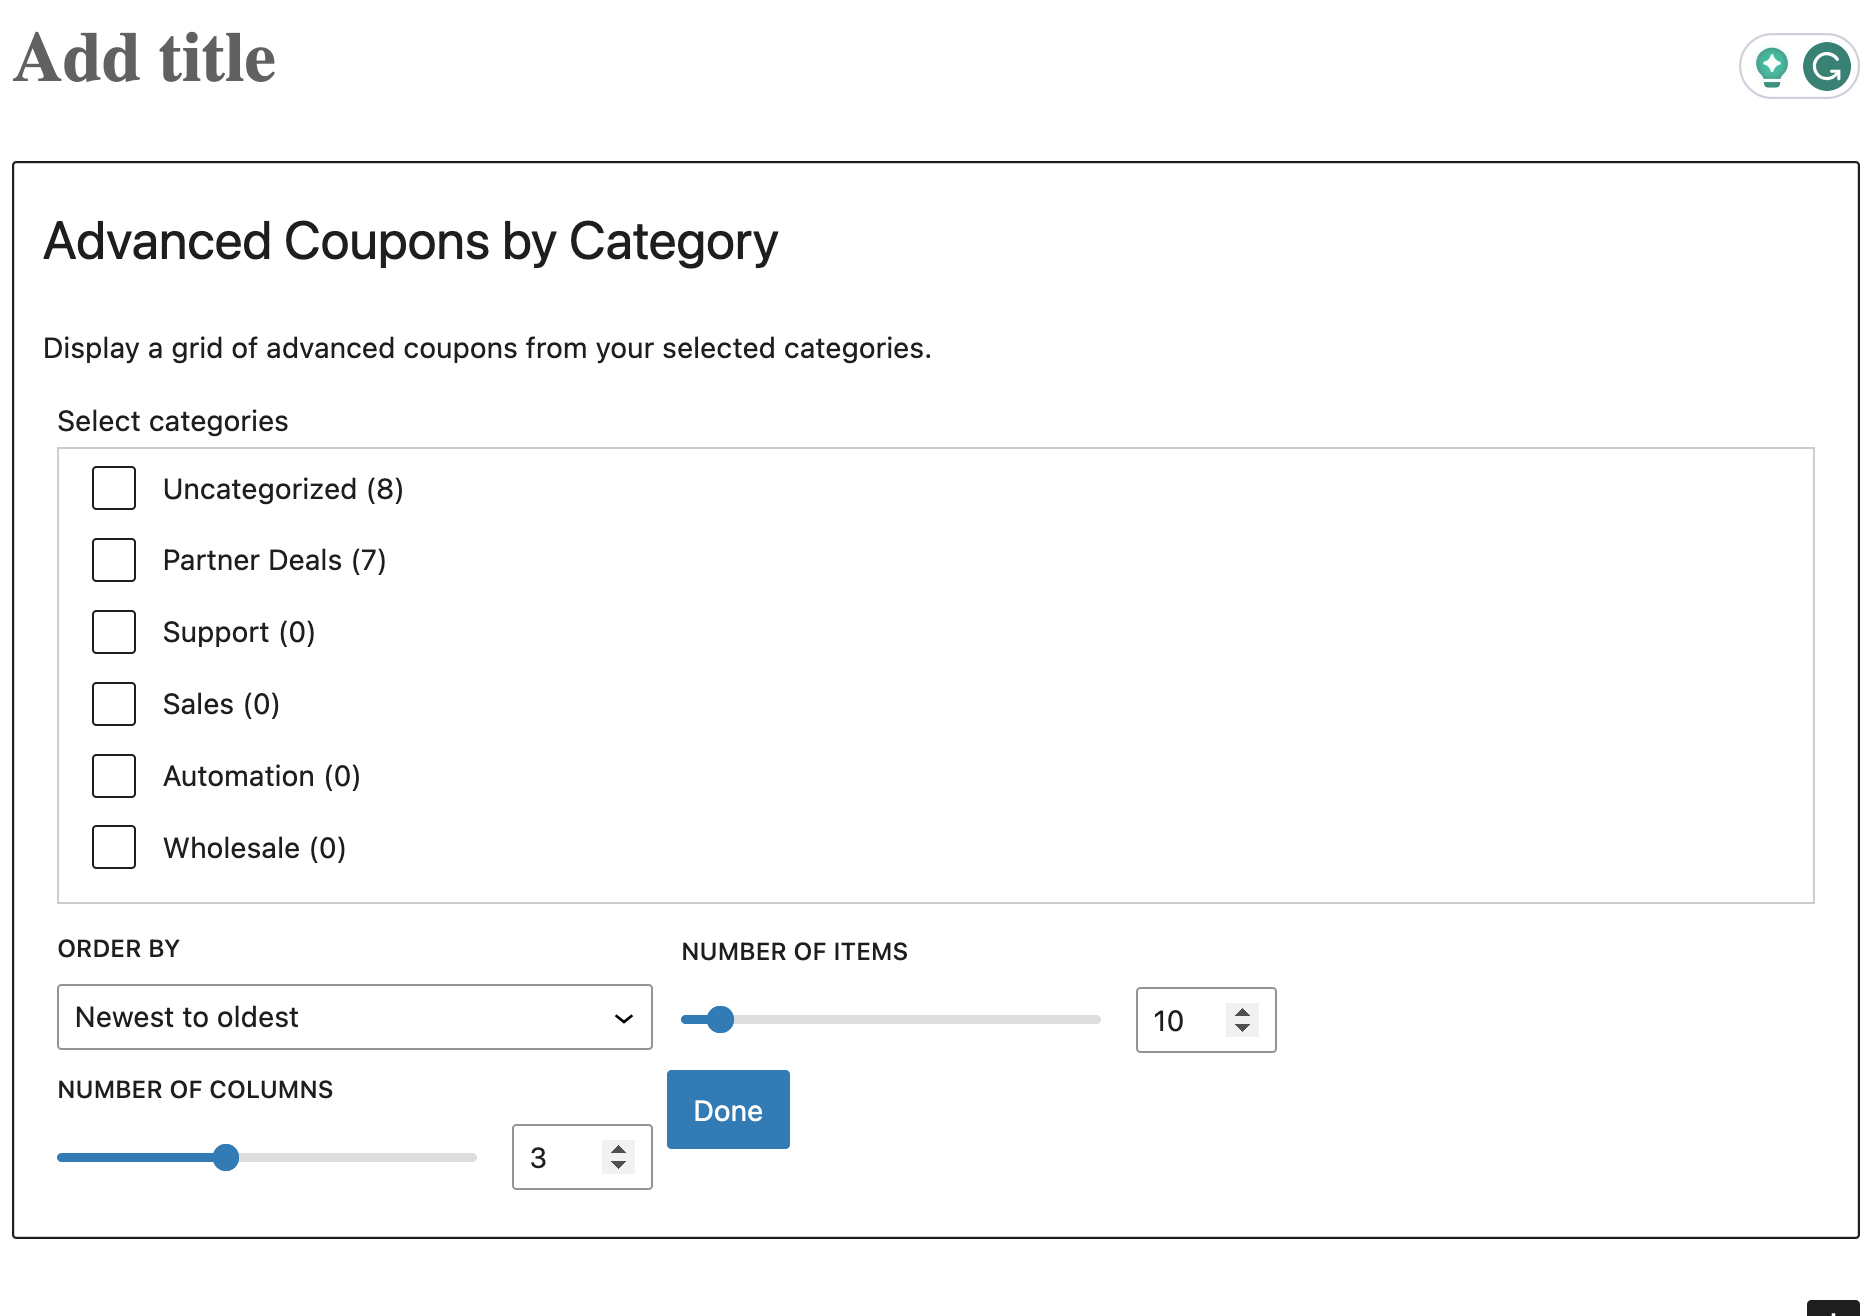
Finally, you can choose how many coupons to include in the collage (up to 100) and by how many columns to display them in (with a maximum of six). You can also customize what information will be displayed in each box, just as you did with the Single Advanced Coupon Block.
Advanced Coupons by Customer (Premium)
With the premium version of the plugin, you can use the Advanced Coupons by Customer Discount Gutenberg block, which allows you to insert a single coupon or create a grid of coupons that are assigned to a unique customer.
This gives you total control over which coupons are available to whom, beyond just the rules and conditions you chose when creating a coupon:
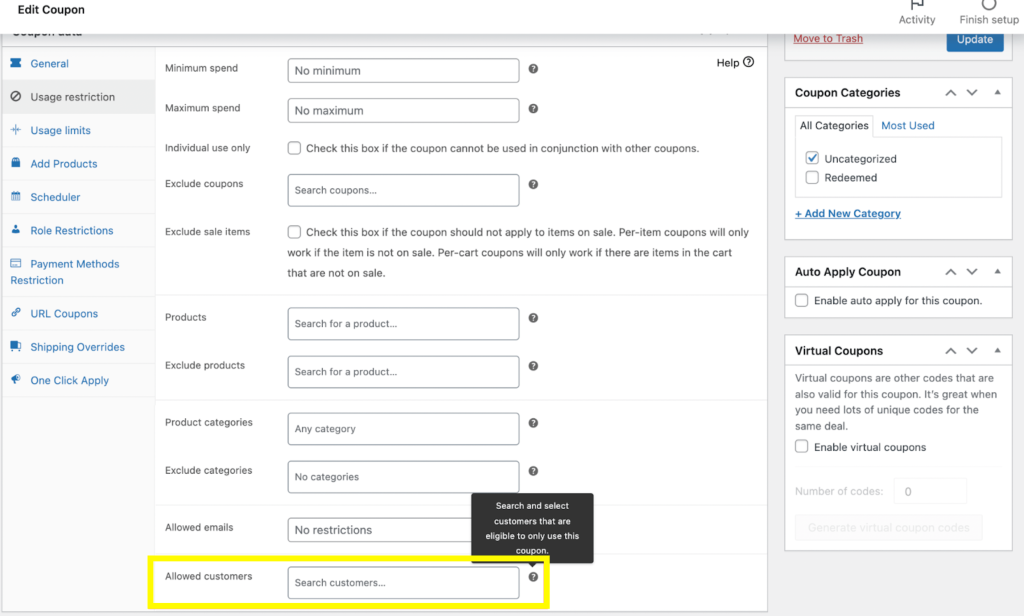
You can assign coupons to specific types of customers by going to Edit Coupon > Usage Restriction > Allowed Customers:
Alternatively, you can assign virtual coupons in a pop-up that will appear when you click on Manage Virtual Coupons:
This particular block may be highly useful if you want to offer additional discounts to wholesale customers only, or if you have a WooCommerce loyalty program.
However you choose to use coupons on your site, our Advanced Coupons plugin improves upon the basic coupon features of WooCommerce, and allows you to easily create custom, targeted discounts to motivate your shoppers. Our new WordPress blocks for both the free and premium versions make it even easier to customize and effectively display your coupons.
Conclusion
Showcasing your coupons can be a challenge. However, with Advanced Coupons‘ new Gutenberg blocks, you can quickly and easily promote your discounts in a variety of visually-appealing ways.
To start adding and personalizing coupons on your website, simply follow these steps:
- Install and activate Advanced Coupons.
- Create your coupons and conditions.
- Display and customize your coupons using three new blocks:
Do you have any questions about how to use our coupon Gutenberg blocks? Let us know in the comments below!


